1. Introduzione
This manual provides detailed instructions for installing and operating your LIGHTAILING LED light kit, designed specifically for the Lego 10340 Wreath model. This kit enhances your Lego creation with vibrant lighting. Please note: The Lego 10340 Wreath model is NOT included with this light kit.
2. Contenuto della confezione
Prima di iniziare l'installazione, verificare che tutti i componenti siano presenti:
- All-in-one USB LED light kit
- Manuale di istruzioni cartaceo
- Cavo di alimentazione USB
- Assorted small components for installation

Image: The LIGHTAILING LED kit box, paper manual, components, and a tablet showing online instructions.
3. Configurazione e installazione
Follow these steps carefully to integrate the LED lights into your Lego 10340 Wreath. For visual guidance, refer to the included paper manual and online video tutorials.
- Prepare Your Lego Model: Ensure your Lego 10340 Wreath is fully assembled and stable before beginning the light kit installation.
- Disimballare il kit luci: Rimuovere con attenzione tutti i componenti dalla confezione.
- Identificare i componenti: Familiarize yourself with the various LED lights, wires, and connection points. The kit is designed with a specific wire layout and distance for optimal fit.
- Luci integrate: Begin integrating the LED lights into your Lego model according to the detailed instructions provided in the paper manual. Pay close attention to the placement of each light to match the intended design.
- Route Wires for Hidden Installation: Carefully route the wires between Lego bricks to ensure they are hidden and do not interfere with the model's appearance or stability. Pre-measured spacing helps achieve a clean, integrated look.
- Collegare la fonte di alimentazione: Once all lights are integrated, connect the USB power cable to the light kit. You will need to provide a USB charger or power bank (not included).
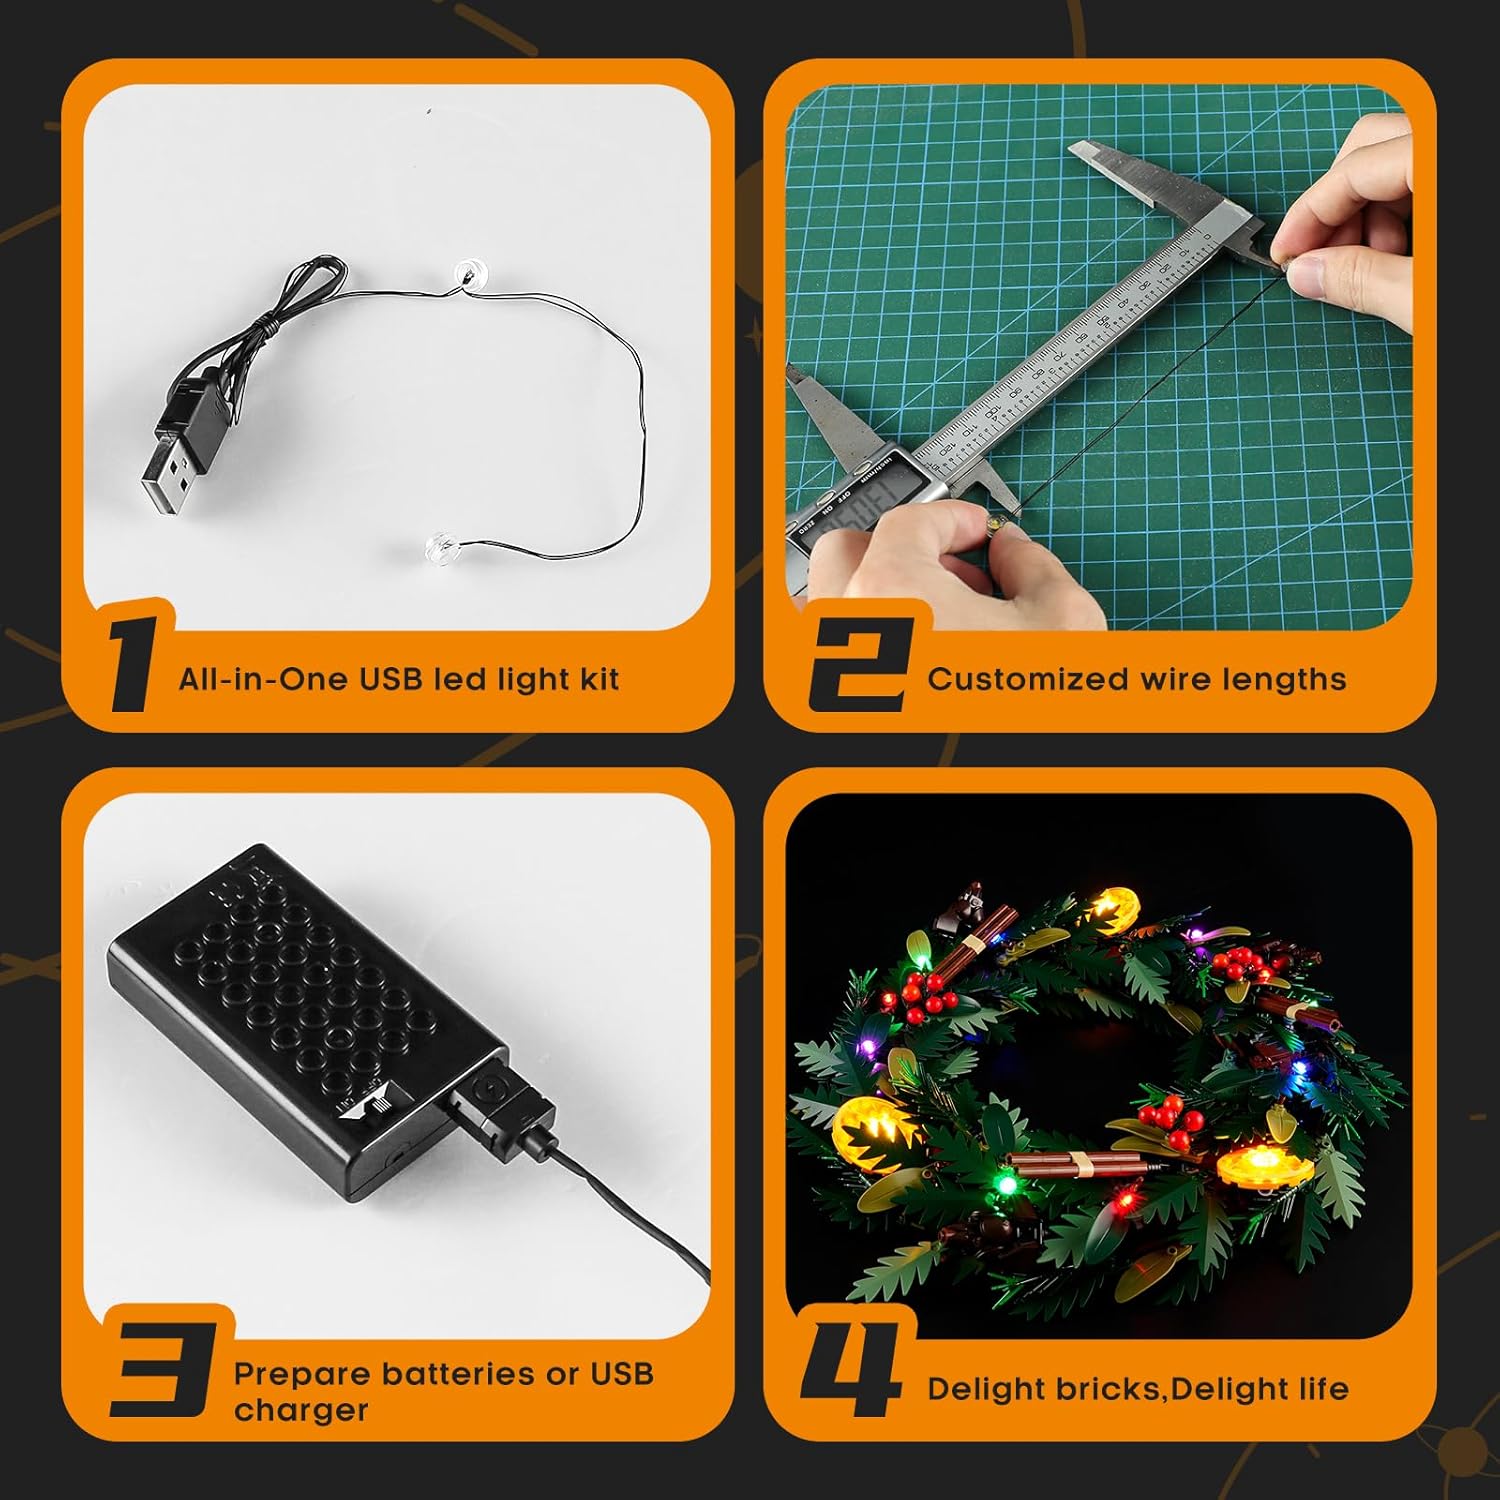
Image: Visual guide showing the all-in-one USB LED light kit, customized wire lengths, preparing power, and the final illuminated wreath.

Image: This banner highlights the ease of installation, the hidden wiring design for a clean look, and the precision craftsmanship of the light kit components.
Video: This video showcases the LIGHTAILING LED light kit installed on the Lego 10340 Wreath, demonstrating the various light effects and the overall illuminated appearance of the model. It highlights the product in action.
4. Istruzioni per l'uso
Once the light kit is fully installed and connected to a power source:
- Ensure the USB power cable is securely plugged into both the light kit and a compatible USB power adapter (e.g., wall charger, power bank, computer USB port).
- The LED lights will illuminate automatically upon receiving power.
- There are no additional controls for this specific light kit; the lights are designed to be continuously on when powered.

Image: This image displays the Lego 10340 Wreath fully illuminated with the LIGHTAILING LED light kit, featuring red berries, green leaves, and warm yellow, green, and blue lights.

Image: A side perspective of the Lego 10340 Wreath with the LIGHTAILING LED lights, highlighting the subtle integration of the lighting components within the structure.
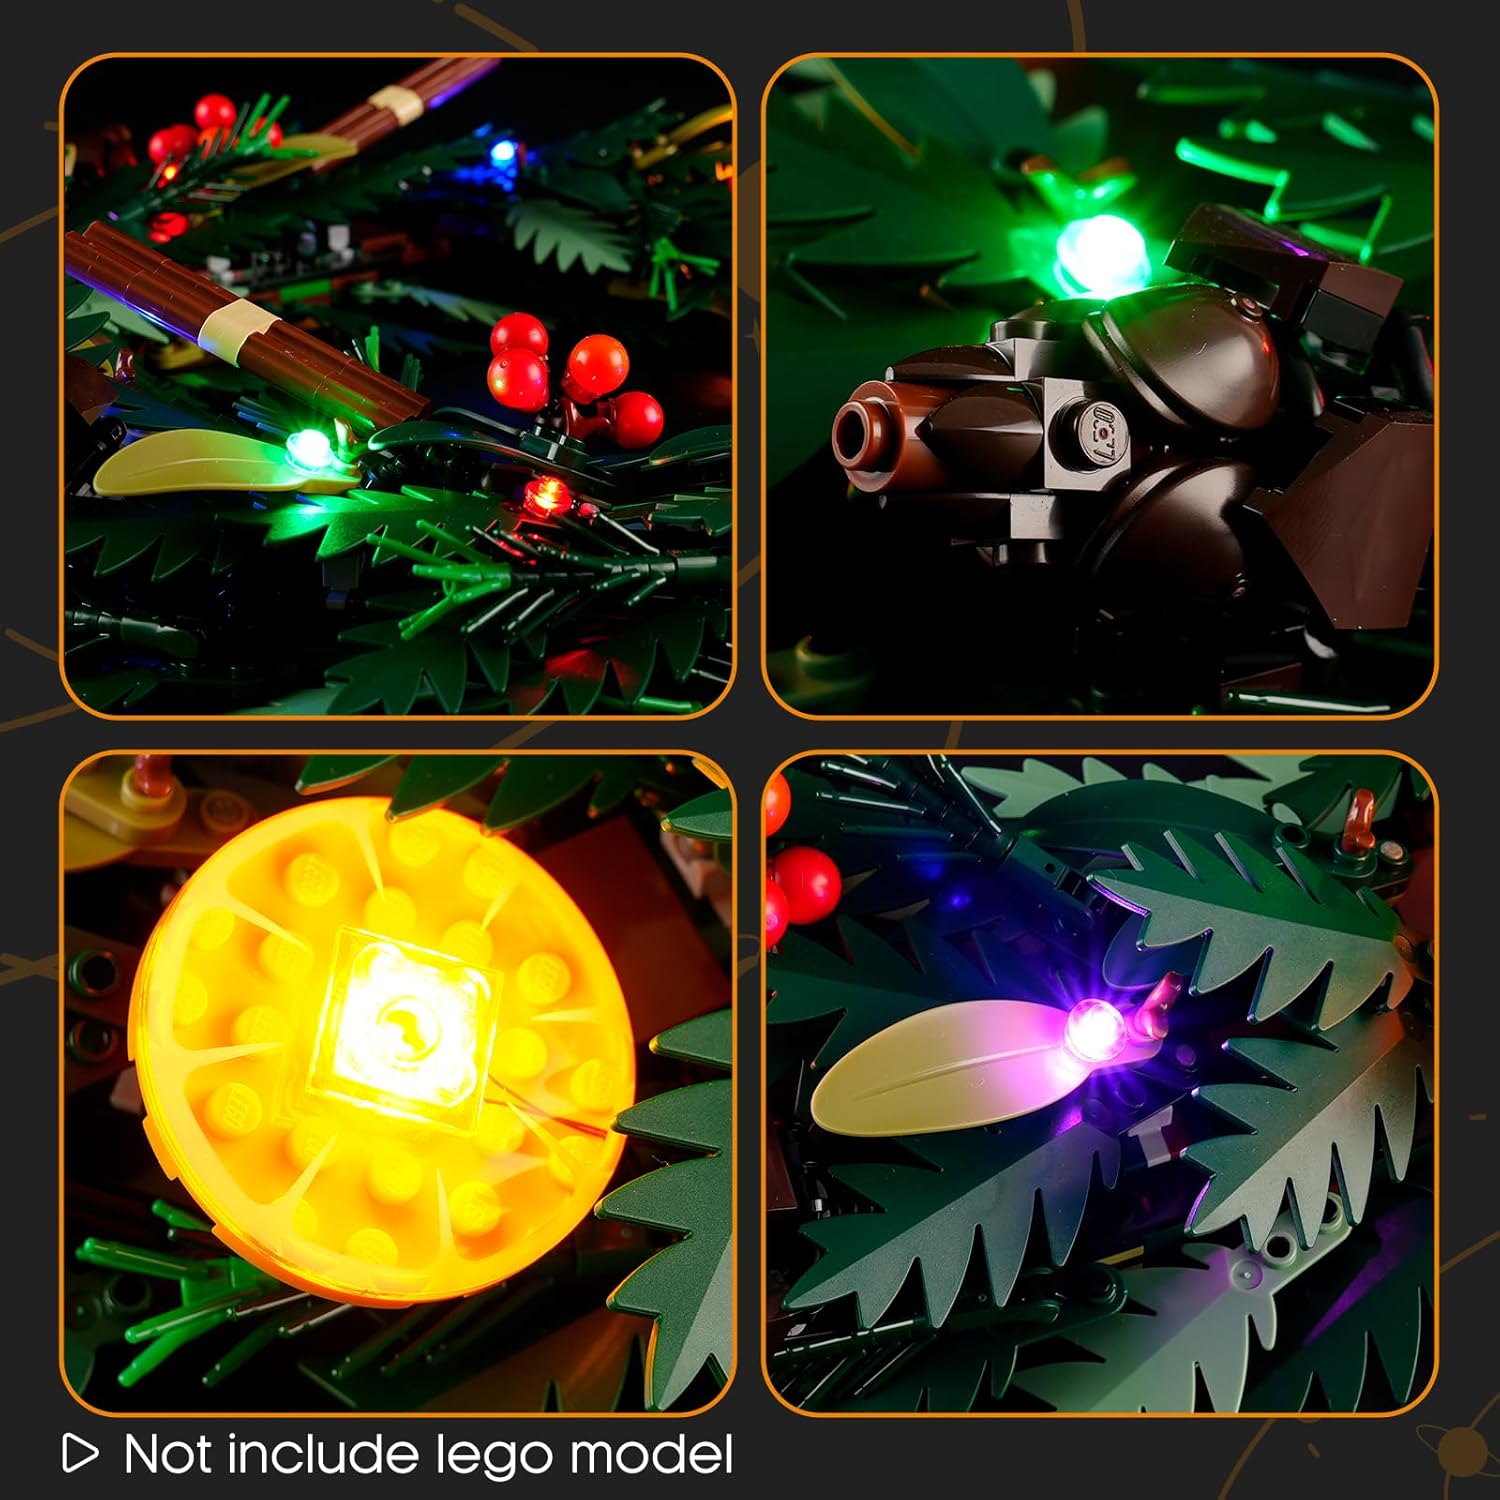
Immagine: dettagliata view showing individual LED lights integrated into the Lego wreath, including red lights on berries, green lights on leaves, and yellow lights on decorative elements. The text 'Not include lego model' is visible.
5. Manutenzione
To ensure the longevity and optimal performance of your LIGHTAILING LED light kit:
- Pulizia: Gently dust the lights and wires with a soft, dry cloth. Avoid using liquid cleaners directly on the electrical components.
- Gestione: Always handle the wires and LED components with care to prevent damage. Avoid excessive bending or pulling of wires.
- Magazzinaggio: If disassembling for storage, carefully detach components and store them in a dry, cool place, preferably in their original packaging or a protective container.
6. Risoluzione Dei Problemi
If you encounter any issues with your light kit, please refer to the following common solutions:
- Luci non illuminate:
- Check all power connections. Ensure the USB cable is firmly plugged into both the light kit and the power source.
- Verify that your USB power source is functioning correctly (e.g., try plugging another device into the same USB port).
- Inspect wires for any visible damage or breaks.
- Alcune luci non funzionano:
- Check the individual connections for the non-working lights. Ensure they are securely attached.
- Gently adjust the position of the light or wire to see if it restores connection.
- Wires Visible or Not Secure:
- Carefully re-route wires to conceal them within the Lego structure as much as possible.
- Ensure wires are not pinched or stressed by Lego bricks.
If these steps do not resolve the issue, please contact LIGHTAILING customer support for further assistance.
7. Specifiche
| Caratteristica | Dettaglio |
|---|---|
| Marca | LIGHTAILING |
| Numero di modello | 10340 |
| Dimensioni del prodotto | 6.5 x 4.72 x 1.57 pollici |
| Peso dell'articolo | 4.9 once |
| Fonte di alimentazione | USB Powered (USB charger/batteries not included) |
| Età consigliata | 3 anni e oltre |
8. Garanzia e supporto
LIGHTAILING is committed to providing an enjoyable installation experience and high-quality products. If you have any questions, require assistance with installation, or encounter any issues, please do not hesitate to contact our customer support team.
For additional resources, including online installation videos and detailed paper instructions, please scan the QR code provided on the product packaging or refer to the LIGHTAILING official websito.

Image: Scan this QR code for online installation videos and to view product safety certifications.


