1. Introduzione
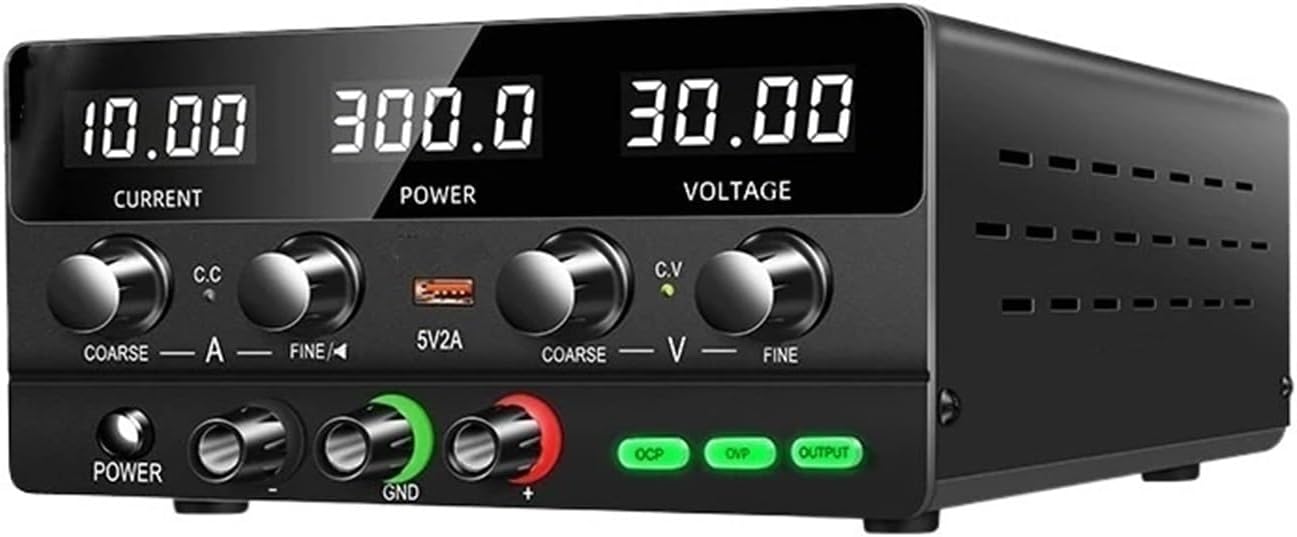
Figure 1: HQHSGCGVA SPPS-H3010 Bench Power Supply
This image shows the HQHSGCGVA SPPS-H3010 30V10A 220V Adjustable Bench Switching DC Power Supply from a front-right perspective. The digital displays for Current, Power, and Voltage are visible, along with the control knobs and output terminals.
This manual provides detailed instructions for the safe and efficient operation of your HQHSGCGVA SPPS-H3010 30V10A 220V Adjustable Bench Switching DC Power Supply. This device is designed to provide a stable and adjustable DC power source for various electronic applications, laboratory work, and maintenance tasks. Please read this manual thoroughly before use to ensure proper functionality and to prevent damage to the unit or connected equipment.
The SPPS-H3010 offers precise control over output voltage and current, featuring a maximum output of 30V and 10A, with a 220V input. It incorporates multiple protection mechanisms for enhanced safety.
2. Istruzioni di sicurezza
To ensure safe operation and prolong the lifespan of the power supply, observe the following safety precautions:
- Fonte di energia: Connect the unit only to a grounded 220V AC power outlet. Ensure the power cord is in good condition and properly connected.
- Ventilazione: Do not block the ventilation openings on the unit. Adequate airflow is essential to prevent overheating. Operate the device in a well-ventilated area.
- Ambiente: Avoid operating the power supply in environments with excessive dust, humidity, direct sunlight, or extreme temperatures. Keep it away from liquids.
- Protezione da sovraccarico: The unit is equipped with over-voltage (OVP), over-current (OCP), over-heat, and short-circuit protection. Do not intentionally bypass these safety features.
- Manutenzione: Do not attempt to open or service the unit yourself. Refer all servicing to qualified personnel. Opening the casing può esporvi a vol pericolositages.
- Connessione di uscita: Ensure the output terminals are correctly connected to the load. Reverse polarity can damage the power supply and the connected device.
- Bambini: Tenere il dispositivo fuori dalla portata dei bambini.
3. Caratteristiche del prodotto
- Uscita regolabile: Provides continuously adjustable DC voltage up to 30V and current up to 10A.
- Display digitale: Clear LED displays for real-time monitoring of output voltage, corrente e potenza.
- Funzioni di protezione: Integrated Over-Voltage Protection (OVP), Over-Current Protection (OCP), Over-Heat Protection, and Short-Circuit Protection for safe operation.
- Volume costantetagModalità e (CV) e corrente costante (CC): Automatically switches between CV and CC modes depending on the load.
- Sistema di raffreddamento: Built-in fan for efficient heat dissipation, extending the product's service life.
- Uscita USB: Convenient 5V/2A USB port for charging or powering small devices.
- Design compatto: Space-saving and lightweight design suitable for various workbenches.
4. Componenti e controlli
Familiarizzare con i comandi e gli indicatori del pannello frontale:

Figura 2: Disposizione e controlli del pannello frontale
This image displays the front panel of the HQHSGCGVA SPPS-H3010 power supply. Key components are labeled, including the digital displays for Current, Power, and Voltage, along with their respective coarse and fine adjustment knobs. Indicators for Constant Current (C.C) and Constant Voltage (C.V) are visible. The 5V/2A USB output, Power On/Off button, Negative Output Port, Ground (GND), Positive Output Port, Overcurrent Protection (OCP), Overvoltage Protection (OVP), and Output button are also clearly marked.
- Visualizzazione corrente: Mostra la corrente di uscita in Ampere (A).
- Visualizzazione della potenza: Mostra la potenza di uscita in Watt (W).
- Voltage Visualizzazione: Mostra il volume di uscitatage in Volt (V).
- Current Coarse Adjustment (COARSE A): Large knob for significant adjustments to the output current limit.
- Current Fine Adjustment (FINE A): Small knob for precise adjustments to the output current limit.
- Indicatore di corrente costante (CC): LED illuminates when the power supply is operating in Constant Current mode.
- Uscita USB 5V/2A: USB port providing a fixed 5V, 2A output.
- Voltage Coarse Adjustment (COARSE V): Large knob for significant adjustments to the output voltage.
- Voltage Fine Adjustment (FINE V): Small knob for precise adjustments to the output voltage.
- Volume costantetage Indicatore (CV): LED illuminates when the power supply is operating in Constant Voltage modalità.
- Accensione/spegnimento: Pulsante per accendere o spegnere l'unità.
- Porta di uscita negativa (-): Terminale nero per il collegamento dell'uscita negativa.
- Terra (GND): Green terminal for chassis ground connection.
- Porta di uscita positiva (+): Terminale rosso per il collegamento di uscita positivo.
- OCP (Overcurrent Protection) Indicator: LED illuminates when overcurrent protection is active.
- OVP (sovravoltage Protection) Indicator: LED illuminates when overvoltagla protezione è attiva.
- Pulsante di uscita: Enables or disables the main power output to the terminals.
5. Impostazione
- Disimballaggio: Carefully remove the power supply from its packaging. Inspect the unit for any signs of damage during transit. Retain the packaging for future storage or transport.
- Posizionamento: Place the power supply on a stable, level surface. Ensure there is sufficient space around the unit for proper ventilation, especially around the rear fan and side vents. Avoid placing it near heat sources or in direct sunlight.
- Collegamento elettrico: Connect the provided 220V AC power cord to the power input socket on the rear of the unit, then plug the other end into a grounded 220V AC wall outlet.
- Accensione iniziale: Press the Power On/Off button on the front panel. The digital displays should illuminate.
- Collegamento del cavo di uscita: Before connecting any load, ensure the power supply output is disabled (OUTPUT button LED off). Connect your load using appropriate test leads to the Positive (+) and Negative (-) output terminals. For safety, connect the ground (GND) terminal to the chassis of your circuit if required.
6. Istruzioni per l'uso
6.1 Impostazione del volumetagee Limiti di corrente
- Imposta Vol.tage: With the output disabled (OUTPUT button LED off), use the COARSE V E FINE V knobs to set the desired output voltage. Osservare il Voltage Visualizza.
- Imposta limite corrente: With the output disabled, use the COARSE A E FINE A knobs to set the desired maximum current limit. This acts as a safety feature to protect your circuit.
- Abilita output: Una volta voltage i limiti di corrente sono impostati, premere il tasto PRODUZIONE button. The LED will illuminate, and power will be supplied to the output terminals.
6.2 Volume costantetagModalità e (CV) e corrente costante (CC)
- Volume costantetage (CV) Modalità: When the load current is below the set current limit, the power supply operates in CV mode. The output voltage remains constant at the set value, and the CV l'indicatore LED si accenderà.
- Modalità corrente costante (CC): If the load current attempts to exceed the set current limit, the power supply automatically switches to CC mode. The output current is maintained at the set limit, and the output voltage will drop to protect the load. The CC l'indicatore LED si accenderà.
6.3 Using the 5V/2A USB Output
The front panel includes a dedicated 5V/2A USB port. This port provides a fixed 5V output with a maximum current of 2A, independent of the main adjustable output. It can be used to power or charge compatible USB devices.
7. Manutenzione
- Pulizia: Disconnect the power supply from the AC outlet before cleaning. Use a soft, dry cloth to wipe the exterior of the unit. Do not use abrasive cleaners or solvents.
- Ventilazione: Periodically check the ventilation openings for dust accumulation. Use compressed air to gently clear any blockages to ensure proper airflow.
- Magazzinaggio: When not in use for extended periods, store the power supply in a cool, dry place, away from direct sunlight and extreme temperatures. It is recommended to use the original packaging for storage.
- Ispezione dei cavi: Regularly inspect the power cord and output cables for any signs of damage, fraying, or loose connections. Replace damaged cables immediately.
8. Risoluzione Dei Problemi
| Problema | Possibile causa | Soluzione |
|---|---|---|
| L'unità non si accende. | No AC power, faulty power cord, internal fuse. | Check AC power connection. Ensure power cord is securely plugged in. If problem persists, contact support. |
| Nessun volume di uscitatage/corrente. | Output disabled, OVP/OCP active, incorrect settings, faulty connection. | Premere il tasto PRODUZIONE button to enable output. Check if OVP/OCP indicators are lit. Verify voltage/current settings. Ensure output cables are correctly connected. |
| Volume di uscitatage/la corrente fluttua. | Unstable AC input, loose connections, faulty load. | Ensure stable AC input. Check all cable connections. Test with a different load to isolate the issue. |
| Over-protection (OVP/OCP) activates frequently. | Load exceeds set limits, short circuit in load. | Aumenta il voltage/current limits if appropriate for the load. Check the load for short circuits or excessive current draw. |
| L'unità diventa eccessivamente calda. | Blocked ventilation, prolonged high load. | Ensure ventilation openings are clear. Reduce load or operate in a cooler environment. |
9. Specifiche
| Parametro | Valore |
|---|---|
| Modello | SPPS-H3010 |
| Ingresso volumetage | 220 V CA |
| Volume di uscitatage Gamma | 0-30 V CC (regolabile) |
| Gamma di corrente di uscita | 0-10A CC (regolabile) |
| Potenza di uscita | 300 W (massimo) |
| Tipo di uscita | Canale singolo |
| Frequenza di ingresso | Frequenza 50/60 Hz |
| Uscita USB | 5V / 2A |
| Caratteristiche di protezione | OVP, OCP, Over-Heat, Short-Circuit |
| Peso dell'articolo | 2.2 libbre (circa 1 kg) |
10. Garanzia e supporto
For warranty information, technical support, or service inquiries, please contact your original point of purchase or the manufacturer directly. Retain your purchase receipt as proof of purchase for warranty claims.


