1. Introduzione
The Prolink DH-5202 Wi-Fi 6 AX1500 Dual-band Extender is designed to enhance your existing Wi-Fi coverage and eliminate dead zones. It operates on both 2.4GHz and 5GHz bands simultaneously, providing a combined speed of up to 1500Mbps. This extender supports the latest Wi-Fi 6 technology, offering faster speeds, improved connectivity, and greater capacity for multiple devices. It can function as a Wi-Fi Repeater or an Access Point, adapting to your network requirements. Key features include a Gigabit Ethernet port for wired connections, a Smart LED Indicator for optimal placement, and WPA3 security for enhanced network protection.
2. Prodotto finitoview
2.1 Componenti fisici
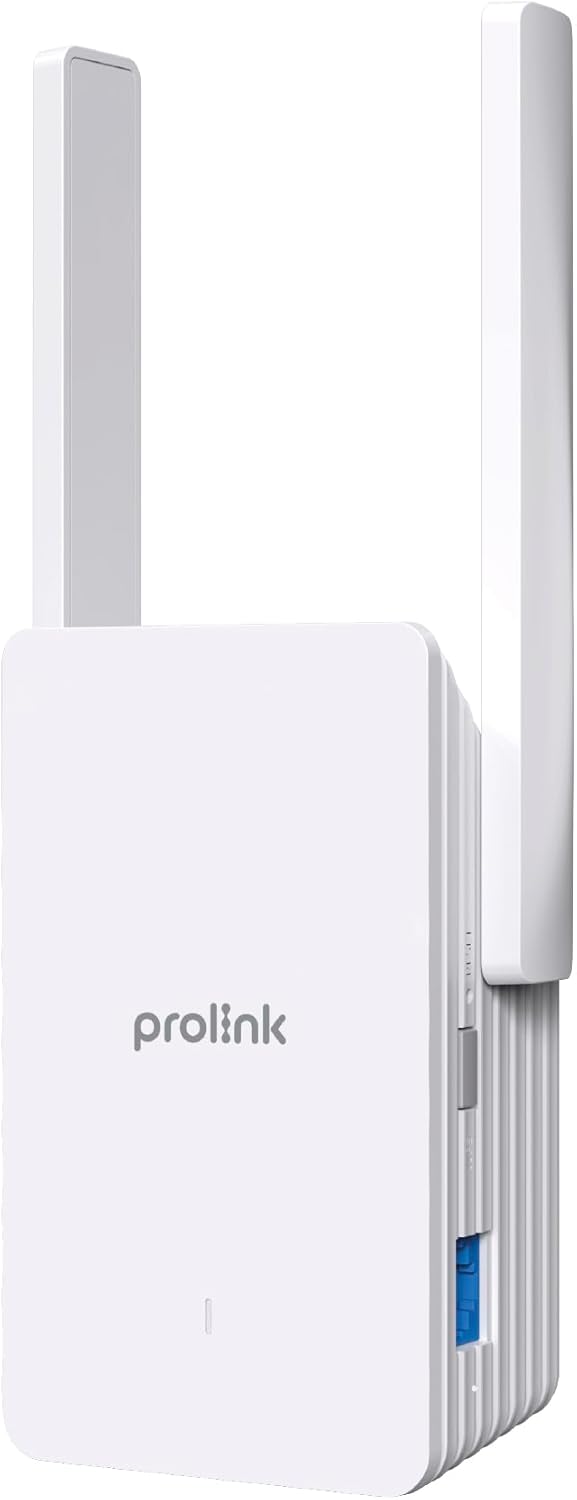
The Prolink DH-5202 features a compact design with integrated antennas and essential ports for network extension.

2.2 Smart LED Indicator
The LED indicator on the front of the extender provides visual feedback on the connection status and signal strength, aiding in optimal placement.
- Verde: Buona connessione.
- Giallo: Unstable connection. Consider changing the extender's location.
- Rosso: Poor connection. Move the extender closer to the main router.
- Rosso lampeggiante: Network extension failed or re-connection is needed.
3. Impostazione
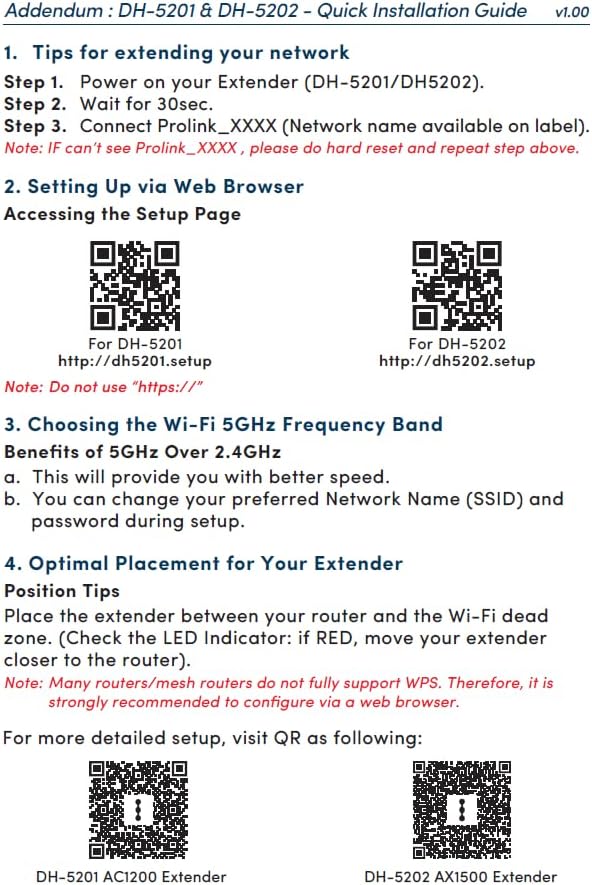
The Prolink DH-5202 offers two primary methods for setup: WPS (Wi-Fi Protected Setup) for quick pairing or Web GUI (Graphical User Interface) for more detailed configuration.
3.1 Method 1: WPS Setup
- Collegare l'extender a una presa di corrente vicino al router principale.
- Wait for 30 seconds for the extender to power on.
- Premi il pulsante WPS sul router principale.
- Within two minutes, press the WPS button on the Prolink DH-5202 extender.
- The LED indicator on the extender will change to green when successfully connected.
Note: Many routers/mesh routers do not fully support WPS. If WPS fails, use the Web GUI method.
3.2 Metodo 2: Web Configurazione della GUI
- Collegare l'extender a una presa di corrente.
- On your computer or mobile device, connect to the extender's default Wi-Fi network (e.g., Prolink_XXXX).
- Aprire un web browser e vai a http://dh5202.setup.
- Follow the on-screen instructions to set up a login password for the extender.
- Select the Wi-Fi network you wish to extend (preferably the 5GHz band for better speed).
- Inserisci la password per la rete Wi-Fi del tuo router principale.
- The extender will then connect and extend your network.


4. Modalità operative
The Prolink DH-5202 can operate in two distinct modes:
4.1 Modalità ripetitore
In Repeater Mode, the extender wirelessly connects to your existing Wi-Fi network and re-broadcasts it, extending the coverage area. This mode is ideal for eliminating Wi-Fi dead zones and providing wireless connectivity to devices like smart TVs, gaming consoles, and laptops in areas with weak signals.
4.2 Modalità punto di accesso (AP)
In Access Point Mode, the extender connects to your main router via an Ethernet cable. It then creates a new dual-band wireless network, effectively turning your wired connection into a Wi-Fi hotspot. This mode is suitable for situations where you have an Ethernet port available but need to provide wireless access.

5. Posizionamento ottimale
Proper placement of your Wi-Fi extender is crucial for maximizing its performance and ensuring stable network coverage. Use the Smart LED Indicator to find the best location.
- Place the extender roughly halfway between your main router and the Wi-Fi dead zone.
- Evitare di posizionare l'extender vicino a grandi oggetti metallici, pareti di cemento o apparecchi che emettono interferenze elettromagnetiche (ad esempio forni a microonde, telefoni cordless).
- Osservare l'indicatore LED:
- Se il LED è Verde, the connection is good.
- Se il LED è Giallo, the connection is unstable; try adjusting the position slightly.
- Se il LED è Rosso, the connection is poor; move the extender closer to the router.

6. Specifiche
| Caratteristica | Specificazione |
|---|---|
| Marca | Collegamento Pro |
| Numero di modello | DH-5202 |
| Tipo senza fili | 802.11a/b/g/n, 802.11ax (Wi-Fi 6) |
| Velocità di trasferimento dati | 1500 Megabit al secondo (AX1500) |
| Classe di banda di frequenza | Doppia banda (2.4 GHz e 5 GHz) |
| Antenne | 2x 5dBi antennas |
| Porta Ethernet | Porta Gigabit Ethernet |
| Sicurezza | WPA3 |
| Caratteristiche speciali | Modalità Access Point, indicatore LED |
| Dimensioni del prodotto | 12.3P x 7.2L x 4.8A centimetri |
| Peso dell'articolo | 0.25 chilogrammi |
7. Risoluzione Dei Problemi
If you encounter issues with your Prolink DH-5202 extender, refer to the following common troubleshooting steps:
- Nessun potere: Assicurarsi che l'extender sia collegato saldamente a una presa di corrente funzionante.
- No Wi-Fi Signal from Extender: Check the LED indicator. If it's off or blinking red, the extender may not be powered on or connected to the main router. Re-attempt setup.
- Poor Connection (Red/Yellow LED): Relocate the extender closer to your main router. Ensure there are no major obstructions between the router and the extender.
- Impossibile accedere Web Interfaccia grafica: Ensure your device is connected to the extender's Wi-Fi network (e.g., Prolink_XXXX) and you are typing the correct address (http://dh5202.setup) into your browser. Avoid using "https://".
- Bassa velocità: Ensure the extender is placed optimally (Green LED). If extending a 5GHz network, ensure your devices also support 5GHz for best performance. Consider switching to AP mode if a wired connection to the router is feasible.
- Forgotten Login Password: If you forget the extender's login password, you may need to perform a factory reset. Locate the reset button (usually a small pinhole) and press and hold it for about 10 seconds while the extender is powered on. This will revert the extender to its factory default settings, and you will need to set it up again.
- Network Extension Failure (Blinking Red LED): This often indicates an issue with the connection to the main router. Verify the main router's Wi-Fi is active and the password entered during setup is correct. Try restarting both the router and the extender.
8. Manutenzione
To ensure the longevity and optimal performance of your Prolink DH-5202 Wi-Fi Extender, consider the following maintenance tips:
- Pulizia: Gently wipe the exterior of the extender with a soft, dry cloth. Do not use liquid cleaners or abrasive materials. Ensure ventilation holes are clear of dust.
- Aggiornamenti del firmware: Periodically check the Prolink official website for any available firmware updates. Firmware updates can improve performance, add new features, and enhance security. Follow the instructions provided by Prolink for updating firmware.
- Condizioni ambientali: Operate the extender within recommended temperature and humidity ranges. Avoid exposing it to direct sunlight, excessive heat, or moisture.
- Riavvio: If you experience intermittent connectivity issues, a simple restart of the extender (unplugging and replugging after 10 seconds) can often resolve the problem.
9. Garanzia e supporto
Prolink offers local warranty and technical support for its products. For assistance, please contact:
- Supporto via e-mail: support@prolink2u.com
- Supporto telefonico: (65) 6357 0666
Prolink is an established Singaporean brand with 30 years of excellence since 1991, committed to providing reliable products and support.


