1. Introduzione
Thank you for choosing the Yoobure L-Shaped Gaming Desk. This manual provides detailed instructions for the assembly, operation, and maintenance of your new desk. Please read all instructions carefully before assembly and use to ensure safe and proper functionality.

Figure 1: Yoobure L-Shaped Gaming Desk Overview
2. Informazioni sulla sicurezza
Always assemble the desk on a stable, level surface. Use the adjustable foot pads to ensure the desk is level. This desk is heavy and large; consider anchoring it to the wall or floor to prevent tipping, especially if using it for gaming or other activities that may cause sudden movements. Do not place heavy objects on the desk that could cause it to tip over. Always follow the assembly instructions carefully to ensure the desk is stable and secure.
3. Contenuto della confezione
Before beginning assembly, please ensure all components are included and intact. Refer to the detailed parts list and diagrams provided in the assembly video for identification. All necessary assembly tools are included.
I componenti chiave includono:
- Pannelli per scrivania (sezioni a L)
- Componenti del telaio in metallo
- Pegboard with bins and hooks
- Cassetti in tessuto
- Removable monitor stand
- Supporto per CPU
- LED light strip with remote
- Power outlet strip (4 AC, 2 USB)
- Ferramenta e utensili per l'assemblaggio
4. Istruzioni di montaggio
This desk features a reversible design, allowing you to configure the L-shape with the storage unit on either the left or right side. Follow the instructions carefully for your desired orientation. Do not fully tighten screws until the entire desk frame is assembled to allow for adjustments.
Guida video di montaggio
For a visual step-by-step guide, please refer to the official assembly video:
Video 1: Yoobure L Shaped Desk with Pegboard Assembly Video. This video provides a comprehensive visual guide for assembling your desk.
General Assembly Steps (Refer to video for details):
- Disimballare tutti i componenti e verificarli rispetto all'elenco delle parti.
- Assemble the fabric drawers (Step 1 in video).
- Construct the monitor stand (Step 2 in video).
- Assemble the main desk frames, including the CPU stand and cross-braces (Steps 3-7 in video).
- Attach the pegboard and shelves to the frame (Step 4 in video).
- Secure the desk panels to the assembled frames, ensuring the power outlet panel is correctly positioned (Steps 11-12 in video).
- Install the LED light strip. Confirm placement before permanent adhesion to avoid damage (Step 13 in video).
- Place the fabric drawers and monitor stand in their desired locations (Step 14 in video).
- Once all parts are in place and aligned, tighten all screws securely.

Figura 2: dettagliata view of storage and features including pegboard, drawers, CPU stand, and monitor stand.
5. Istruzioni per l'uso
Luci LED
The integrated LED light strip can be controlled via a dedicated remote control or a smartphone application. It offers 22 dynamic modes and various color adjustments. You can also sync the lights to music or set a timer for automatic operation. Ensure the plastic tab is removed from the remote's battery compartment before first use.

Figure 3: Gaming setup with LED lights activated.
Prese di corrente
The desk includes a built-in power strip with 4 AC outlets and 2 USB ports, connected by a 6.56ft power cord. This allows for convenient charging and powering of your electronic devices directly on the desktop.
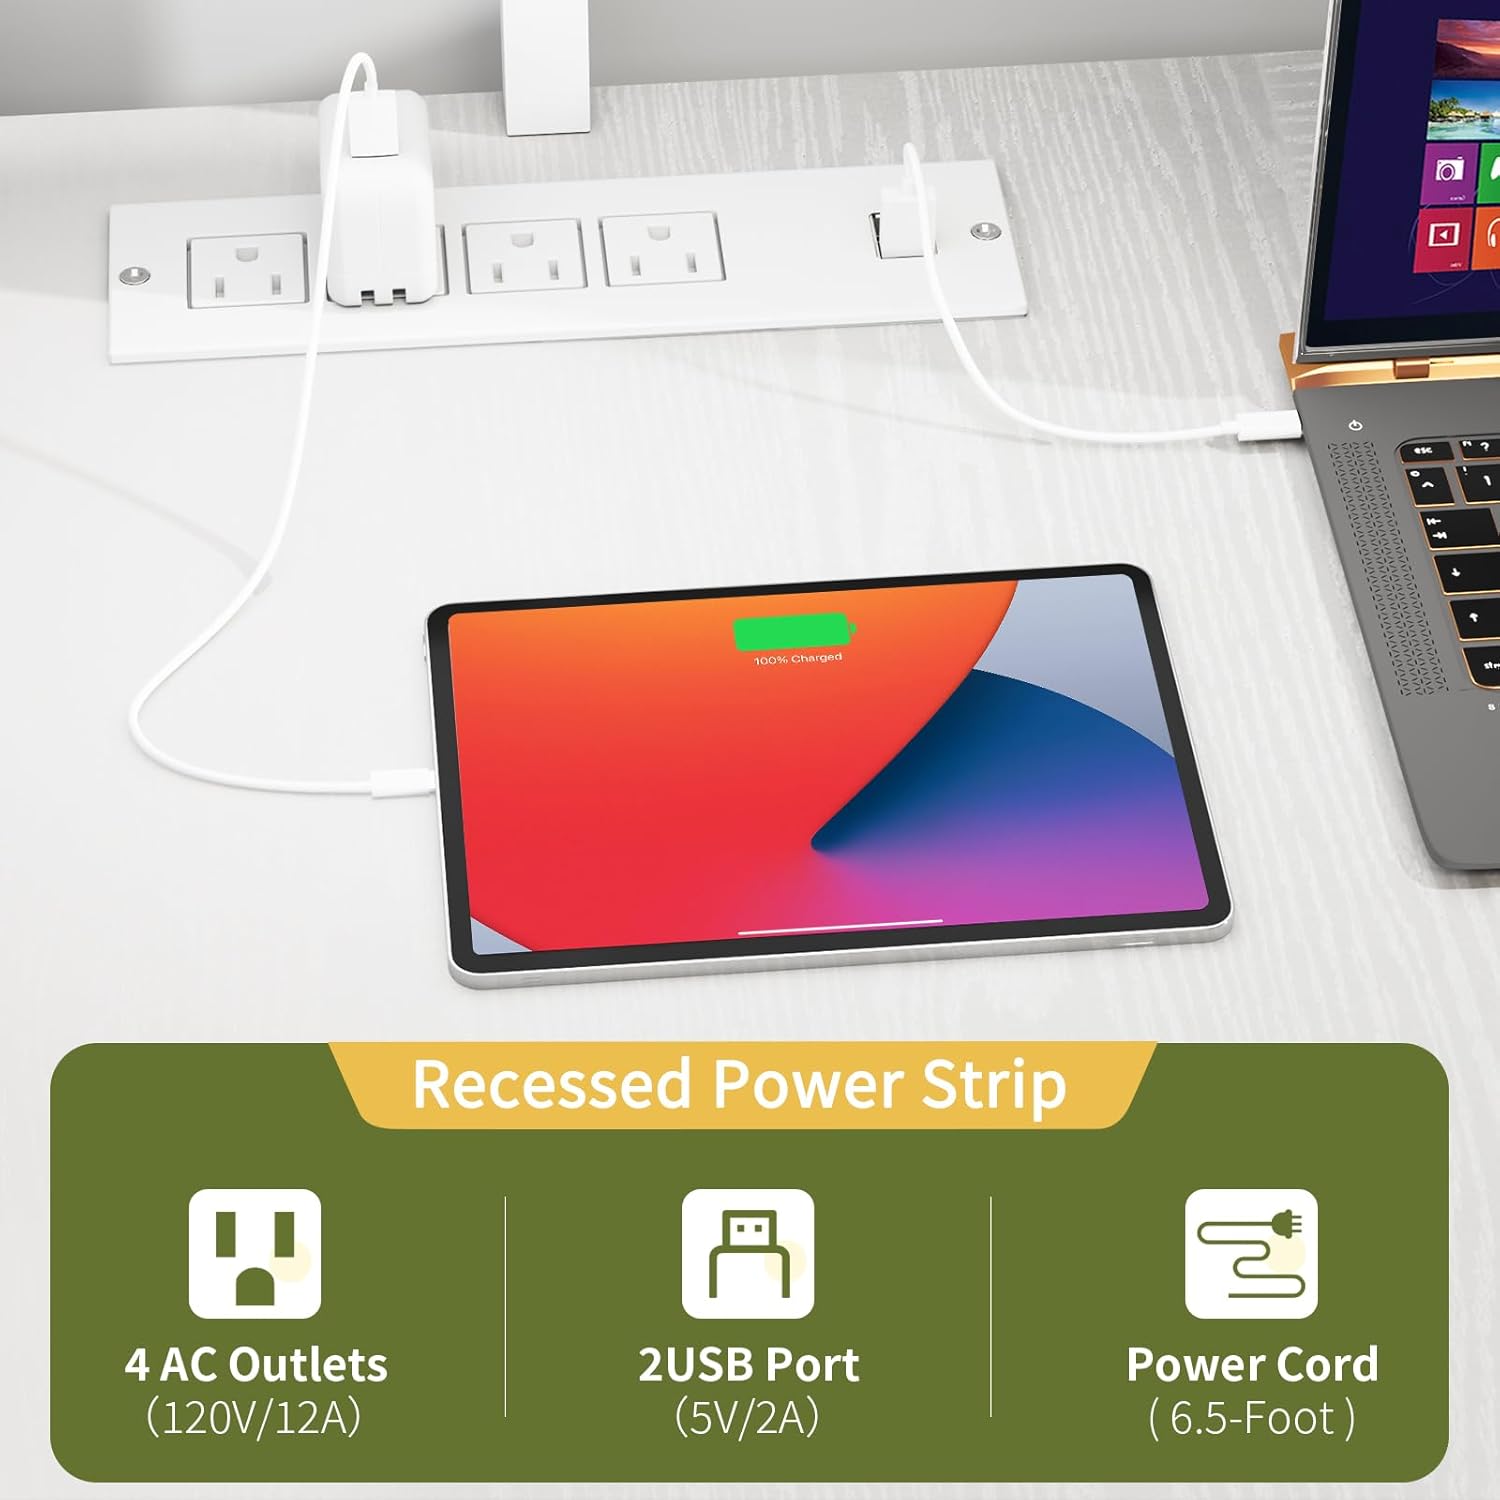
Figure 4: Integrated power outlets for convenient charging.
6. Manutenzione
To maintain the appearance and longevity of your desk, follow these guidelines:
- Pulisci regolarmente le superfici con un panno morbido eamp stoffa. Evitare detergenti abrasivi.
- Immediately clean up spills to prevent damage to the engineered wood finish.
- Controllare periodicamente tutte le viti e i collegamenti per assicurarsi che siano ben serrati. Serrare nuovamente se necessario.
- Avoid exposing the desk to direct sunlight or extreme temperature changes.
7. Risoluzione Dei Problemi
Se riscontri problemi durante il montaggio o l'uso, ti preghiamo di contattarci.view the assembly video and instructions. For persistent problems, contact customer support.
Problemi comuni:
- Scrivania traballante: Ensure all screws are fully tightened. Adjust the foot pads to stabilize the desk on uneven floors.
- Luci LED non funzionanti: Check the power connection and ensure the remote's battery tab is removed. Try replacing the remote battery if needed.
- Prese di corrente non funzionanti: Verify the desk's power cord is securely plugged into a working wall outlet.
8. Specifiche
| Caratteristica | Dettaglio |
|---|---|
| Marca | Yoobure |
| Modello | B0DM68K261 |
| Forma | L-Shaped (Rectangular sections) |
| Dimensioni del prodotto (P x L x A) | 47.2"P x 55.1"L x 57.1"A |
| Colore | Bianco |
| Stile | Rustico |
| Tipo di materiale superiore | Legno ingegnerizzato |
| Tipo di materiale del telaio | Acciaio |
| Caratteristiche speciali | Pegboard, LED Lights, Power Outlets, Reversible Design, Removable Monitor Stand, CPU Stand |
| Numero di cassetti | 2 (Tessuto) |
| Numero di ripiani | 3 (including hutch and CPU stand) |
| Assemblaggio richiesto | SÌ |
| Persone consigliate per l'assemblaggio | 2 (can be done by 1 person) |
| Include tutti gli strumenti di assemblaggio | SÌ |

Figura 5: Dimensioni della scrivania e opzioni di configurazione reversibile.
9. Garanzia e supporto
The Yoobure L-Shaped Gaming Desk comes with a 1-Year Warranty. For any questions, concerns, or support needs, please contact Yoobure customer service. We aim to provide a quick 12-hour customer response service.
Contact Information: Please refer to your purchase platform or the Yoobure official websito per i dettagli di contatto più aggiornati.