1. Introduzione
The NDI ND0988 Stud Detector utilizes advanced electronic signals technology to detect the precise location of studs hidden behind walls. This tool is ideal for indoor decoration wiring, installation of electric equipment such as air conditioners and range hoods, and detecting metal in wooden furniture and wood product structures. It offers clear audio and visual indicators to ensure safe drilling and hanging, making it perfect for home improvement tasks like hanging shelves or installing appliances.
2. Prodotto finitoview
The NDI ND0988 is designed for user-friendly operation and accurate results. Below are its key features and components.
- Accurate Stud Detection: Locates wooden studs with precision at depths of 12mm, 25mm, and 38mm.
- User-Friendly LCD Interface: Bright backlit LCD screen displays detection strength, battery level, and stud depth indicators.
- Multiple Depth Modes: Three depth settings (0.5", 1.0", and 1.5") adapt to various wall thicknesses.
- Battery Indicator & Power Saving: Features a battery level indicator and automatically shuts down after 2 minutes of inactivity.
- Design compatto e durevole: Lightweight, easy to handle, and built to withstand everyday use.
Componenti del prodotto

Figure 1: NDI ND0988 Stud Detector with labeled components.
- LCD retroilluminato: Displays all operational information.
- Pulsante di accensione: Accende/spegne il dispositivo.
- Pulsante Modalità: Switches between different detection modes (depths).
- Detection Button: Press and hold to initiate scanning.
- Vano batteria: Contiene le batterie AAA.
3. Impostazione
Installazione della batteria
The NDI ND0988 requires two AAA batteries (not included). Follow these steps to install them:
- Individuare il coperchio del vano batteria sul retro del dispositivo.
- Far scorrere il coperchio per aprirlo.
- Inserire due batterie AAA, assicurandosi della corretta polarità (+/-).
- Riposizionare il coperchio del vano batteria finché non scatta in posizione.
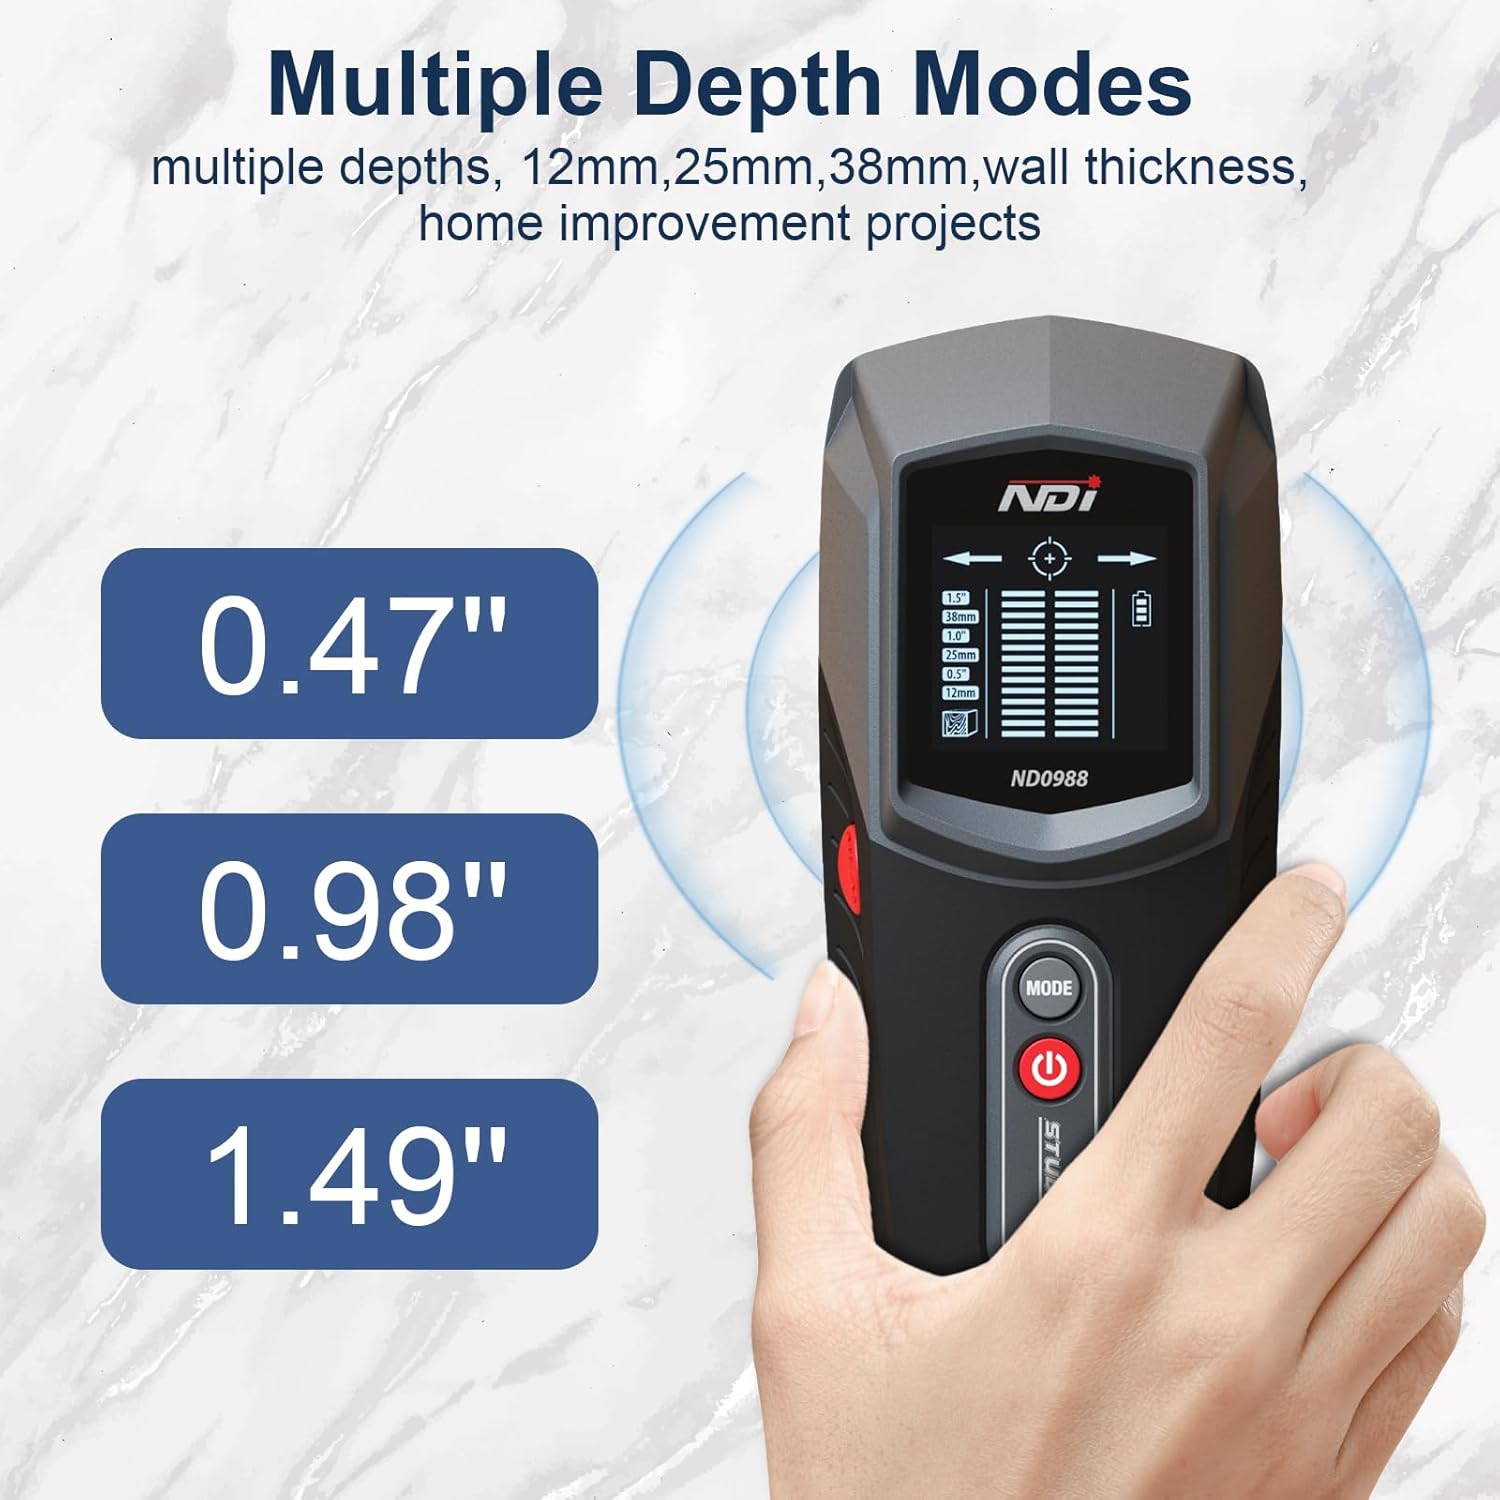
Figure 2: NDI ND0988 Stud Detector.
4. Istruzioni per l'uso
Accensione/spegnimento
- Per accendere: Short press the Power button. The tool will display full information on the LCD screen.
- Per spegnere: Long press the Power button until the screen turns off. The device also features an automatic shutdown after 2 minutes of inactivity to preserve battery life.
Mode Selection and Unit Switch
- To Switch Depth Modes: Short press the MODE button to cycle through the available stud detection depths (12mm, 25mm, 38mm).
- Per cambiare unità: Long press the MODE button to switch between Metric (mm) and Imperial (inches) units.
Stud Detection Procedure
For accurate results, ensure the device is calibrated before scanning.
- Place the detector flat against the wall surface where you intend to scan.
- Press and hold the Detection button (MEAS). The device will calibrate automatically. Wait for the calibration to complete (usually a short beep and stable display).
- Slowly slide the detector horizontally across the surface. Keep the device flat against the wall.
- When a stud is detected, the LCD screen will show signal strength indicators, and an audible beep will sound. Arrows on the display will guide you towards the center of the stud.
- Mark the center of the stud once the display indicates maximum signal strength and a bullseye icon.
- Repeat the scan from the opposite direction to confirm the stud's edges and center for maximum accuracy.
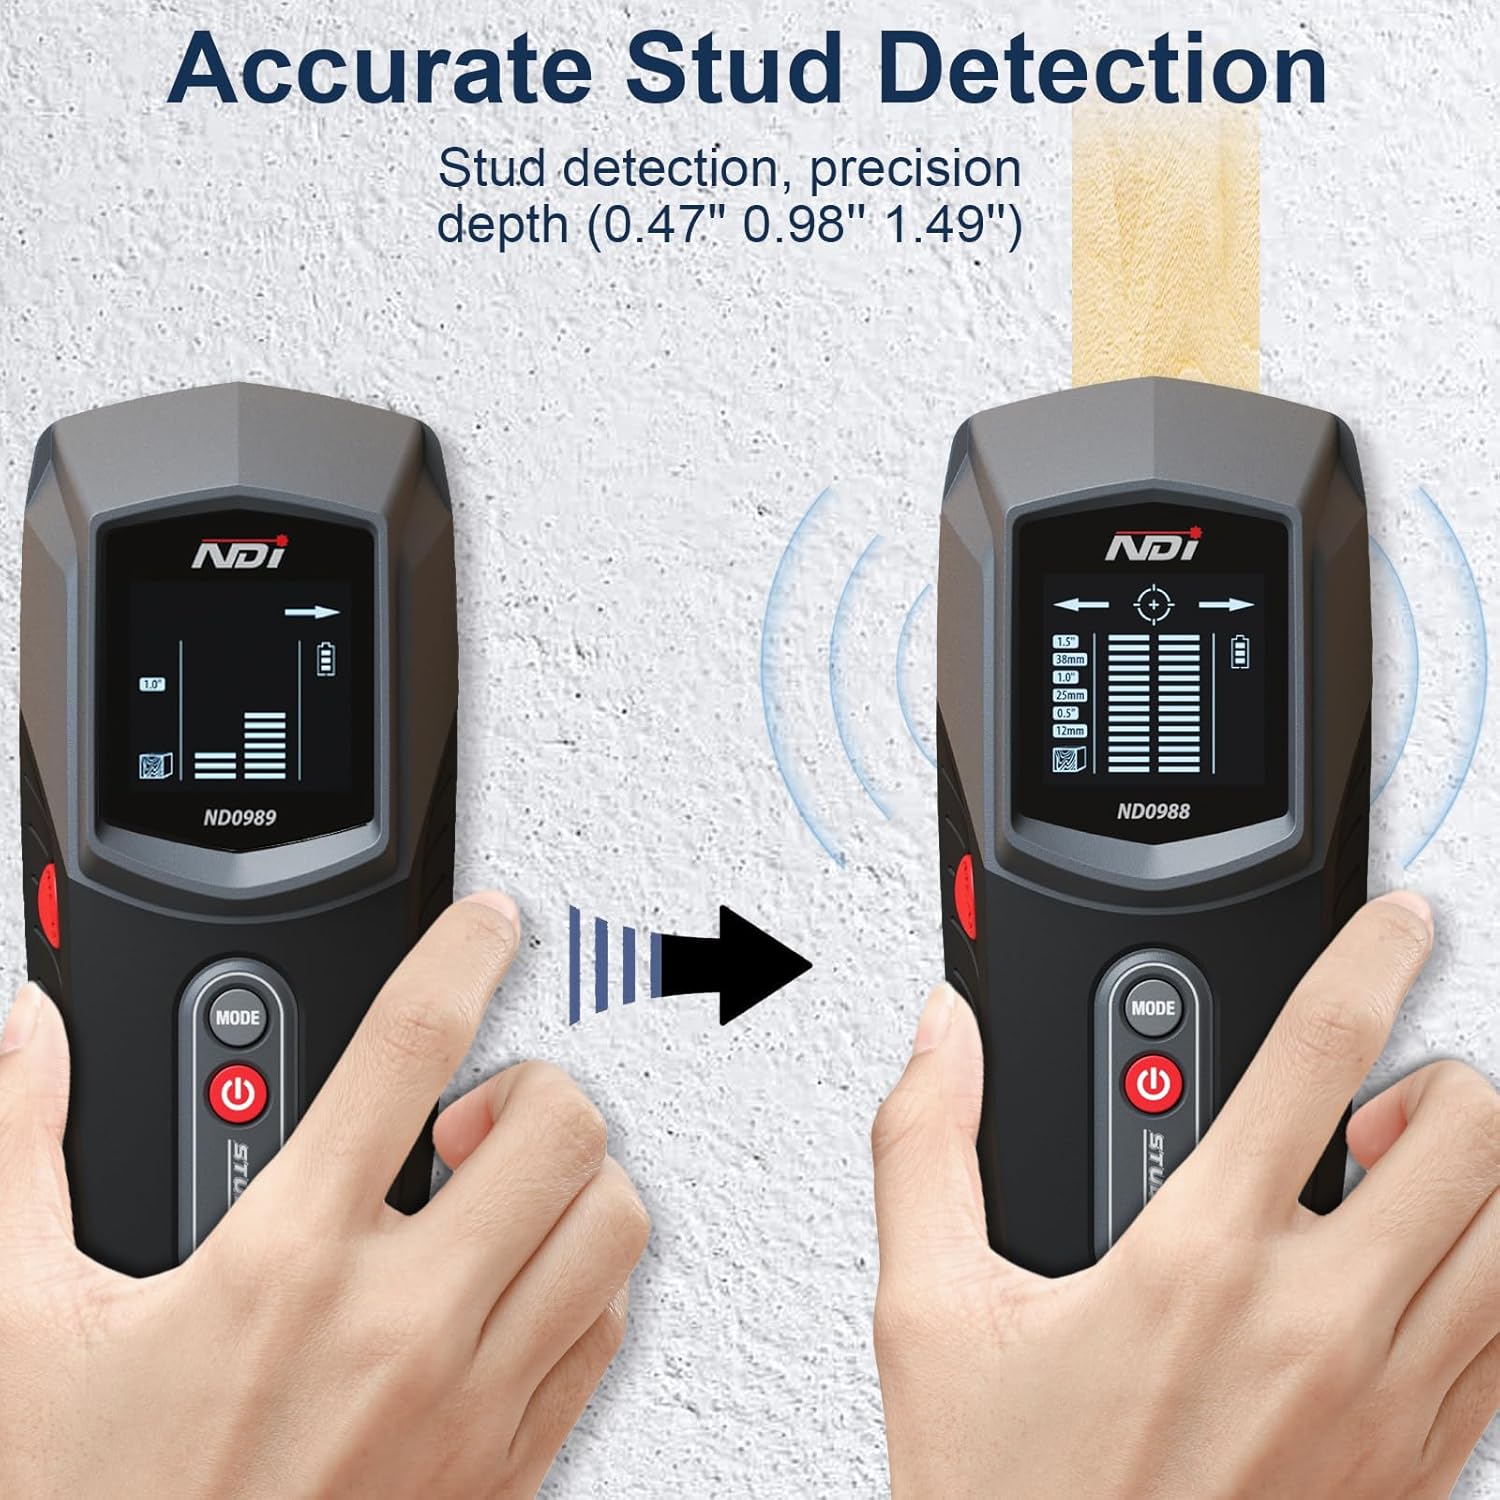
Figure 3: Accurate Stud Detection in progress.
Video 1: Demonstration of NDI ND0988 Stud Detector in action, showing detection of studs behind a wall.
5. Depth Modes
The NDI ND0988 offers three distinct depth modes to accommodate various wall thicknesses and material types:
- Modalità 1 (12 mm / 0.5"): Ideal for detecting studs closer to the surface.
- Modalità 2 (25 mm / 1.0"): Suitable for standard wall thicknesses.
- Modalità 3 (38 mm / 1.5"): For deeper stud detection through thicker materials.
Select the appropriate mode based on your wall's construction for optimal accuracy.

Figure 4: Multiple Depth Modes for versatile scanning.
6. Informazioni sulla batteria
The NDI ND0988 is powered by two AAA batteries. The device includes a battery level indicator on the LCD screen to inform you when the batteries are running low and need replacement. To conserve battery life, the tool automatically shuts down after 2 minutes of inactivity.
Suggerimenti per la sicurezza della batteria
- Always remove batteries when storing the product for extended periods.
- Smaltire correttamente le batterie usate secondo le normative locali.
- Non esporre le batterie a temperature elevate o alla luce solare diretta.
7. Manutenzione
To ensure the longevity and optimal performance of your NDI ND0988 Stud Detector, follow these maintenance guidelines:
- Pulizia: Pulire il dispositivo con un panno morbido e asciutto. Non utilizzare detergenti abrasivi o solventi.
- Magazzinaggio: Store the detector in a cool, dry place away from direct sunlight and extreme temperatures. Remove batteries if storing for an extended period.
- Gestione: Evitare di far cadere il dispositivo o di sottoporlo a forti urti, poiché ciò potrebbe danneggiare i componenti interni.
8. Risoluzione Dei Problemi
If you encounter issues with your NDI ND0988 Stud Detector, refer to the following common troubleshooting tips:
- Letture imprecise: Ensure the device is properly calibrated by pressing it flat against the wall before scanning. Avoid scanning over wet paint or wallpaper, which can affect accuracy.
- Nessun rilevamento: Check if the batteries are correctly installed and have sufficient charge. Try switching to a different depth mode. Ensure the device is held flat against the wall and moved slowly.
- Dispositivo non si accende: Verify that the batteries are new or fully charged and inserted with correct polarity. If the issue persists, replace the batteries.
For further assistance, please contact NDI customer support.
9. Specifiche
| Caratteristica | Specificazione |
|---|---|
| Marca | NDI |
| Numero di modello | Numero di modello: ND0988 |
| Colore | Grigio |
| Materiale | Plastica |
| Fonte di alimentazione | Alimentato a batteria (2 x AAA) |
| Peso dell'articolo | 8 once |
| Dimensioni del prodotto | 2.7 cm L x 1.6 cm P x 6.4 cm A |
| Profondità di rilevamento dei perni | 12mm (0.5"), 25mm (1.0"), 38mm (1.5") |
| Display | LCD retroilluminato |
| Avvisi audio | SÌ |
10. Garanzia e supporto
NDI products are manufactured to high-quality standards. For information regarding warranty coverage, product support, or to purchase replacement parts, please refer to the contact information provided with your product packaging or visit the official NDI websito. Conservare la prova d'acquisto per eventuali reclami in garanzia.


