1. Prodotto finitoview
The JONSBO N10 is a compact Mini ITX PC case designed for small form factor (SFF) builds. It features an aluminum alloy shell with a sandblasted finish and North American walnut trim, offering both durability and aesthetic appeal. The case supports Mini ITX motherboards and 1U FLEX power supplies up to 150mm in length. Its design allows for flexible placement in both standing and lying positions.

Image 1.1: The JONSBO N10 Mini ITX PC Case in a typical desktop setup, showcasingrazie alle sue dimensioni compatte e al suo design.
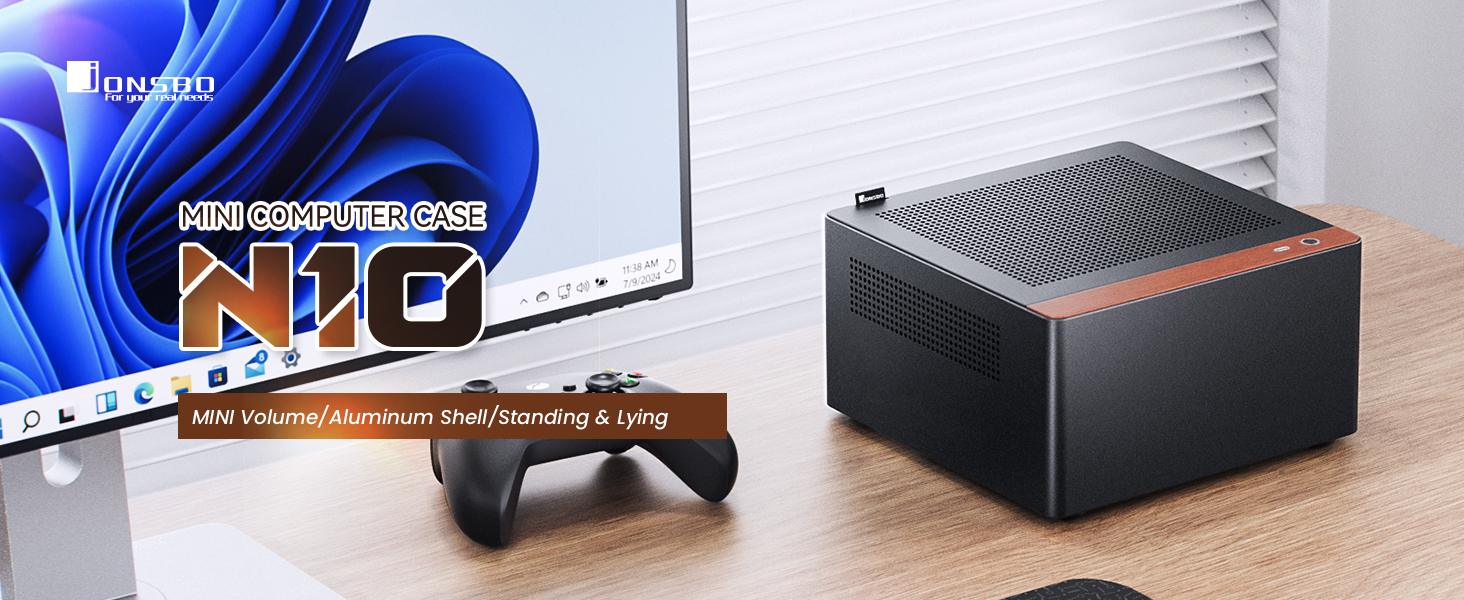
Image 1.2: The JONSBO N10 case positioned on a desk, highlighting its small footprint and integration into a workspace.
Video 1.1: Prodotto ufficiale finitoview of the JONSBO N10/NV10 Mini ITX PC Case, demonstrating its features and design.
Caratteristiche principali:
- Design compatto: Portable capacity of approximately 4.5L, suitable for small spaces.
- Materiali di prima qualità: Constructed from aluminum alloy with a sandblasted finish and North American walnut trim.
- Posizionamento flessibile: Can be used in both standing and lying orientations.
- Raffreddamento efficiente: Features a multi-component perforated design for enhanced heat dissipation and improved airflow. Includes two 5000 RPM 40mm high-speed fans for auxiliary hard drive cooling.
- Supporto per l'archiviazione: Accommodates up to four 2.5-inch SSDs.
- Compatibilità dell'alimentatore: Supports 1U FLEX power supplies with a maximum length of 150mm.
- Facile manutenzione: The upper cover is equipped with an easy-to-pull handle for convenient disassembly and maintenance.
- I / O anteriore: Includes a USB 3.2 Gen 2 Type-C port.
- Supporto per radiatori: Compatible with air coolers up to 38mm in height.
2. Configurazione e installazione
This section provides general guidelines for installing components into your JONSBO N10 PC case. Always refer to the specific manuals for your motherboard, power supply, and other components for detailed instructions.
2.1 Smontaggio della cassa
To begin installation, the case needs to be opened. The JONSBO N10 features a quick-release design for the top plate, allowing for easy access to the internal components.
- Locate the easy-to-pull handle on the upper cover.
- Gently pull the handle to release the top cover.
- Remove the top cover to access the interior of the chassis.
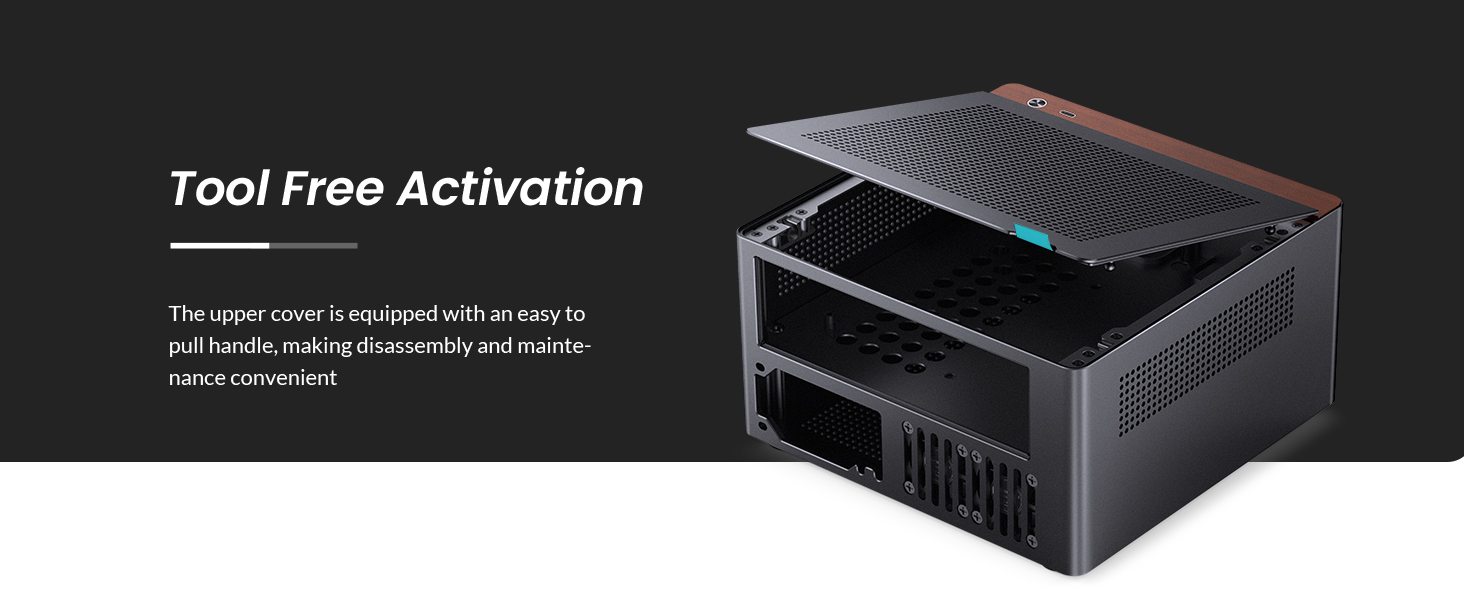
Image 2.1: The JONSBO N10 case with its top panel lifted, demonstrating the tool-free access for installation and maintenance.
2.2 Installazione della scheda madre
The JONSBO N10 is compatible with Mini ITX motherboards. Install your motherboard into the designated area within the chassis, securing it with the appropriate screws.

Immagine 2.2: Interno view of the JONSBO N10 case showing a Mini ITX motherboard and CPU cooler installed.
2.3 Installazione dell'alimentatore
The case supports 1U FLEX power supplies with a maximum length of 150mm. The power supply is typically installed from the bottom of the chassis.
- Orient the 1U FLEX power supply correctly.
- Slide the power supply into its designated slot from the bottom of the case.
- Secure the power supply using the provided screws.

Image 2.3: Diagram illustrating the installation process of a 1U FLEX power supply into the JONSBO N10 case from the bottom.
2.4 Installazione del dispositivo di archiviazione
The JONSBO N10 provides support for up to four 2.5-inch SSDs. A dedicated bracket is used for mounting these drives.
- Attach the 2.5-inch SSDs to the provided storage bracket.
- Slide the filled bracket into its designated position within the chassis.
- Assicurarsi che la staffa sia fissata saldamente.

Image 2.4: Diagram demonstrating the installation of 2.5-inch SSDs into the JONSBO N10 case using a dedicated bracket.
2.5 Installazione della ventola
The N10 case includes two 40mm high-speed fans for auxiliary hard drive cooling, located at the rear window. Ensure these fans are properly connected to your motherboard's fan headers.
Immagine 2.5: posteriore view of the JONSBO N10 case, highlighting the placement of the two 40mm fans for hard drive cooling.
3. Istruzioni per l'uso
Once all components are installed and the case is reassembled, you can begin operating your PC.
- Connect all necessary external peripherals (monitor, keyboard, mouse, etc.) to the motherboard's I/O ports.
- Connect the power cable to the power supply unit and then to a wall outlet.
- Press the power button located on the front panel of the case to turn on your PC.
- Utilize the front USB 3.2 Gen 2 Type-C port for connecting compatible devices.
Immagine 3.1: anteriore view of the JONSBO N10 case, showing the walnut trim and the front I/O port.
4. Manutenzione
Una manutenzione regolare aiuta a garantire prestazioni ottimali e longevità dei componenti del PC.
4.1 Pulizia
- Esterno: Wipe the aluminum alloy and walnut surfaces with a soft, dry cloth. Avoid abrasive cleaners.
- Interno: Periodically open the case (refer to Section 2.1) and use compressed air to remove dust buildup from fans, heatsinks, and other components. Ensure the PC is powered off and unplugged before cleaning the interior.
- Fori di ventilazione: The perforated design allows for good airflow. Keep these holes clear of obstructions and dust.
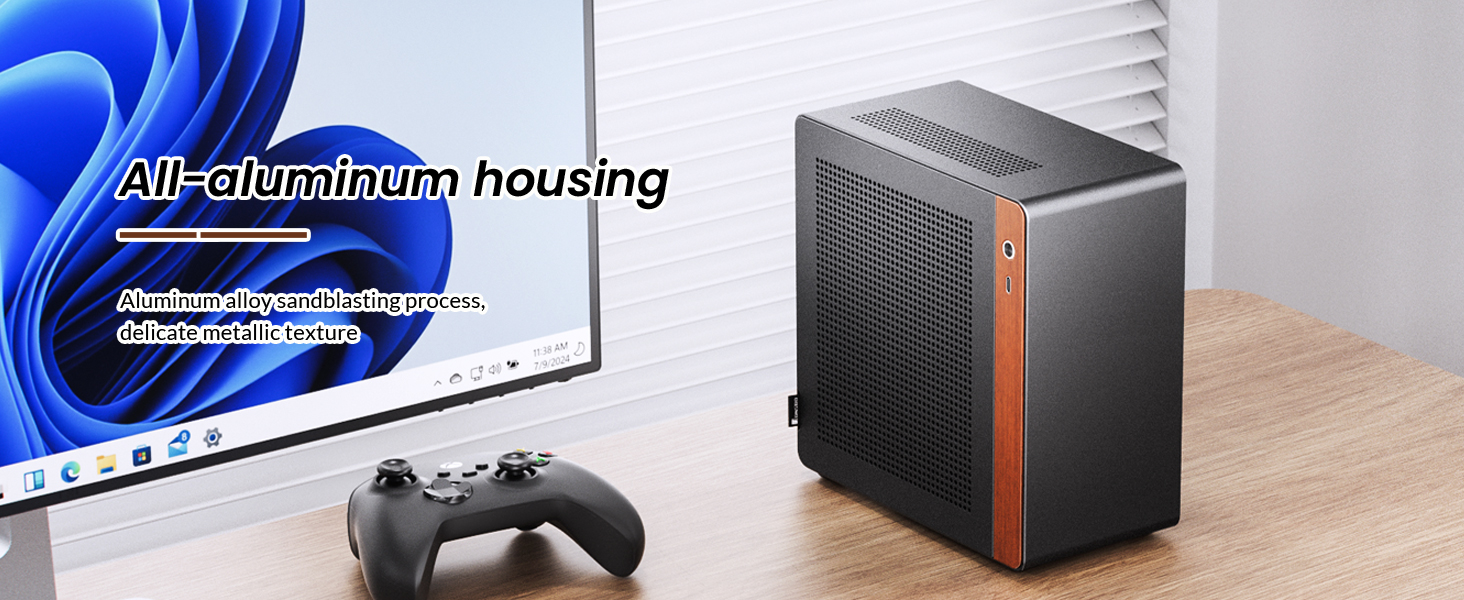
Immagine 4.1: Varie views of the JONSBO N10 case highlighting the perforated panels designed for optimal heat dissipation and airflow.
4.2 Fan Check
Ensure the two 40mm fans are free from dust and spinning correctly to maintain adequate cooling for your hard drives.
5. Risoluzione Dei Problemi
Questa sezione affronta i problemi più comuni che potresti riscontrare con il case del tuo PC.
5.1 Il PC non si accende
- Cavo di alimentazione: Assicurarsi che il cavo di alimentazione sia collegato saldamente sia all'alimentatore sia alla presa a muro.
- Interruttore di alimentazione: Verify that the power switch on the power supply unit is in the "ON" position.
- Connettori del pannello frontale: Check that the power button and other front panel connectors are correctly attached to the motherboard.
- Collegamenti interni: Confirm all internal power cables (24-pin ATX, CPU power, etc.) are firmly seated.
5.2 Problemi di surriscaldamento
- Flusso d'aria: Ensure the case's ventilation holes are not obstructed.
- Tifosi: Verify that all case fans and CPU cooler fans are spinning correctly. Clean any dust buildup.
- Compatibilità dei componenti: Ensure your CPU cooler height is within the 38mm limit to allow for proper airflow.
6. Specifiche
| Caratteristica | Specificazione |
|---|---|
| Dimensioni del prodotto | 205 mm (L) x 205 mm (P) x 108 mm (A) |
| Materiale | 3.3mm Aluminum Alloy + 1.0mm Steel Plate |
| Hard Drive Bay | 4 SSD da 2.5" |
| Compatibilità della scheda madre | Mini-ITX |
| Porta I/O anteriore | USB 3.2 Gen 2 Tipo-C x 1 |
| Supporto PSU | 1U FLEX power supply (max length 150mm) |
| Radiator Support (Air Cooler) | ≤ 38mm height |
| I fan | 2 x 40mm (5000 rpm ± 10%) (standard) |
| Chassis Weight (N.W.) | 1.6 KG |

Image 6.1: Diagram illustrating the dimensions of the JONSBO N10 Mini ITX PC Case.
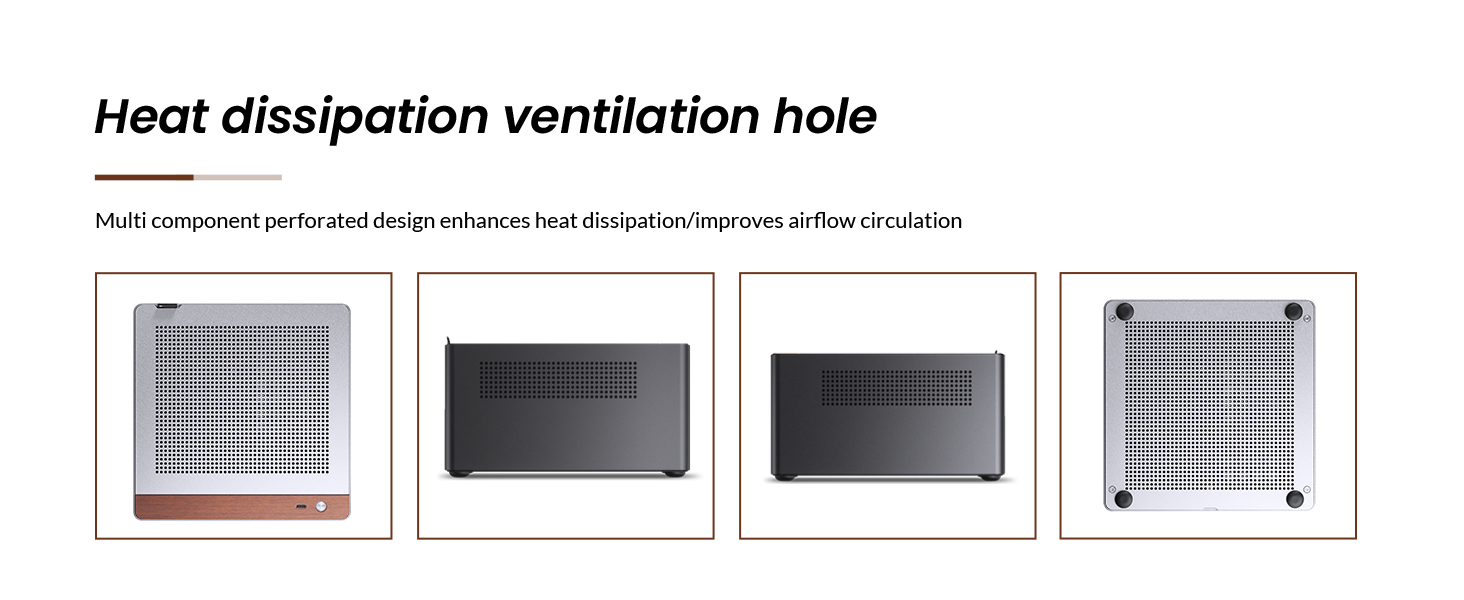
Image 6.2: Detailed product information table for the JONSBO N10 case, including dimensions, materials, and component support.
7. Garanzia e supporto
For warranty information, technical support, or service inquiries, please contact JONSBO customer service or visit the official JONSBO websito. Conservare la ricevuta d'acquisto come prova d'acquisto per eventuali reclami in garanzia.
JONSBO Ufficiale Websito: www.jonsbo.com


