1. Prodotto finitoview
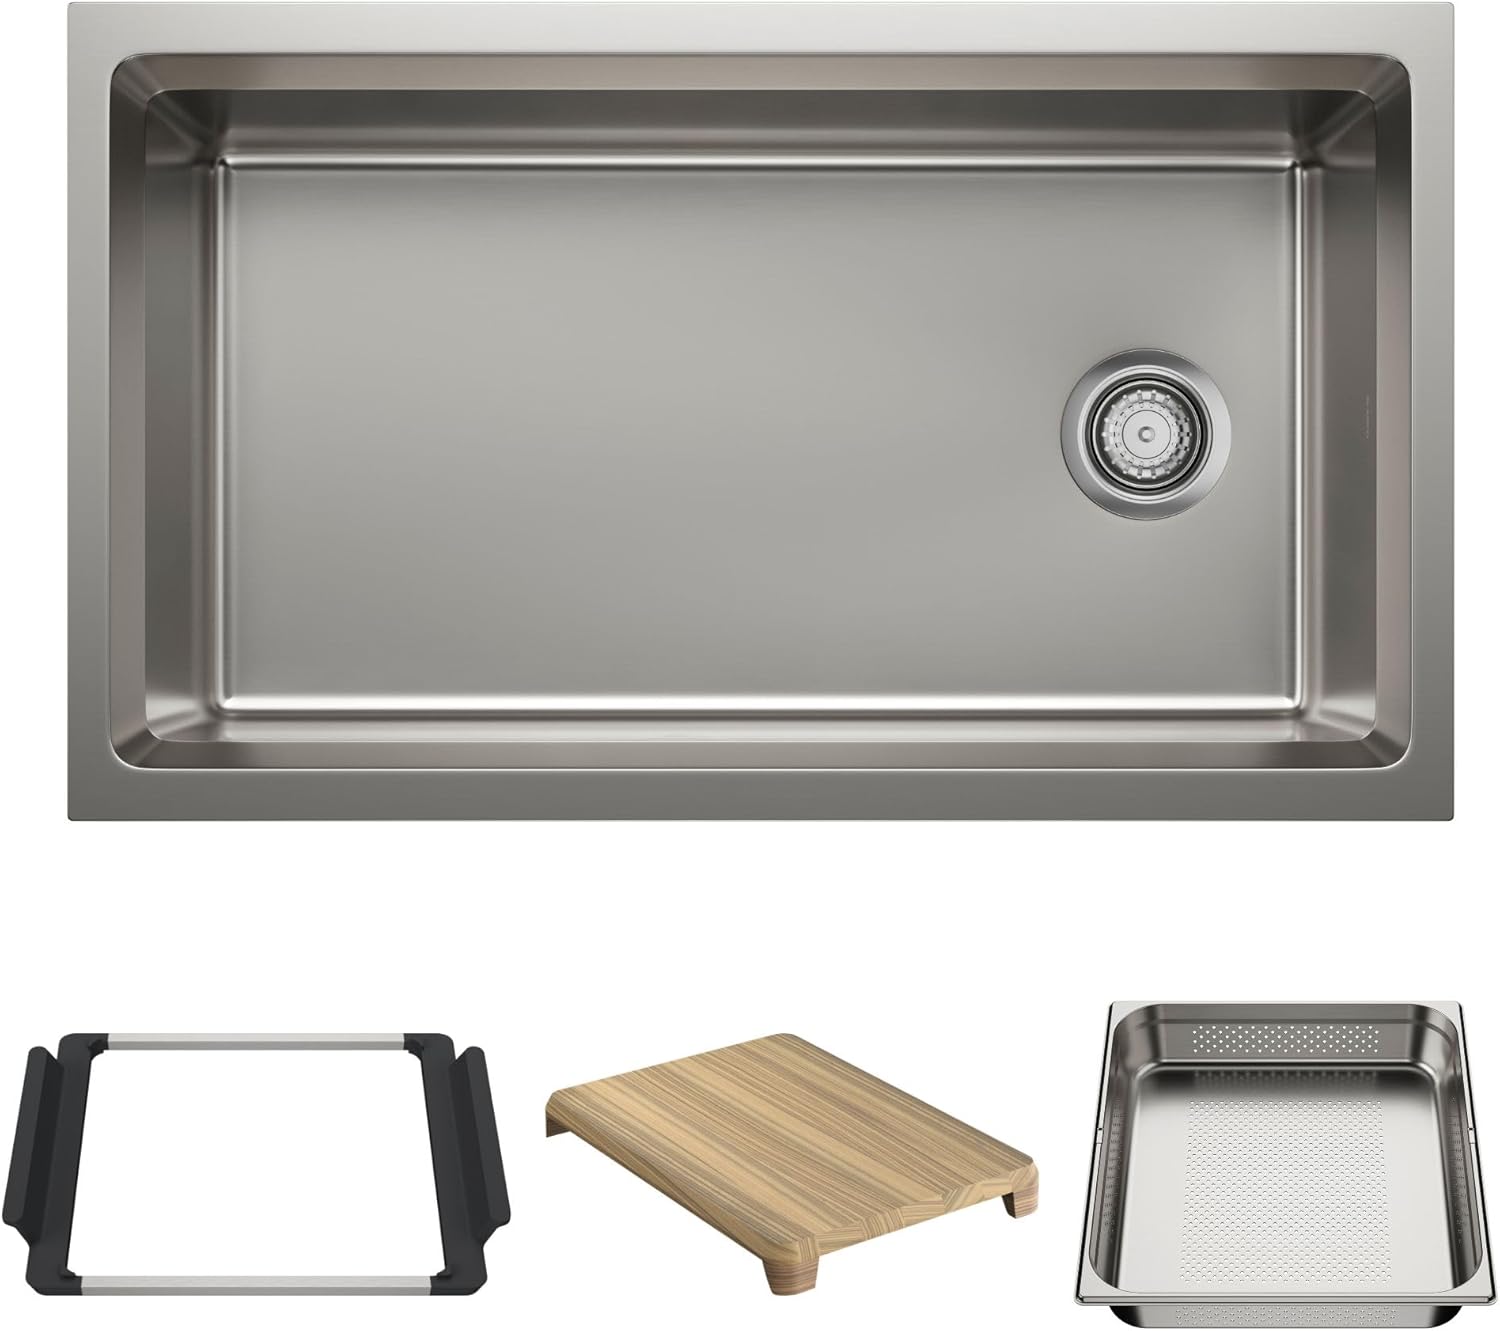
The BLANCO Inteos 33" Single Bowl Reversible Undermount Stainless Steel Workstation Kitchen Sink is designed to streamline kitchen tasks and enhance organization. This workstation sink integrates adaptable accessories to facilitate various meal preparation activities and efficient clean-up.
Caratteristiche principali:
- Included INTEOS workstation sink accessories: Wood Cutting Board, Large Colander and Accessory Holder.
- Optional INTEOS workstation sink accessories: INTEOS 33 Grid (443345), Dish Rack (443342), Small Colander (443340), Large Tray (443339) and Small Tray (443338).
- Accessories can be stored under the sink using the INTEOS Storage Organizer Bag XL (527670).
- Constructed from durable 304 series, 18/10 chrome-nickel content stainless steel, ensuring corrosion resistance.
- Features a generous 9-inch bowl depth and fits into a 36-inch minimum cabinet size.
2. Guida all'installazione
This section outlines the steps for properly installing your BLANCO Inteos workstation sink. Ensure all required tools and supplies are available before beginning the installation process.
2.1. Preparazione
- Ispezionare il lavandino: Carefully inspect the sink upon arrival. Verify the model number (443300) and size (33") match your order. Check for any visible damage.
- Verifica gli accessori: Confirm all included accessories (Wood Cutting Board, Large Colander, Accessory Holder) are present.
- Countertop Cutouts: Measure your countertop cutout to confirm dimensions. Refer to the provided template or specifications for exact cutout sizes based on the sink model. Accurate cutouts are crucial for proper accessory function.

2.2. Frame and Support Build
The Inteos series requires additional cabinet reinforcement. An inner support frame must be fully installed before the sink and countertop. This frame consists of two side supports attached to the cabinet, and a square or rectangular frame that holds the sink and sits on top of the side supports.
- Measure Cabinet: Measure the inside width and depth of the cabinet where the sink will be installed.
- Build Frame: Construct the support frame using hardwood. The sink frame should be 1/8" (3mm) less than the measured inner cabinet length to allow for proper fit.
- Linee guida per i voti: Measure from the top of the cabinet gable down and mark a guideline with a pencil, ensuring a straight line from front to back. The height of this line depends on the sink material: 0.08" (2mm) for Stainless Steel and 1/2" (12.8mm) for Silgranit. The frame for a stainless steel sink will sit higher than a Silgranit sink due to material thickness differences.
- Installare i supporti orizzontali: Install horizontal pieces of wood along the marked guidelines using silicone and cabinet screws. These pieces need to provide an adequate ledge to support the sink frame. Recommended wood thickness is 3/4" to 3.5". Repeat for both sides.
- Installare i supporti verticali: Measure the distance from the horizontal side support to the bottom of the cabinet. Cut four vertical pieces of wood to this length and pre-drill pilot holes. Install these vertical side supports using silicone and cabinet screws. Repeat for both sides.
- Telaio sicuro: Position the assembled support frame along the marked guidelines and clamp it in place. Ensure the frame is level and secure.
2.3. Sink and Countertop Installation
- Posizione lavandino: Carefully place the sink into the support frame. Ensure the sink is centered left-to-right within the cabinet.
- Check Gap: Verify a 1-inch gap from the edge of the sink rim to the outside of the cabinet. Do not include the cabinet door in this measurement.
- Mark Sink Reveal: Mark the sink reveal along the sides, front, and back. Mark a 1/8" (3.18mm) reveal along the sides for a snug fit of the cutting board. Mark a 1/2" (12.7mm) reveal along the front and back to provide a sufficient ledge for accessories to function properly.
- Apply Painter's Tape: Carefully place painter's tape along the marked guidelines on the sink rim. Trim the tape in all four corners to match the corner radius.
- Tape Countertop Cutout: Tape the inside cut of the countertop along the bottom edge. Ensure the tape does not extend underneath the countertop.
- Applicare il silicone: Apply a heavy bead of silicone to the untaped part of the sink rim.
- Posizionare il piano di lavoro: Carefully place the countertop onto the sink, aligning the cutout with the marked sink reveal. Once the countertop position is set, wipe away any excess silicone.
2.4. Clean-up and Accessory Test
- Rimuovere il nastro: After at least one hour, carefully remove the painter's tape from the sink and wipe away any leftover silicone.
- Accessori di prova: Test that the cutting board and accessory holder sit securely in the sink and can move freely along the upper sink ledge.
- Final Wipe Down: After 24 hours, give the sink a final wipe down. You can then proceed with installing faucets and other fixtures.
3. Operating the Workstation Features
The Inteos workstation sink is designed for versatile use with its integrated accessories. These accessories slide along the angled edge of the sink, allowing for dynamic food preparation and clean-up.
Utilizzo degli accessori:
- Wood Cutting Board: Use for chopping and food preparation directly over the sink, allowing waste to fall into the bowl.
- Colino grande: Ideal for rinsing fruits, vegetables, or draining pasta. It fits securely within the sink's ledge.
- Accessory Holder: Provides a convenient space for sponges, brushes, or other small kitchen tools.
- Accessori opzionali: Enhance functionality with additional items like the dish rack, small colanders, and oven-safe trays for serving or food prep.


4. Cura e manutenzione
Proper care ensures the longevity and appearance of your BLANCO Inteos stainless steel sink.
- Pulizia giornaliera: Wipe the sink with warm water and a mild dish soap.
- Essiccazione: Dry thoroughly after each use to prevent water spots and mineral buildup.
- Evitare prodotti chimici aggressivi: Do not use abrasive cleaners, steel wool, or harsh chemical solutions, as these can damage the stainless steel finish.
- Cura degli accessori: Clean wooden accessories with mild soap and water, and allow them to air dry. Stainless steel accessories can be washed with dish soap and dried.
5. Specifiche del prodotto
| Attributo | Valore |
|---|---|
| Marca | BIANCO |
| Numero di modello | 443300 |
| Colore | Acciaio inossidabile |
| Materiale | Acciaio inossidabile |
| Misurare | 33" |
| Dimensioni del prodotto (P x L x A) | 19.5"P x 33"L x 9"A |
| Stile | Contemporaneo |
| Tipo di installazione | sottotop |
| Tipo di finitura | Lucido |
| Forma | Rettangolare |
| Tipo di scarico | Sollevare e girare |
| Peso dell'articolo | 32.8 libbre |
| Conteggio dei fori | 3 |
| Componenti inclusi | Accessory Holder, Large Colander, Wood Cutting Board |
6. Informazioni sulla garanzia
For detailed warranty information regarding your BLANCO Inteos sink, please refer to the official BLANCO website or contact BLANCO customer support. Keep your proof of purchase for warranty claims.
7. Assistenza clienti
If you encounter any issues or have questions regarding your BLANCO Inteos workstation sink, please visit the official BLANCO website for FAQs, troubleshooting guides, and contact information for customer service.


