1. Introduzione
1.1 Prodotto finitoview
The Truman TM-I VISION PRO is a Full HD digital satellite receiver designed to provide a comprehensive entertainment experience. It features a powerful Sunplus 1506HV processor, ensuring smooth performance and high-quality video output. With multiple connectivity options including USB, HDMI, and Ethernet, it offers versatility for various home entertainment setups. The device supports Full HD resolution, multi-language interfaces, and includes parental control features for a family-friendly viewing environment. It also comes with a one-year activated IPTV service.

Figura 1.1: Fronte view of the Truman TM-I VISION PRO Satellite Receiver, showing its compact design and front-facing USB ports.
1.2 Contenuto della confezione
Si prega di verificare che tutti gli articoli elencati di seguito siano inclusi nel pacchetto:
- Truman TM-I VISION PRO Satellite Receiver
- Adattatore di alimentazione
- Controllo remoto standard
- Digital LED Lens
- Cavo HDMI
- Manuale di istruzioni

Figure 1.2: Marketing image highlighting key features such as Wi-Fi, Ultra HD support, ISO 9001 certification, and 5G compatibility.
2. Informazioni sulla sicurezza
Per garantire un funzionamento sicuro ed evitare danni, leggere e rispettare le seguenti linee guida di sicurezza:
- Non esporre il dispositivo all'acqua o all'umidità.
- Avoid placing the receiver in direct sunlight or near heat sources.
- Garantire un'adeguata ventilazione attorno al dispositivo per evitare il surriscaldamento.
- Utilizzare esclusivamente l'adattatore di alimentazione fornito.
- Non tentare di aprire o riparare il dispositivo autonomamente. Rivolgersi a personale qualificato.
- Tenere il dispositivo e gli accessori fuori dalla portata dei bambini.
- Scollegare la spina di alimentazione durante i temporali o quando non si utilizza l'apparecchio per lunghi periodi.
3. Impostazione
3.1 Collegamento del ricevitore
- Collegare l'antenna satellitare: Connect your satellite dish cable to the "LNB IN" port on the back of the receiver.
- Collegamento alla TV (HDMI): Use the provided HDMI cable to connect the receiver's HDMI OUT port to an available HDMI IN port on your television.

Figure 3.1: The included HDMI cable for connecting the receiver to your television.
- Connetti alimentazione: Connect the power adapter to the DC IN port on the receiver, then plug the adapter into a wall outlet.
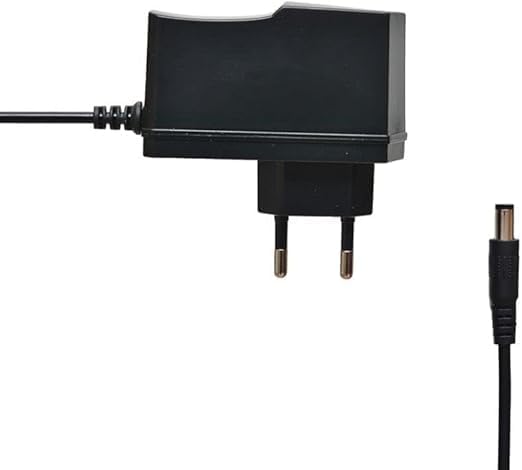
Figure 3.2: The power adapter supplied with the receiver.
- Connect Digital LED Lens: Plug the digital LED lens into its dedicated port on the receiver. This lens displays channel numbers and receives remote control signals.
- Optional: Connect Ethernet/USB: If you plan to use wired internet or external storage, connect an Ethernet cable to the LAN port or a USB drive to one of the USB ports.

Figura 3.3: Posteriore view of the receiver showing the LNB IN, HDMI OUT, USB, Ethernet, and DC IN ports.
3.2 Procedura guidata di configurazione iniziale
Alla prima accensione, il ricevitore ti guiderà attraverso una procedura guidata di configurazione iniziale:
- Selezione della lingua: Scegli la lingua preferita per la visualizzazione sullo schermo.
- Impostazione del fuso orario: Imposta il fuso orario corretto per la tua regione.
- Configurazione dell'antenna: Select your satellite (e.g., Nilesat, Hotbird) and configure LNB settings if necessary.
- Scansione canali: Perform an automatic or manual channel scan to find available TV and radio channels.
- Configurazione di rete (facoltativa): Configure Wi-Fi or Ethernet connection for internet-based features like IPTV.
4. Istruzioni per l'uso
4.1 Funzioni di base
- Accensione/spegnimento: Premere il tasto ENERGIA pulsante sul telecomando.
- Navigazione nel canale: Utilizzare il CH+/CH- pulsanti per cambiare canale in sequenza oppure immettere direttamente il numero del canale utilizzando il tastierino numerico.
- Controllo del volume: Utilizzare il VOL+/VOL- Pulsanti per regolare il volume.
- Disattiva audio: Premere il tasto MUTE pulsante per disattivare l'audio.
- Accesso al menu: Premere il tasto MENU pulsante per accedere al menu principale per impostazioni e funzionalità.
- Pulsante OK: Confirms selections in menus or displays channel information during viewing.
- Uscita: Premere il tasto EXIT button to return to the previous screen or live TV.
4.2 Funzionalità avanzate
- Controllo genitori: Access the Parental Control menu to set age restrictions for channels or lock specific programs. A default PIN (usually 0000 or 1234) may be required.
- Supporto multilingua: Change audio languages (if available) or subtitle languages via the audio/subtitle options in the menu.
- Italiano: The receiver includes a pre-activated IPTV service for one year. Access this feature through the main menu. Ensure your receiver is connected to the internet for IPTV functionality.
- Riproduzione multimediale USB: Inserire un'unità USB in una delle porte USB per riprodurre contenuti multimediali files (videos, music, photos) or record TV programs.
- Aggiornamento software: Regularly check for software updates via USB or network to ensure optimal performance and access to new features. (Refer to Section 5.2 for details).
5. Manutenzione
5.1 Pulizia
To clean the receiver, disconnect it from the power supply. Use a soft, dry cloth to wipe the exterior. Do not use liquid cleaners or abrasive materials.
5.2 Aggiornamenti software
Keeping your receiver's software updated is crucial for performance and security. Updates can be performed via USB or over the network (if connected to the internet).
- Aggiornamento USB: Scarica l'ultimo firmware (.bin file) from the official Truman website to a USB flash drive. Insert the USB drive into the receiver and navigate to the "System Update" or "Software Upgrade" option in the menu. Follow the on-screen instructions.
- Aggiornamento della rete: If your receiver is connected to the internet, navigate to the "Network Upgrade" or "Online Update" option in the system settings. The receiver will check for available updates and prompt you to install them.
Attenzione: Do not power off the receiver during a software update, as this may cause permanent damage.
6. Risoluzione Dei Problemi
If you encounter issues with your Truman TM-I VISION PRO, refer to the following common problems and solutions:
| Problema | Possibile causa | Soluzione |
|---|---|---|
| Nessun potere | Adattatore di alimentazione non collegato; presa di corrente difettosa. | Ensure power adapter is securely connected to the receiver and a working power outlet. |
| Nessun segnale / Schermo nero | Antenna cable loose; Incorrect satellite selected; TV input not set to HDMI. | Check antenna cable connection. Verify satellite settings in menu. Ensure TV input is set to the correct HDMI port. |
| Il telecomando non funziona | Batteries low/dead; Obstruction between remote and receiver's LED lens. | Replace remote control batteries. Ensure clear line of sight to the digital LED lens. |
| Frozen Picture / Lagging | Weak signal; Overheating; Software issue. | Check signal strength in menu. Ensure proper ventilation. Try a software update or factory reset (last resort). |
| IPTV Not Working | No internet connection; IPTV service expired. | Verify internet connection (Ethernet or Wi-Fi). Contact support if service is within the one-year period and still not working. |
7. Specifiche
| Caratteristica | Dettaglio |
|---|---|
| Modello | TM-I VISION PRO |
| Processore | Sunplus 1506HV |
| Tipo di scatola | Full HD Digital |
| Memoria Flash | 4 MB (SPI SOP8/SOIC8) |
| Uscita video | HDMI (Full HD Resolution Support) |
| Modalità di uscita audio | Stereo (Dolby Digital, DTS, PCM supported) |
| Connettività | USB, HDMI, Ethernet |
| Dispositivi compatibili | Televisione, Personal Computer |
| Caratteristiche speciali | User-friendly display, Remote Control, Multi-language support, Parental Control, 1-year IPTV activation. |
| Peso dell'articolo | 10 grammi |
| Produttore | Truman |
8. Garanzia e supporto
For warranty information, please refer to the warranty card included with your product or contact your point of purchase. The receiver includes a 1-year activated IPTV service.
For technical support or further assistance, please contact Truman customer service or visit their official website. Contact details are typically provided in the product packaging or on the manufacturer's websito.


