1. Introduzione
This manual provides essential information for the safe and efficient operation, installation, and maintenance of your Panda Compact Dryer, model PAN760SF-001. Please read all instructions carefully before using the appliance and retain this manual for future reference.

Figura 1: Fronte view of the Panda Compact Dryer.
2. Informazioni sulla sicurezza
Quando si utilizzano apparecchi elettrici, seguire sempre le precauzioni di sicurezza di base per ridurre il rischio di incendi, scosse elettriche o lesioni personali.
- Leggere tutte le istruzioni prima di utilizzare l'asciugatrice.
- Non asciugare articoli che sono stati precedentemente puliti, lavati, immersi o macchiati con benzina, solventi per lavaggio a secco o altre sostanze infiammabili o esplosive.
- Non permettere ai bambini di giocare con o dentro l'apparecchio. È necessaria un'attenta supervisione dei bambini quando l'apparecchio viene utilizzato in presenza di bambini.
- Non mettere le mani nell'elettrodomestico se il cestello è in movimento.
- Non installare o conservare questo apparecchio in un luogo esposto alle intemperie.
- Non tampcon i controlli.
- Pulire il filtro anti-pelucchi prima o dopo ogni carico.
- The dryer automatically shuts off when the door is open for safety.
3. Configurazione e installazione
3.1 Disimballaggio
Carefully remove the dryer from its packaging. Check for any shipping damage and ensure all accessories are present. Included components are the plastic venting hose and mounting kits.
3.2 Opzioni di posizionamento
The Panda Compact Dryer offers versatile installation options:
- Autoportante: Posizionare su una superficie piana e stabile.
- Impilato: Can be stacked on top of a compatible washing machine (ensure stability).
- Montaggio a parete: Use the provided mounting kits to secure the dryer to a sturdy wall.

Figure 2: Dryer dimensions for placement planning.
3.3 Collegamento di alimentazione
Plug the dryer into any standard 120V outlet. Ensure the outlet meets the electrical requirements of the appliance (1500W).
3.4 Sfiato
The dryer is a vented model and must be connected to an exhaust system to expel moist air. Use the provided plastic venting hose. Ensure the vent is clear of obstructions.

Figura 3: Posteriore view showing the vent connection.
3.5 Knob Installation
If the control knobs are not pre-installed, gently push them onto their respective shafts on the control panel until they are secure.
Video 1: Demonstration of knob installation for Panda dryers. This video shows how to correctly attach the control knobs to the dryer's panel.
4. Istruzioni per l'uso
4.1 Caricamento dei vestiti
Open the see-through door (opens up to 105 degrees for easy loading). Load up to 13.2 pounds of laundry into the 3.51 cu.ft. stainless steel drum. Avoid overloading to ensure efficient drying and prevent excessive wrinkling.
4.2 Pannello di controllo Sopraview

Figura 4: dettagliata view del pannello di controllo.
4.3 Selecting a Drying Mode
Your dryer features customizable drying modes:
- Cold (0-20 minutes): For cooling down clothes and preventing creasing.
- Caldo (30-200 minuti): Ideal for bulky items or large loads requiring thorough drying.
- Asciugatura all'aria (0-80 minuti): Uses cool air to freshen clothes without heat.
- ECO: An energy-saving mode with a preset drying time.
- Sensore asciutto: Automatically adjusts drying temperature by detecting moisture levels in clothes and the drum.
Turn the timer knob to select the desired drying time or mode. For ECO and Sensor Dry, the dryer will manage the cycle automatically.
4.4 Starting the Dryer
After loading clothes and selecting the desired mode, close the door firmly. The dryer will begin operation. The dryer automatically shuts off when the door is opened during a cycle for safety.
5. Manutenzione
5.1 Pulizia del filtro anti-lanugine
The dryer is equipped with a three-layer filter set that traps lint and hair. For optimal performance and safety, clean the lint filter before or after each load.
- Apri lo sportello dell'asciugatrice.
- Individuare il gruppo filtro anti-pelucchi all'interno del cestello.
- Rimuovere il filtro tirandolo verso l'esterno.
- Separate the layers and remove accumulated lint.
- Reassemble the filter layers and place the filter back into the drum securely.
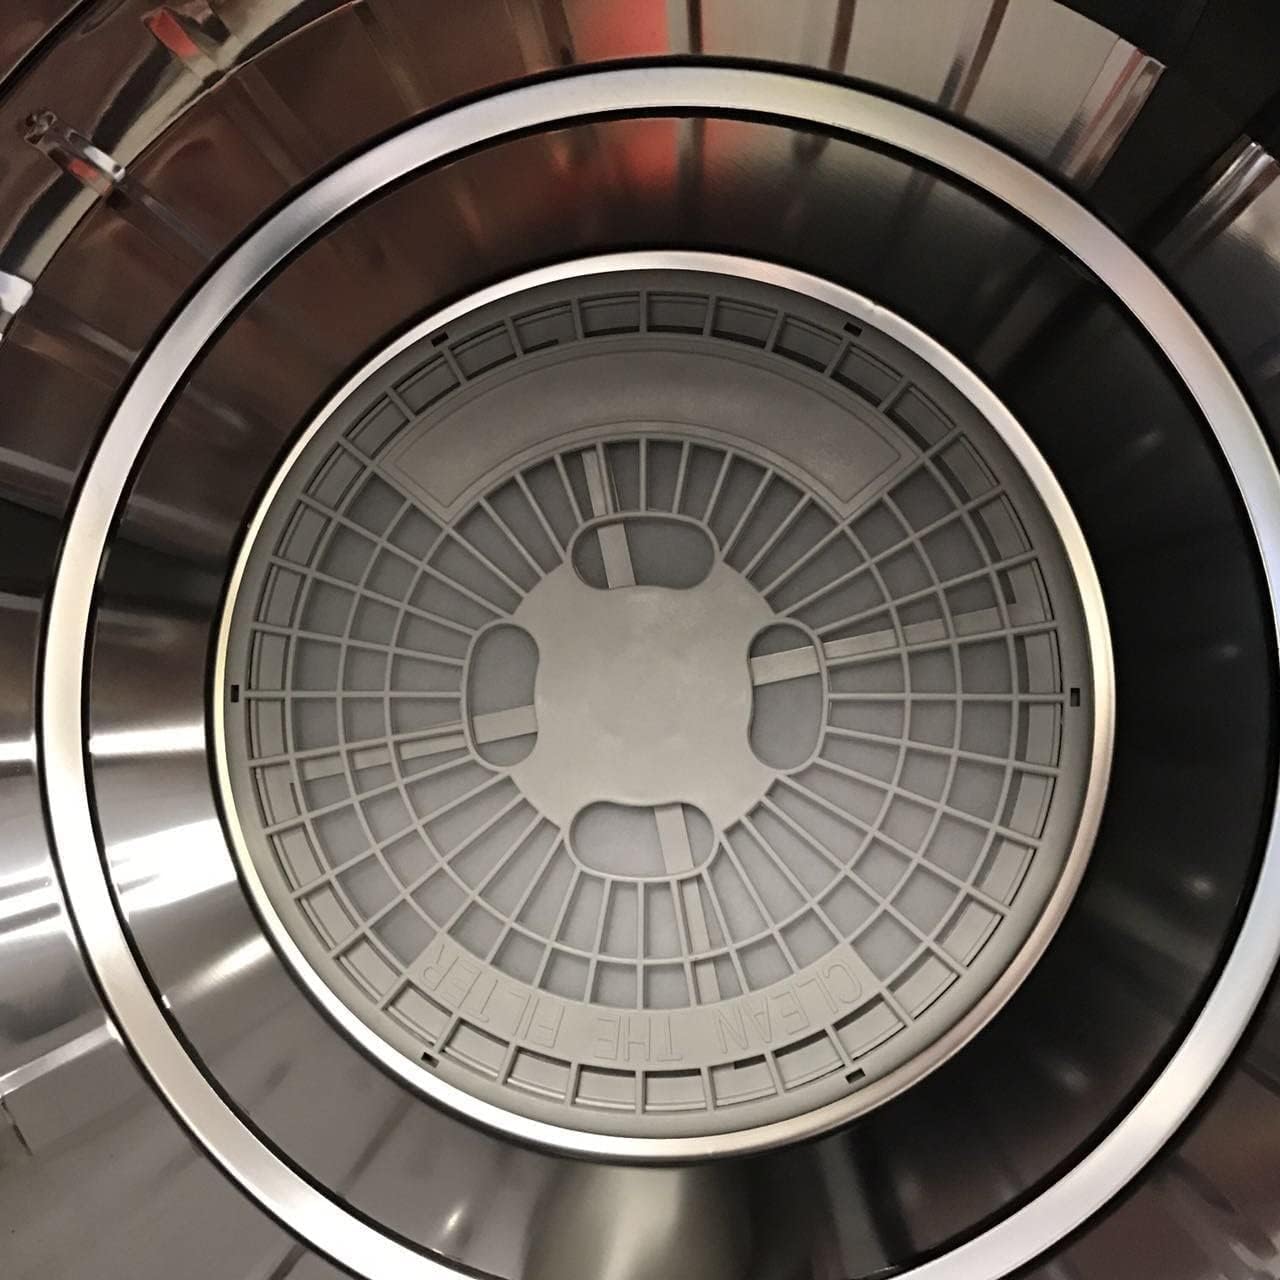
Figure 5: Lint filter located inside the drum.
Video 2: Demonstration of assembling filter parts. This video illustrates the process of putting together the dryer's filter components.
6. Risoluzione Dei Problemi
If you encounter issues with your Panda Compact Dryer, refer to the following common troubleshooting steps:
| Problema | Possibile causa | Soluzione |
|---|---|---|
| L'asciugatrice non si avvia | No power; Door not closed properly | Check power connection; Ensure door is fully latched. |
| I vestiti non si asciugano completamente | Overloaded; Lint filter clogged; Incorrect drying mode selected | Reduce load size; Clean lint filter; Select appropriate drying mode. |
| Rumore insolito durante il funzionamento | Loose items in drum; Dryer not level; Internal component issue | Remove foreign objects; Adjust leveling feet; Contact customer support if noise persists. |
| L'asciugatrice si ferma inaspettatamente | Overheat protection activated; Power interruption | Allow dryer to cool down; Check power supply. |
Se i problemi persistono dopo aver provato queste soluzioni, contattare l'assistenza clienti.
7. Specifiche
| Caratteristica | Specificazione |
|---|---|
| Marca | Panda |
| Numero di modello | PAN760SF-001 |
| Capacità | 3.52 Cubic Feet (13.2 lbs load volume) |
| Energia | 110V, 1500W |
| Dimensioni (L x P x A) | 23.5" x 21.5" x 27.25" |
| Peso dell'articolo | 48.5 libbre |
| Materiale del tamburo | Acciaio inossidabile |
| Modalità di asciugatura | Cold, Hot, Air Dry, ECO, Sensor Dry |
| Componenti inclusi | Plastic Venting Hose, mounting kits |
8. Garanzia e supporto
For warranty information, please refer to the documentation included with your purchase. If you require technical assistance, replacement parts, or have any questions not covered in this manual, please contact Panda customer support through their official channels or the retailer where the product was purchased.