1. Introduzione
This manual provides detailed instructions for the setup, operation, and maintenance of your ECOWITT WH5360H Rain Gauge. The system includes a WH40H Rain Collector Sensor and an Indoor Display Console, designed to accurately measure and display rainfall data, along with indoor temperature and humidity.
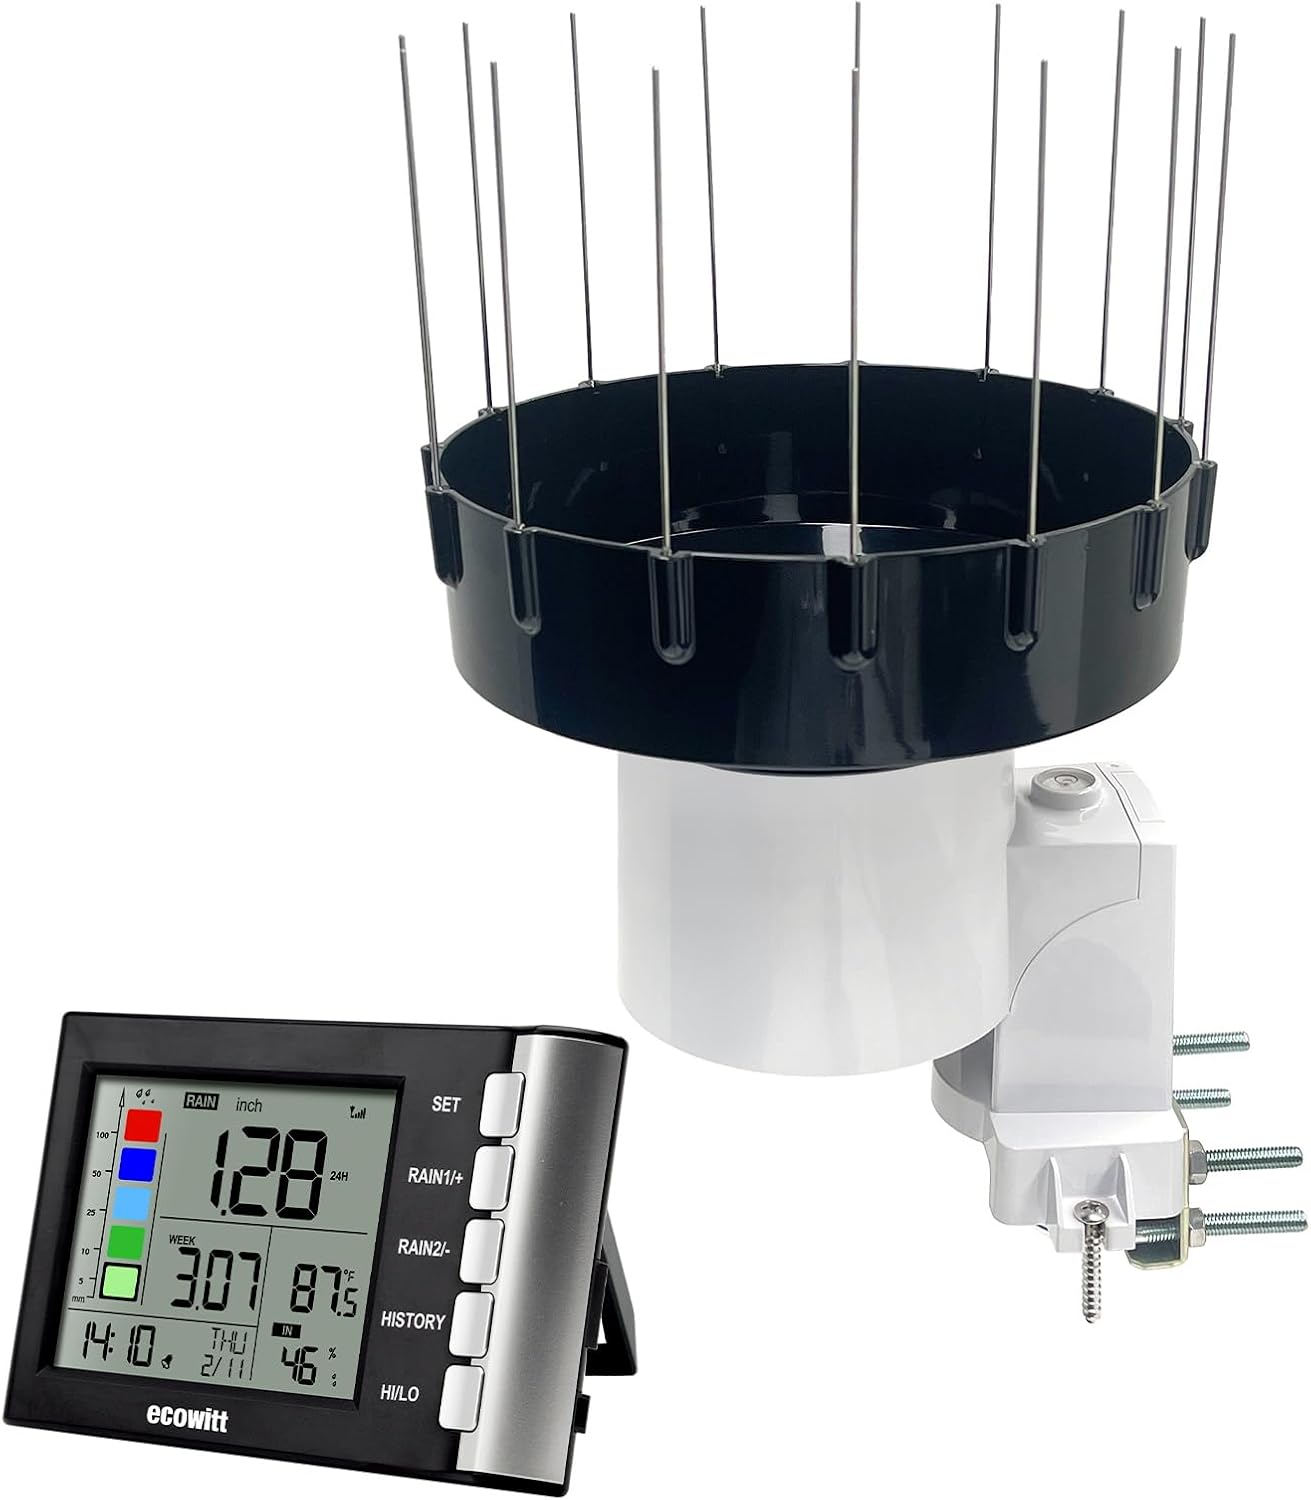
Figure 1: ECOWITT WH5360H Rain Gauge components: WH40H Rain Collector Sensor with bird spikes and the Indoor Display Console.
2. Contenuto della confezione
Verificare che tutti i componenti siano presenti e in buone condizioni:
- WH40H Rain Collector Sensor
- Indoor Display Console (WH5360BH)
- Bird Spikes (15 pieces)
- Mounting Accessories (U-bolts, screws)
- Manuale dell'utente (questo documento)
3. Prodotto finitoview
3.1 WH40H Rain Collector Sensor
The WH40H is a self-emptying rain collector sensor designed for outdoor use. It features a heightened rainfall collector funnel (5cm/1.96in) to improve rain data accuracy. The sensor transmits rainfall data wirelessly to the Indoor Display Console.
The sensor includes 15 bird spikes to deter birds from nesting in the funnel, ensuring unobstructed rain collection.
3.2 Indoor Display Console (WH5360BH)
The Indoor Display Console receives and displays rainfall data from the WH40H sensor. It also has a built-in sensor for indoor temperature and humidity. The console provides various rainfall data displays, including rain rate, rain event, and historical records (1h/24h, daily, weekly, monthly, yearly, 24 monthly history, 730 days with rainfall records). It features a rain grade graph and allows selection between mm/inch measuring units.
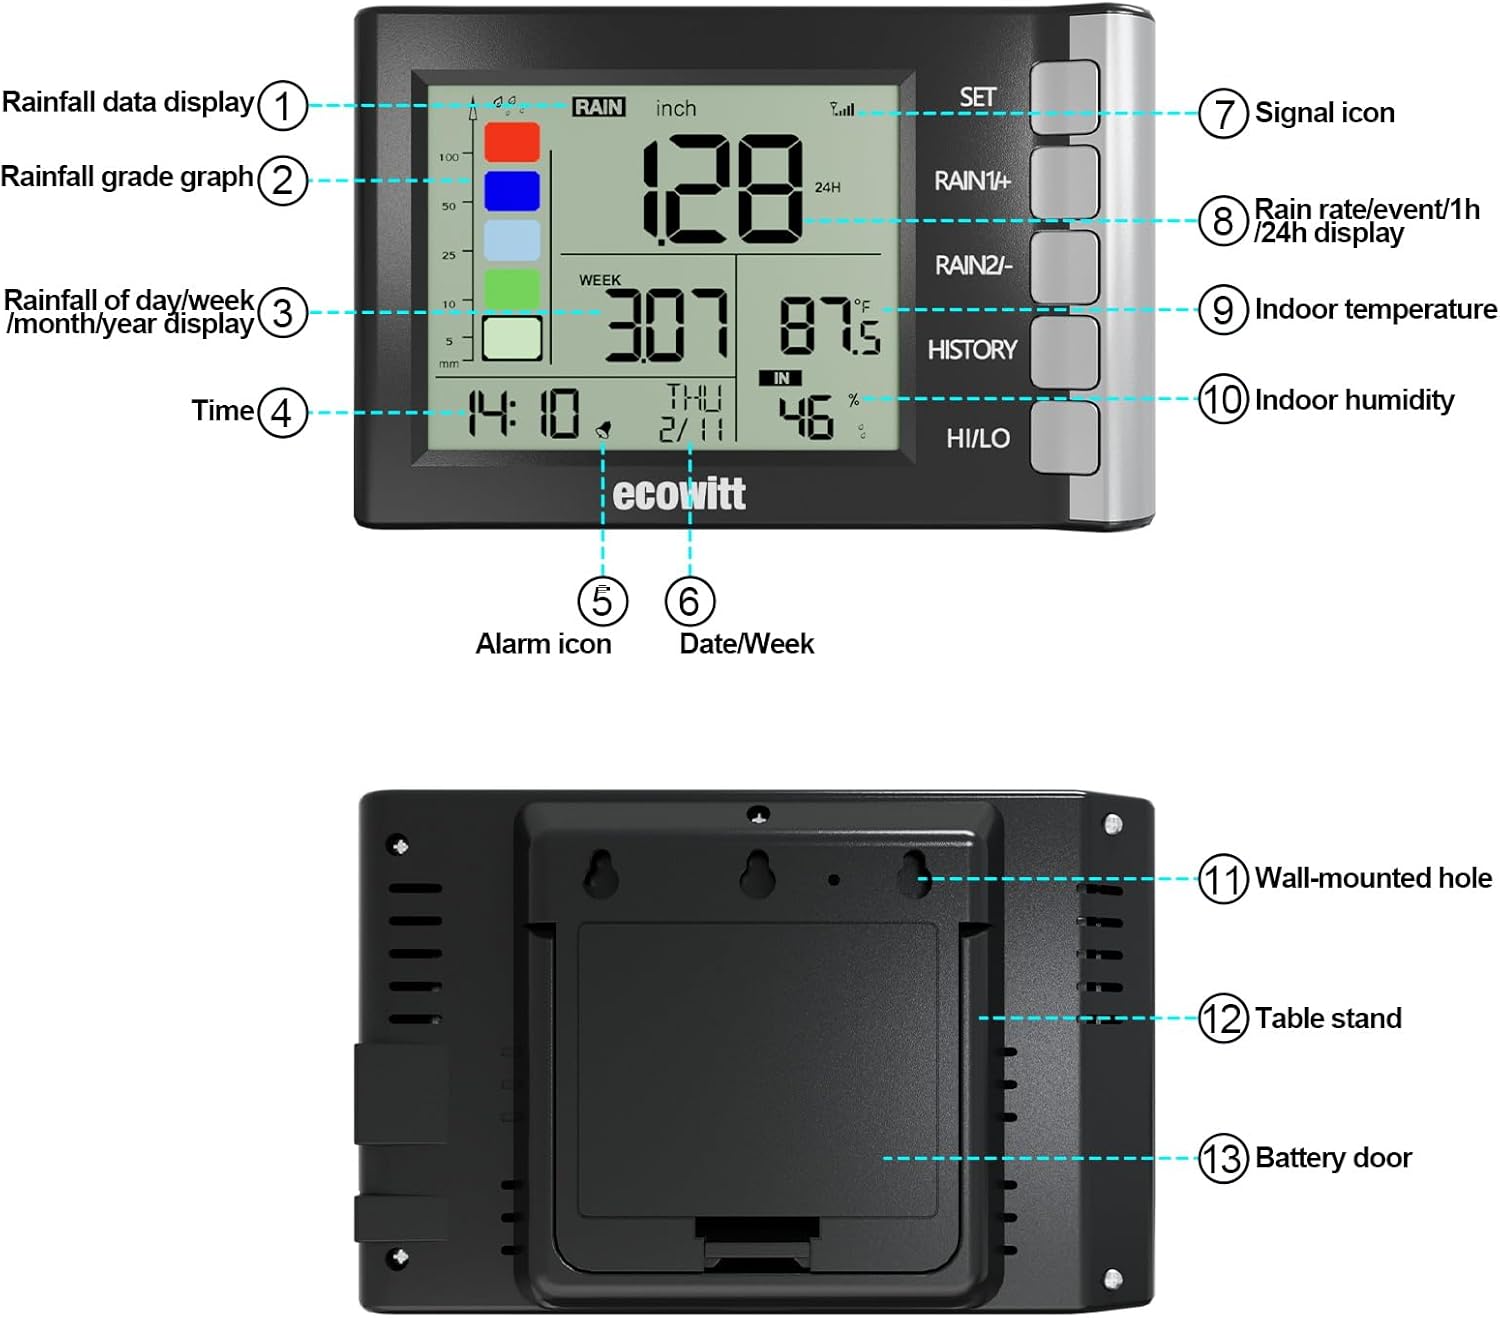
Figure 2: Indoor Display Console (Front and Rear View) with numbered components.
Componenti dello schermo:
- Rainfall data display
- Rain grade graph
- Rainfall of day/week/month/year display
- Tempo
- Icona di allarme
- Data/Settimana
- Icona del segnale
- Rain rate/event/1h/24h display
- Temperatura interna
- Umidità interna
- Foro a parete
- Supporto da tavolo
- Sportello della batteria
4. Configurazione e installazione
4.1 Rain Collector Sensor Installation
Proper placement and installation are crucial for accurate rainfall measurements.
- Posizione: Choose an open area where the sensor is not obstructed by trees, buildings, or other structures that could block rain or cause splash-back. Ensure it is on a level surface.
- Montaggio: The sensor offers two installation methods:
- Use the provided U-bolts to fix the sensor securely onto a pole.
- Use screws to mount the sensor on a leveled flat surface.
- Bird Spikes: Insert the 15 bird spikes into the designated holes on the funnel to prevent birds from interfering with rain collection.
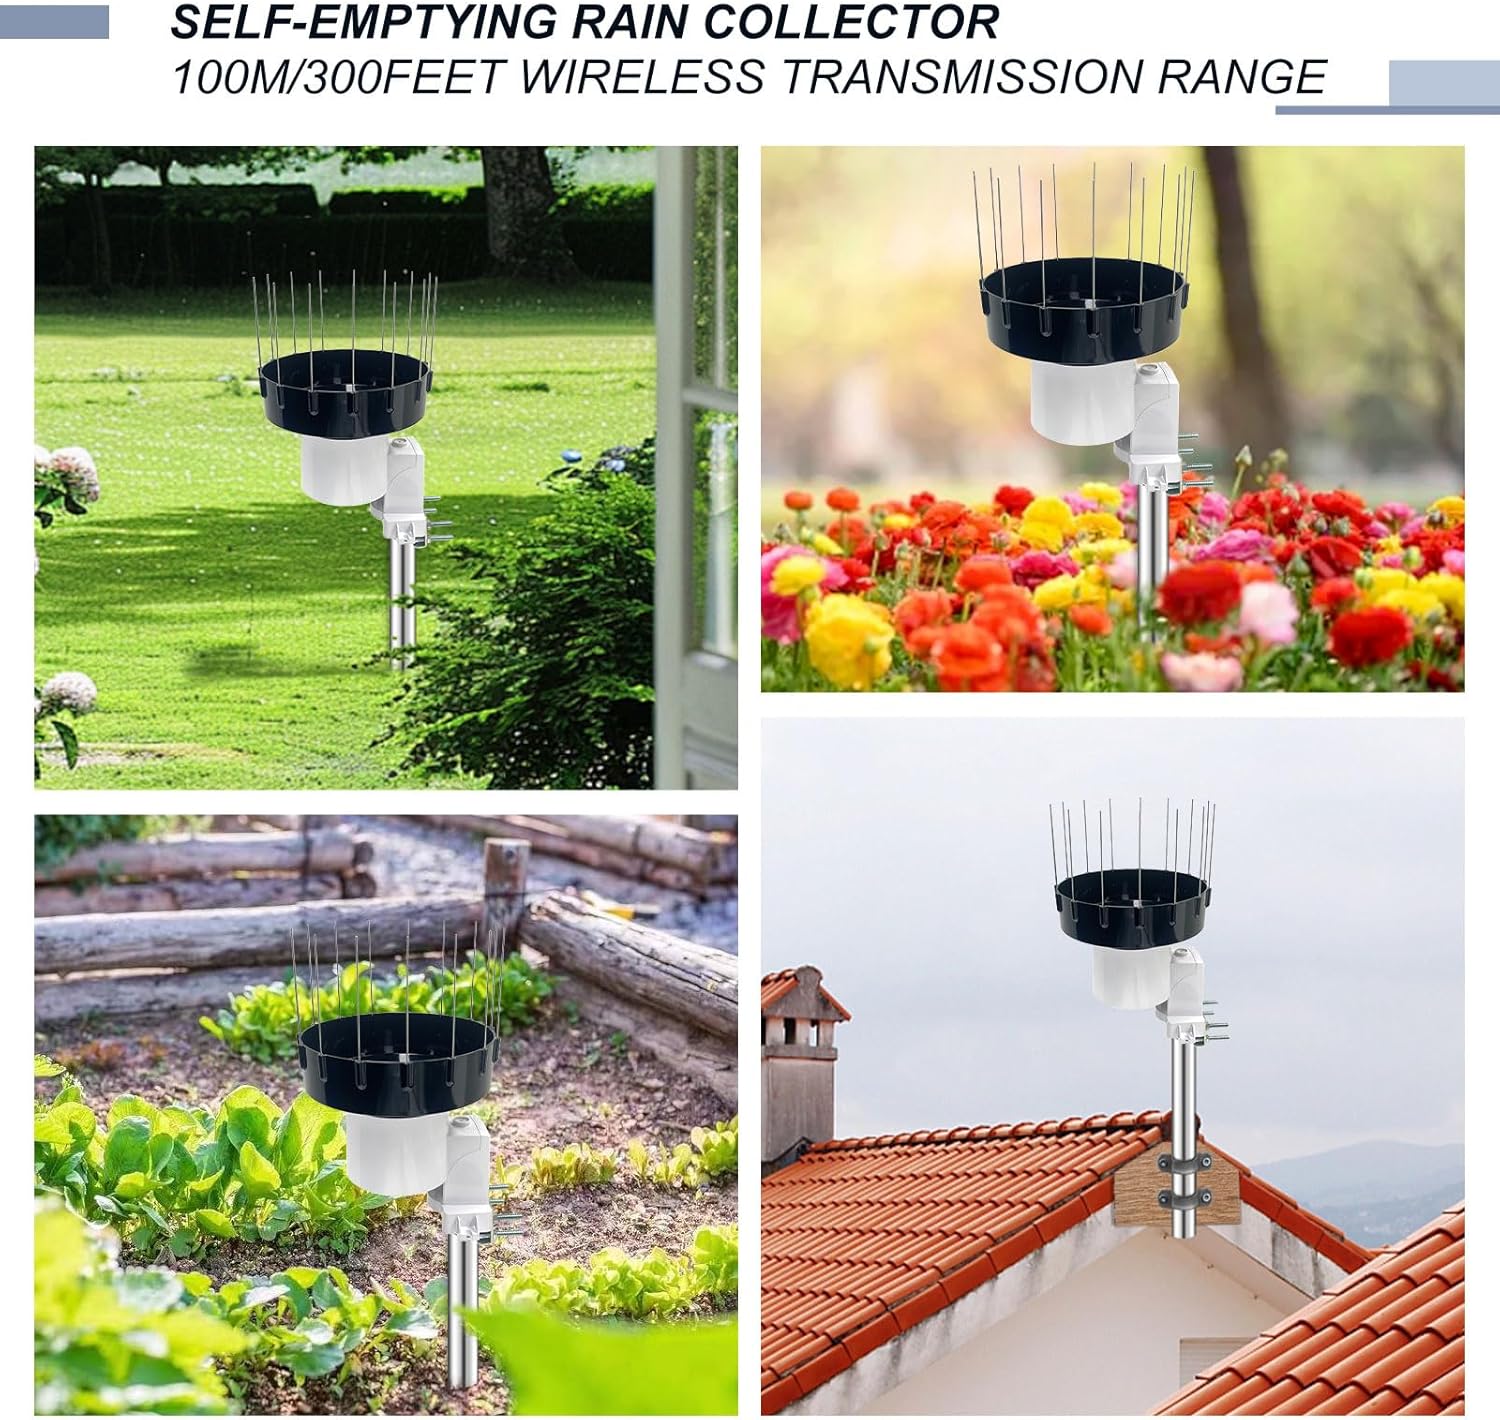
Figure 3: Rain Collector Sensor installation exampmeno.
4.2 Configurazione della console di visualizzazione interna
- Energia: Install batteries into the console's battery compartment (refer to Figure 2, item 13).
- Posizionamento: Place the console indoors within the wireless transmission range (up to 100m/328ft line of sight) of the rain collector sensor. Avoid placing it near large metal objects or electrical appliances that may cause interference.
- Abbinamento: The console should automatically connect with the rain collector sensor upon power-up. If connection is not established, refer to the troubleshooting section.
- Impostazioni iniziali: Set the current time, date, and preferred measurement units (mm/inch) using the console buttons. Refer to the 'Operation' section for button functions.

Figure 4: Wireless communication between sensor and display console.
5. Funzionamento
The Indoor Display Console provides comprehensive rainfall data and indoor environmental readings. Refer to Figure 2 for button and display component identification.
5.1 Funzioni di visualizzazione
- Dati sulle precipitazioni: Displays current rain rate, rain event, and total rainfall for various periods (1 hour, 24 hours, daily, weekly, monthly, yearly).
- Rain Grade Graph: Visual representation of rainfall intensity over time.
- Documenti storici: Access 24 monthly rain history and records for the 730 days with rainfall. Use the STORIA pulsante per navigare.
- Temperatura e umidità interna: Current indoor temperature and relative humidity are shown.
- Ora dell'appuntamento: Visualizza l'ora e la data correnti.
- Icona del segnale: Indicates the strength of the wireless connection between the console and the rain sensor.
5.2 Funzioni dei pulsanti
The console features several buttons for navigation and settings:
- IMPOSTATO: Enters setup mode or confirms settings.
- RAIN1/+: Used to cycle through different rainfall data displays (e.g., 1h, 24h, daily) or increase values during setting.
- RAIN2/-: Used to cycle through different rainfall data displays or decrease values during setting.
- STORIA: Accesses historical rainfall records.
- CIAO/BASSO: Displays high and low records for temperature and humidity.
6. Manutenzione
6.1 Cleaning the Rain Collector Sensor
Periodically inspect and clean the rain collector funnel to ensure accurate readings. Debris such as leaves, insects, or dirt can obstruct the tipping bucket mechanism.
- Carefully remove the top funnel section.
- Clean any debris from the funnel and the tipping bucket mechanism using a soft cloth and water. Avoid abrasive cleaners.
- Assicurarsi che la benna ribaltabile si muova liberamente.
- Reassemble the sensor, ensuring the bird spikes are properly reinserted.
6.2 Sostituzione della batteria
Replace batteries in both the sensor and console as needed. Low battery indicators will appear on the display.
- Rain Collector Sensor: Access the battery compartment, typically located at the base of the sensor. Replace with fresh batteries of the specified type (refer to sensor markings or original packaging).
- Consolle espositiva interna: Open the battery door on the rear of the console (Figure 2, item 13). Replace with fresh batteries of the specified type.
- After battery replacement, the devices may need to re-establish connection.
7. Risoluzione Dei Problemi
| Problema | Possibile causa | Soluzione |
|---|---|---|
| No rainfall data on display. |
|
|
| Letture imprecise delle precipitazioni. |
|
|
| Indoor temperature/humidity incorrect. |
|
|
8. Specifiche
| Caratteristica | Dettaglio |
|---|---|
| Numero di modello | WH5360H (Console: WH5360BH, Sensor: WH40H) |
| Dimensioni del prodotto (console) | Circa 14.22 cm x 9.44 cm (5.6 pollici x 3.6 pollici) |
| Dimensioni del prodotto (sensore) | Circa 18.9 cm x 19.4 cm (7.44 pollici x 7.64 pollici) |
| Peso dell'articolo | 2.31 libbre (pacchetto totale) |
| Frequenza senza fili | 915 MHz |
| wireless Range | Fino a 100 metri (328 piedi) di linea di vista |
| Rainfall Funnel Height | 5 cm (1.96 pollici) |
| Produttore | ECOWITT |

Figura 5: Dimensioni del prodotto.
9. Garanzia e supporto
I prodotti ECOWITT sono progettati per garantire affidabilità e prestazioni. Per informazioni specifiche sulla garanzia, consultare la scheda di garanzia inclusa con il prodotto o visitare il sito web ufficiale ECOWITT. website. For technical support, product inquiries, or assistance with troubleshooting, please contact ECOWITT customer service through their official channels.
Spesso puoi trovare risorse di supporto, FAQ e informazioni di contatto sul sito web del produttore websito: www.ecowitt.com


