1. Informazioni importanti sulla sicurezza
Leggere attentamente tutte le istruzioni prima di utilizzare il deumidificatore. Conservare il manuale per riferimento futuro.
Sicurezza elettrica
- Assicurarsi che l'alimentazione corrisponda al voltage i requisiti specificati sull'etichetta di classificazione dell'unità.
- Collegare sempre l'unità a una presa elettrica dotata di messa a terra. Non utilizzare prolunghe o adattatori.
- Do not operate the dehumidifier with a damaged power cord or plug. If damaged, contact qualified service personnel.
- Non toccare mai la spina di alimentazione con le mani bagnate.
Sicurezza operativa generale
- Questo apparecchio è solo per uso interno. Non utilizzare all'aperto.
- Maintain a minimum clearance of 12 inches (30 cm) around the unit for proper airflow.
- Non inserire oggetti nell'ingresso o nell'uscita dell'aria.
- Keep the unit away from heat sources, flammable materials, and direct sunlight.
- Spegnere sempre l'unità e scollegarla dalla presa di corrente prima di pulirla o di eseguire qualsiasi operazione di manutenzione.
- Do not allow children to play with or around the dehumidifier.
2. Prodotto finitoview
The Waykar 125 Pint Crawl Space Dehumidifier is designed for efficient moisture removal in large areas up to 6,500 square feet, featuring a robust metal construction and advanced humidity control.
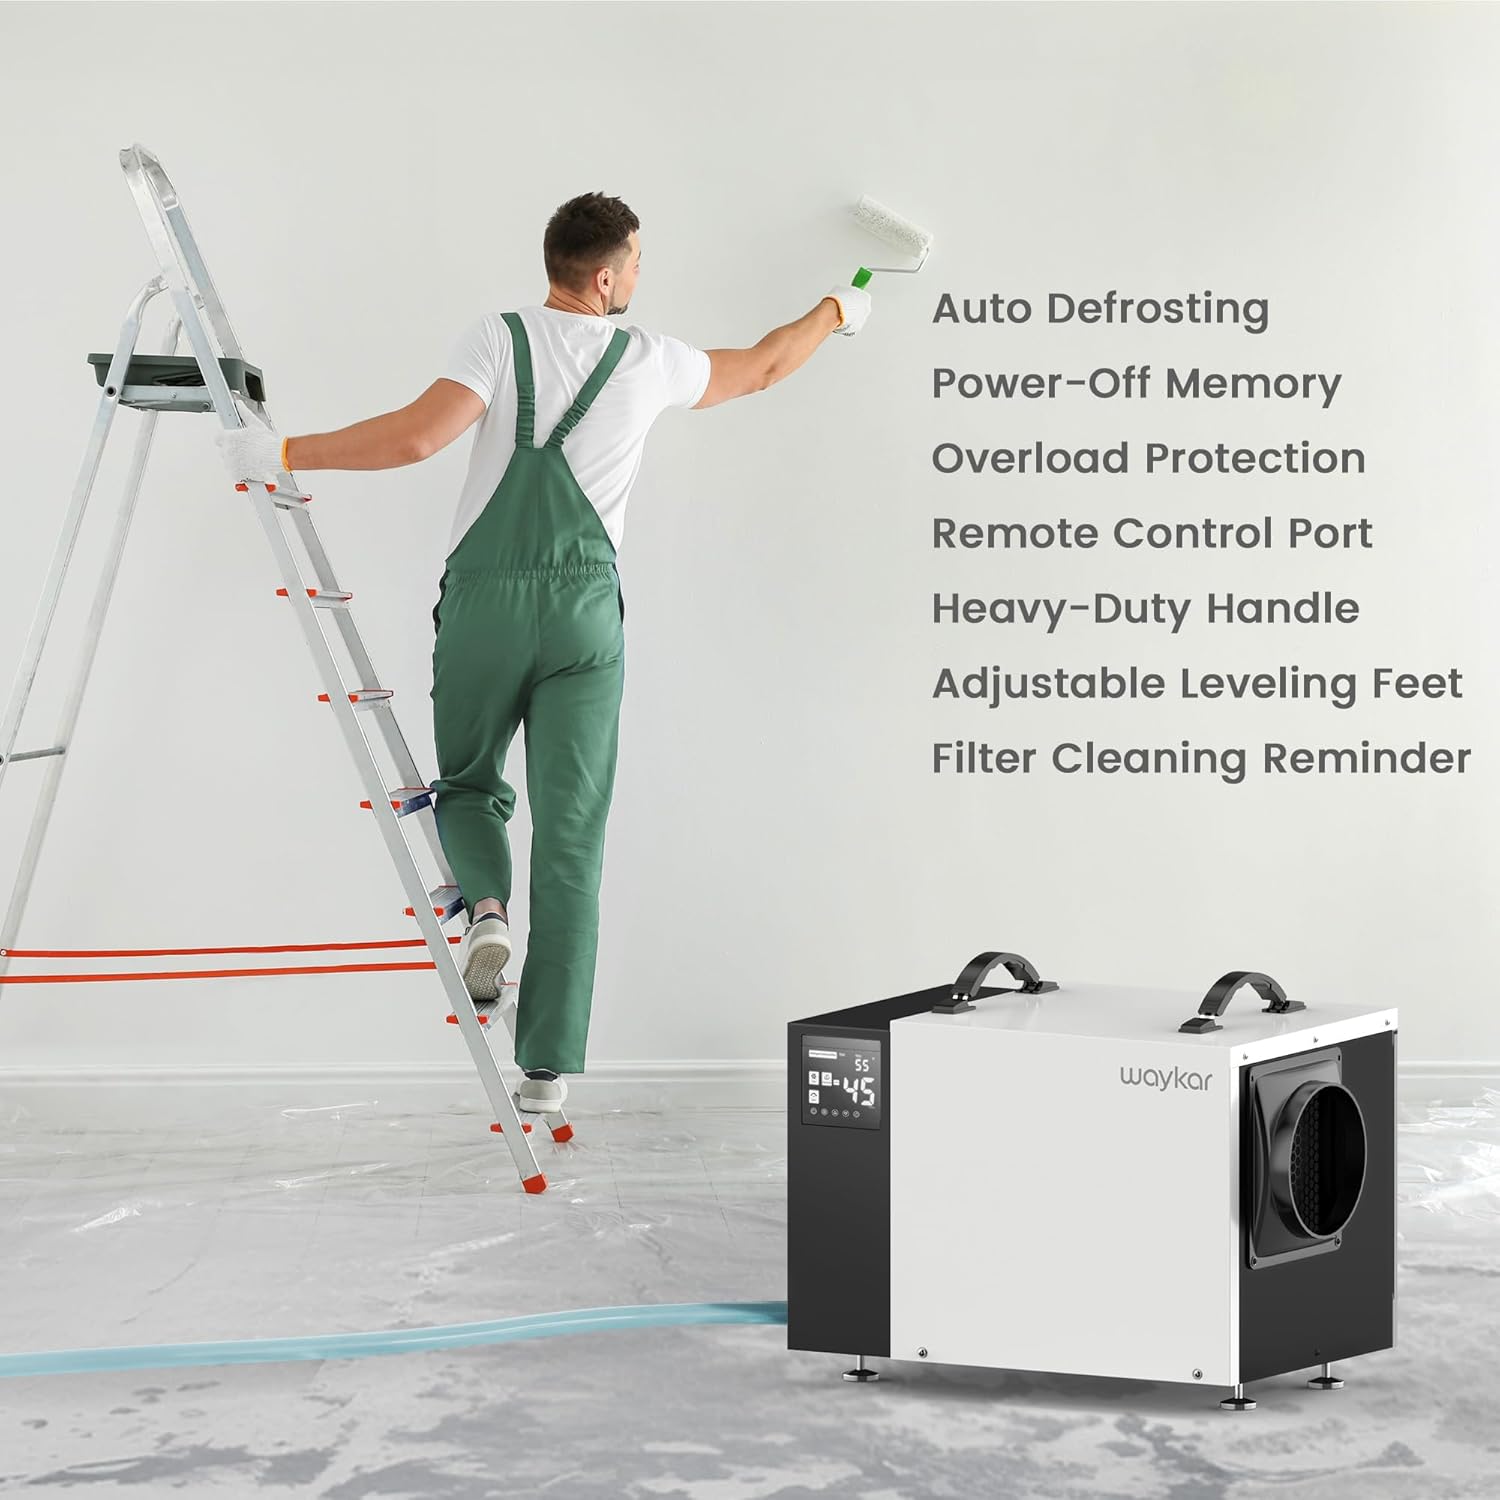
Caratteristiche principali
- Alta capacità: Removes up to 125 pints of moisture per day (at 95°F, 90% RH).
- Ampia copertura: Suitable for spaces up to 6,500 sq. ft.
- Umidità regolabile: Range of 10%-98% Relative Humidity (RH).
- Rotary Compressor: High-efficiency design for improved energy savings and lifespan.
- Opzioni di doppio drenaggio: Includes a 16.4 ft pump drainage hose for vertical drainage and a 6.6 ft gravity drainage hose.
- Duct Mount Supported: Can be integrated into existing HVAC systems (venting hoses not included).
- Costruzione per impieghi gravosi: High-strength metal casing per durevolezza.
- Auto scongelamento: Prevents frost buildup on coils, maintaining efficiency.
- Memoria di spegnimento: Ripristina le impostazioni precedenti dopo un'interruzione di corrente.
- Filtro lavabile: Easy to clean and reuse, with a cleaning reminder function.
Componenti dell'unità
Familiarizza con le parti principali del tuo deumidificatore:

Descrizione dell'immagine: Davanti view of the Waykar 125 Pint Crawl Space Dehumidifier, showing the control panel on the left, the main white casing, and the air outlet on the right. A coiled clear drainage hose is visible in the foreground.

Descrizione dell'immagine: Close-up of the dehumidifier's control panel on the left, displaying digital readings and control buttons. The side of the unit with the air outlet is also visible.
- Pannello di controllo: Digital display and buttons for setting humidity, timer, and other functions.
- Presa d'aria: Situato sul retro/lato, dove entra l'aria umida.
- Uscita aria: Located on the front/side, where dry air is expelled.
- Drainage Ports: Connections for the pump drainage hose and gravity drainage hose.
- Filtro lavabile: Removable filter for air purification and maintenance.
- Heavy-Duty Handles: Two handles on top for easy transport.
- Piedini di livellamento regolabili: For stable placement on uneven surfaces.
3. Impostazione
Disimballaggio
- Estrarre con cautela il deumidificatore dalla confezione.
- Rimuovere tutto il materiale di imballaggio, compresi eventuali nastri adesivi o pellicole protettive.
- Ispezionare l'unità per verificare eventuali segni di danni durante il trasporto. In caso di danni, non utilizzarla e contattare l'assistenza clienti.
Posizionamento
Proper placement is crucial for efficient operation and safety.
- Posizionare il deumidificatore su una superficie solida e piana, in grado di sostenerne il peso.
- Ensure there is at least 12 inches (30 cm) of clearance around all sides of the unit for adequate airflow.
- Evitare di posizionare l'unità alla luce diretta del sole o vicino ad apparecchi che generano calore.
- For crawl spaces or basements, ensure the unit is elevated slightly off the ground to prevent contact with standing water, if applicable. The adjustable leveling feet can assist with this.

Descrizione dell'immagine: The Waykar dehumidifier positioned in a crawl space, demonstrating typical installation under a raised floor. The unit is placed on blocks for elevation.
Opzioni di drenaggio
The unit offers two methods for continuous drainage:

Descrizione dell'immagine: A visual representation illustrating the two drainage options: a pump drain hose extending upwards for vertical drainage and a gravity drain hose extending downwards for horizontal drainage.
A. Pump Drainage (16.4 ft hose included)
- Connect the provided 16.4 ft pump drainage hose to the pump outlet port on the unit.
- Route the hose to a suitable drain location, ensuring it is free of kinks or obstructions. The built-in pump can lift water vertically up to 16.4 ft.
- This option is ideal for draining water to a sink, floor drain, or outside, especially when the drain is higher than the dehumidifier.
B. Gravity Drainage (6.6 ft hose included)
- Connect the provided 6.6 ft gravity drainage hose to the gravity drain outlet port on the unit.
- Ensure the hose is sloped downwards continuously from the unit to the drain point to allow water to flow by gravity.
- This option is suitable when the drain is lower than the dehumidifier.
4. Istruzioni per l'uso
Funzioni del pannello di controllo
Descrizione dell'immagine: The control panel of the dehumidifier, highlighting the digital display and various buttons for power, humidity settings, timer, and filter reminder.
- Pulsante di accensione: Accende o spegne l'unità.
- Pulsanti di impostazione dell'umidità (frecce su/giù): Adjusts the desired humidity level from 10% to 98% RH.
- Pulsante Timer: Imposta il timer di accensione o spegnimento automatico (0-24 ore).
- Pulsante velocità ventola: Regola la velocità della ventola (alta/bassa).
- Schermo di visualizzazione: Mostra l'umidità attuale, l'umidità impostata, le impostazioni del timer e i codici di errore.
- Filter Reminder Indicator: Si illumina quando è necessario pulire il filtro.
Operazione iniziale
- Collegare il cavo di alimentazione a una presa elettrica dotata di messa a terra.
- Press the Power button to turn on the unit. The display will show the current room humidity.
- Use the Up/Down arrows to set your desired humidity level. A common comfortable range is 45%-55% RH. The unit will operate until the set humidity is reached, then cycle off. It will restart when the humidity rises above the set level.
Funzionamento continuo
To run the dehumidifier continuously regardless of humidity level, set the target humidity to the lowest possible setting (e.g., 10% RH). The unit will then run continuously, provided the temperature is within its operating range and the drainage system is functioning.
Telecomando opzionale
A wired remote control (sold separately) can be connected to the unit for convenient long-distance control, allowing you to adjust settings without directly accessing the dehumidifier, which is particularly useful in crawl spaces or hard-to-reach areas.
Descrizione dell'immagine: An image showing the optional wired remote control panel mounted on a wall, with a hand interacting with its display. The dehumidifier is visible in the background, indicating remote operation.
5. Manutenzione
Una manutenzione regolare garantisce prestazioni ottimali e prolunga la durata del deumidificatore.
Pulizia del filtro
The washable filter should be cleaned regularly, typically every two weeks or when the filter reminder indicator illuminates.

Descrizione dell'immagine: A diagram illustrating the location of the washable filter on the dehumidifier, along with the unit's overall dimensions. A separate inset shows the filter being cleaned under running water.
- Spegnere l'unità e scollegarla dalla presa di corrente.
- Locate the filter access panel (usually on the side or back) and remove the filter.
- Rinse the filter under warm, running water. For stubborn dirt, use a mild detergent.
- Lasciare asciugare completamente il filtro all'aria prima di reinstallarlo. Non utilizzare un'asciugatrice o fonti di calore dirette.
- Reinsert the dry filter into the unit and close the access panel.
- Plug in the unit and press the filter reset button (if available) or power cycle the unit to clear the reminder.
Pulizia dell'unità
- Pulire l'esterno dell'unità con un panno morbido, damp stoffa. Non utilizzare prodotti chimici aggressivi o detergenti abrasivi.
- Clean the air inlet and outlet grilles with a vacuum cleaner or soft brush to remove dust and debris.
Magazzinaggio
Se si conserva l'unità per un periodo prolungato:
- Spegnere e scollegare l'unità.
- Ensure all water has drained from the unit and hoses.
- Clean the filter and the exterior of the unit.
- Coil the power cord and drainage hoses neatly.
- Conservare l'unità in un luogo fresco e asciutto, lontano dalla luce solare diretta e da temperature estreme.
6. Risoluzione Dei Problemi
Prima di contattare l'assistenza clienti, consultare la seguente guida alla risoluzione dei problemi più comuni.
| Problema | Possibile causa | Soluzione |
|---|---|---|
| L'unità non si accende. | No power supply; Power cord loose; Unit is in standby mode. | Check power outlet and circuit breaker; Ensure power cord is securely plugged in; Press the Power button. |
| L'unità è in funzione ma non deumidifica. | Filtro dell'aria intasato; Temperatura ambiente troppo bassa; Umidità impostata troppo alta; Porte/finestre aperte. | Clean the air filter; Ensure room temperature is above 41°F (5°C); Lower the humidity setting; Close all doors and windows. |
| Perdita d'acqua. | Drainage hose kinked or blocked; Hose not properly connected; Unit not level. | Check and clear any kinks or blockages in the hose; Ensure hose is securely connected to the drain port; Adjust leveling feet to ensure the unit is stable and level. |
| L'unità è rumorosa. | Unit not level; Air filter clogged; Fan obstruction. | Ensure unit is on a flat, stable surface; Clean the air filter; Check for any obstructions in the fan area. |
| Pump not draining water. | Pump hose kinked or blocked; Pump malfunction; Water level not high enough to activate pump. | Verify pump hose is clear and properly routed; Ensure the unit has accumulated enough water for the pump to activate; If issue persists, contact customer support. |
7. Specifiche
| Specificazione | Dettaglio |
|---|---|
| Numero di modello | AFW2.0DPM |
| Capacità di rimozione dell'umidità | 125 pinte/giorno (95°F, 90% RH) |
| Area di copertura | Fino a 6500 piedi quadrati |
| Dimensioni del prodotto (PxLxA) | 19.29" x 13.58" x 12.6" |
| Peso dell'articolo | 49.8 libbre |
| Intervallo di impostazione dell'umidità | 10% - 98% UR |
| Flusso d'aria (CFM) | 300 piedi cubi |
| Opzioni di drenaggio | Built-in Pump (16.4 ft hose), Gravity Drain (6.6 ft hose) |
| Caratteristiche speciali | Automatic Defrost, Automatic Moisture Removal, Automatic Restart, Built-In Pump, Overheat Protection, Washable Filter |
| Colore | Bianco |
8. Garanzia e supporto
Waykar provides a 5-Year Quality Coverage for this dehumidifier, demonstrating commitment to product reliability and customer satisfaction.
For technical assistance, warranty claims, or any questions regarding your Waykar dehumidifier, please refer to the contact information provided on the product packaging or the official Waykar website. When contacting support, please have your model number (AFW2.0DPM) and purchase details ready.


