Prodotto finitoview
The ALLmeter DTI Digital Dial Indicator is a precision measuring tool designed for accurate dimensional measurements in various mechanical and industrial applications. It features a large LCD display for easy readability, switchable metric and imperial units, and a zero-setting function for versatile use.

Figura 1: Fronte view of the ALLmeter DTI Digital Dial Indicator, showing the LCD display and control buttons.

Figure 2: Detailed diagram illustrating the key components and dimensions of the digital dial indicator, including the LCD display, on/off switch, inch/mm switch, zero-setting button, holding point for clamp, spring-loaded probe, and screw thread type M2.5.
Cosa è incluso
Dopo aver aperto la confezione, verificare che siano presenti tutti i componenti:
- Digital Dial Indicator unit
- Rear Cover (for mounting)
- 1.5V Battery (LR44 type)
- Manuale di istruzioni (questo documento)
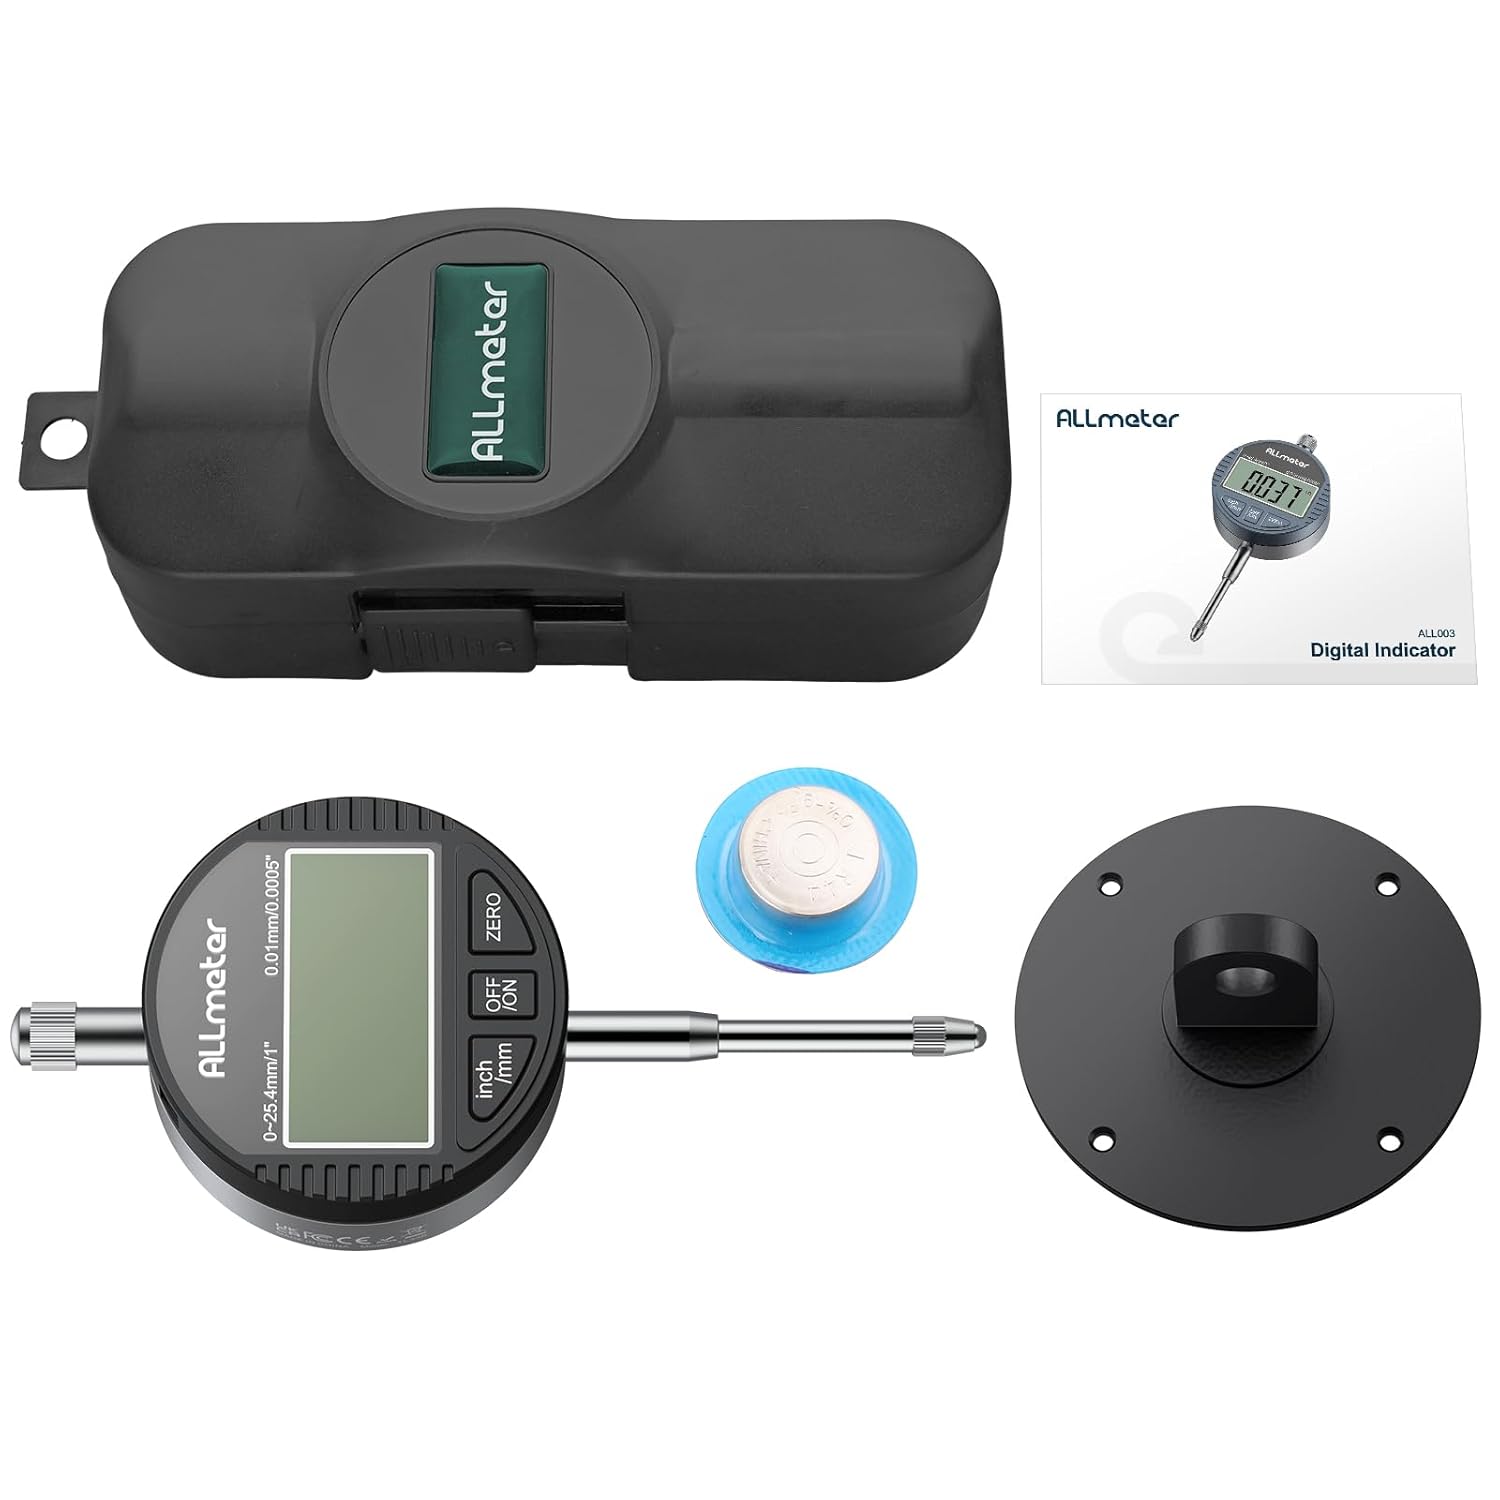
Figure 3: Image showing the complete contents of the product package, including the digital dial indicator, rear cover, battery, and instruction manual.
Impostare
1. Installazione della batteria
The digital dial indicator requires one LR44 1.5V button cell battery. The battery compartment is located on the side of the unit.
- Individuare il coperchio del vano batteria.
- Per aprire il vano, far scorrere o sganciare delicatamente il coperchio.
- Insert the LR44 battery with the positive (+) side facing upwards.
- Chiudere saldamente il coperchio del vano batterie.

Figura 4: primo piano view of the digital dial indicator, highlighting the convenient LR44 battery compartment for easy replacement and the zero button.
2. Attaching Rear Cover
The digital dial indicator comes with a detachable rear cover, allowing it to be used with different magnetic base holder stands or other mounting solutions. The standard rear cover can be replaced with the included metal back with a mounting lug for increased versatility.
- If a different rear cover is desired, use a small screwdriver to remove the screws securing the current rear cover.
- Carefully remove the existing cover.
- Align the desired rear cover (e.g., the metal one with mounting lug) with the screw holes.
- Secure the new cover by tightening the screws.
Video 1: Demonstration of how to detach and attach the rear cover of the digital dial indicator, showcasing its adaptability for various magnetic base holder stands.
Istruzioni per l'uso
1. Accensione/spegnimento
Premere il tasto SPENTO/ACCESO pulsante per accendere o spegnere il dispositivo.
2. Unit Conversion (mm/inch)
Premere il tasto pollici / mm button to switch between metric (millimeters) and imperial (inches) units. The selected unit will be displayed on the LCD screen.

Figure 5: Comparison of the digital dial indicator display showing measurements in both millimeters (mm) and inches (in), demonstrating the unit conversion feature.
3. Zero Setting
To set the current position as zero, press the ZERO button. This allows for relative measurements from any desired reference point.
4. Misurazione
Extend or retract the spring-loaded probe to make contact with the surface to be measured. The measurement will be displayed instantly on the LCD screen.
Video 2: Operational demonstration of the electronic digital dial indicator, including switching between mm/inch units, performing zero setting, and taking measurements on a surface.
5. Spegnimento automatico
The device features an automatic shutdown function to conserve battery life. If there is no operation for approximately 5 minutes, the indicator will automatically turn off.

Figure 6: Illustration of the automatic shutdown feature, indicating that the device powers off after 5 minutes of inactivity to save battery.
Manutenzione
1. Pulizia
To ensure accurate readings and prolong the life of your digital dial indicator, keep it clean. Wipe the surface with a soft, dry cloth. Avoid using abrasive cleaners or solvents that could damage the display or housing.
2. Conservazione
When not in use, store the digital dial indicator in its protective case to prevent dust and damage. Store in a dry environment away from direct sunlight and extreme temperatures.

Figure 7: The digital dial indicator shown with its protective storage case and included batteries, emphasizing proper storage for protection and longevity.
3. Sostituzione della batteria
If the display starts flashing consistently, it indicates a low battery. Replace the LR44 battery as described in the "Battery Installation" section to ensure continued accurate operation.
Risoluzione dei problemi
| Problema | Possibile causa | Soluzione |
|---|---|---|
| Il display è vuoto o poco luminoso. | La batteria è scarica o non è installata correttamente. | Controllare l'orientamento della batteria. Sostituire la batteria se necessario. |
| Display is flashing. | Indicatore di batteria scarica. | Sostituire la batteria LR44. |
| Letture imprecise. | Dirt or debris on the probe or measuring surface; damaged probe; unit not properly zeroed. | Clean the probe and measuring surface. Re-zero the device. If problem persists, contact support. |
| L'unità non si accende. | Problema con la batteria; malfunzionamento interno. | Ensure battery is new and correctly installed. If still unresponsive, contact support. |
Specifiche

Figura 8: Oltreview of the digital dial indicator's key specifications, including measuring range, resolution, and operating conditions.
- Campo di misura: 0-25.4 mm (0-1 pollici)
- Risoluzione: 0.01 mm (0.0005 pollici)
- Tempo di risposta: ≤ 0.5 m/s
- Temperatura di esercizio: 0 ~ 40 ° C (32 ~ 104 ° F)
- Temperatura di conservazione: -20 ~ 70 ° C (-4 ~ 158 ° F)
- Umidità relativa: ≤ 80% R.H
- Materiale: Aluminum Alloy frame
- Dimensioni del prodotto: 7.09 x 3.35 x 2.36 pollici
- Peso: Circa 129 g (4.55 once)
- Tipo di batteria: 1 x LR44 1.5V button cell (included)
- Spegnimento automatico: Dopo 5 minuti di inattività
Garanzia e supporto
ALLmeter products are manufactured to high quality standards. For warranty information, technical support, or service inquiries, please contact ALLmeter customer service through the retailer where the product was purchased or visit the official ALLmeter websito.
Per maggiori informazioni e aggiornamenti sui prodotti, visita il sito ALLmeter Store on Amazon.


