Introduzione
The VOBAGA Sourdough Starter Warmer is designed to provide a consistent and controlled temperature environment for your sourdough starter. This device helps maintain optimal yeast activity, which is crucial for successful bread baking, especially in cooler conditions. It features adjustable temperature settings, a programmable timer, and an automatic shut-off function for convenience and safety.

Image: The VOBAGA Sourdough Starter Warmer with a jar of sourdough, illustrating its use in a kitchen setting.
Istruzioni di sicurezza
- Leggere tutte le istruzioni prima di utilizzare l'apparecchio.
- Do not immerse the warmer unit, cord, or plug in water or other liquids.
- Ensure the power cord is not damaged. Do not operate if the cord or plug is damaged.
- Tenere lo scaldino lontano da materiali infiammabili.
- Posizionare sempre lo scaldavivande su una superficie stabile, piana e resistente al calore.
- Scollegare lo scaldavivande dalla presa di corrente quando non lo si utilizza e prima di pulirlo.
- Questo apparecchio è destinato esclusivamente all'uso domestico.
- Do not touch hot surfaces. Use caution when handling the warmer during or after operation.
Contenuto della confezione
- 1 x VOBAGA Sourdough Starter Warmer Unit
- 1 x cavo di alimentazione (integrato)
Caratteristiche del prodotto
- Efficient Warming: Provides consistent heat to activate and maintain sourdough starter.
- Precision Thermostat: Adjustable temperature range from 70°F to 105°F, with increments of 3 degrees.
- Timer programmabile: Impostare la durata dell'operazione da 1 a 12 ore.
- Spegnimento automatico: Automatically turns off after 4 hours by default, or after the set timer duration.
- Display a LED: Digital display shows current temperature and remaining time.
- Basso consumo energetico: Operates efficiently with only 5W of power.
Impostare
- Disimballare: Carefully remove the sourdough starter warmer from its packaging.
- Posizionamento: Place the warmer on a clean, dry, flat, and stable surface, away from water sources or heat-sensitive materials.
- Connetti alimentazione: Collegare il cavo di alimentazione a una presa elettrica standard da 120 V. Il display LED si illuminerà.
- Prepare Starter: Place your sourdough starter jar (flat-bottom and thin-wall glass recommended) onto the heating plate of the warmer.
Istruzioni per l'uso
Accensione/spegnimento
- Premere il tasto Pulsante di accensione (center button with power symbol) to turn the unit on or off.
Impostazione della temperatura
- Con l'unità accesa, premere il tasto Pulsante della temperatura (right button with thermometer symbol).
- Each press will cycle through the available temperature settings: 70°F, 73°F, 76°F, 79°F, 82°F, 85°F, 88°F, 91°F, 94°F, 97°F, 100°F, 103°F, 105°F.
- The selected temperature will be displayed on the LED screen. The warmer will begin heating to this temperature.
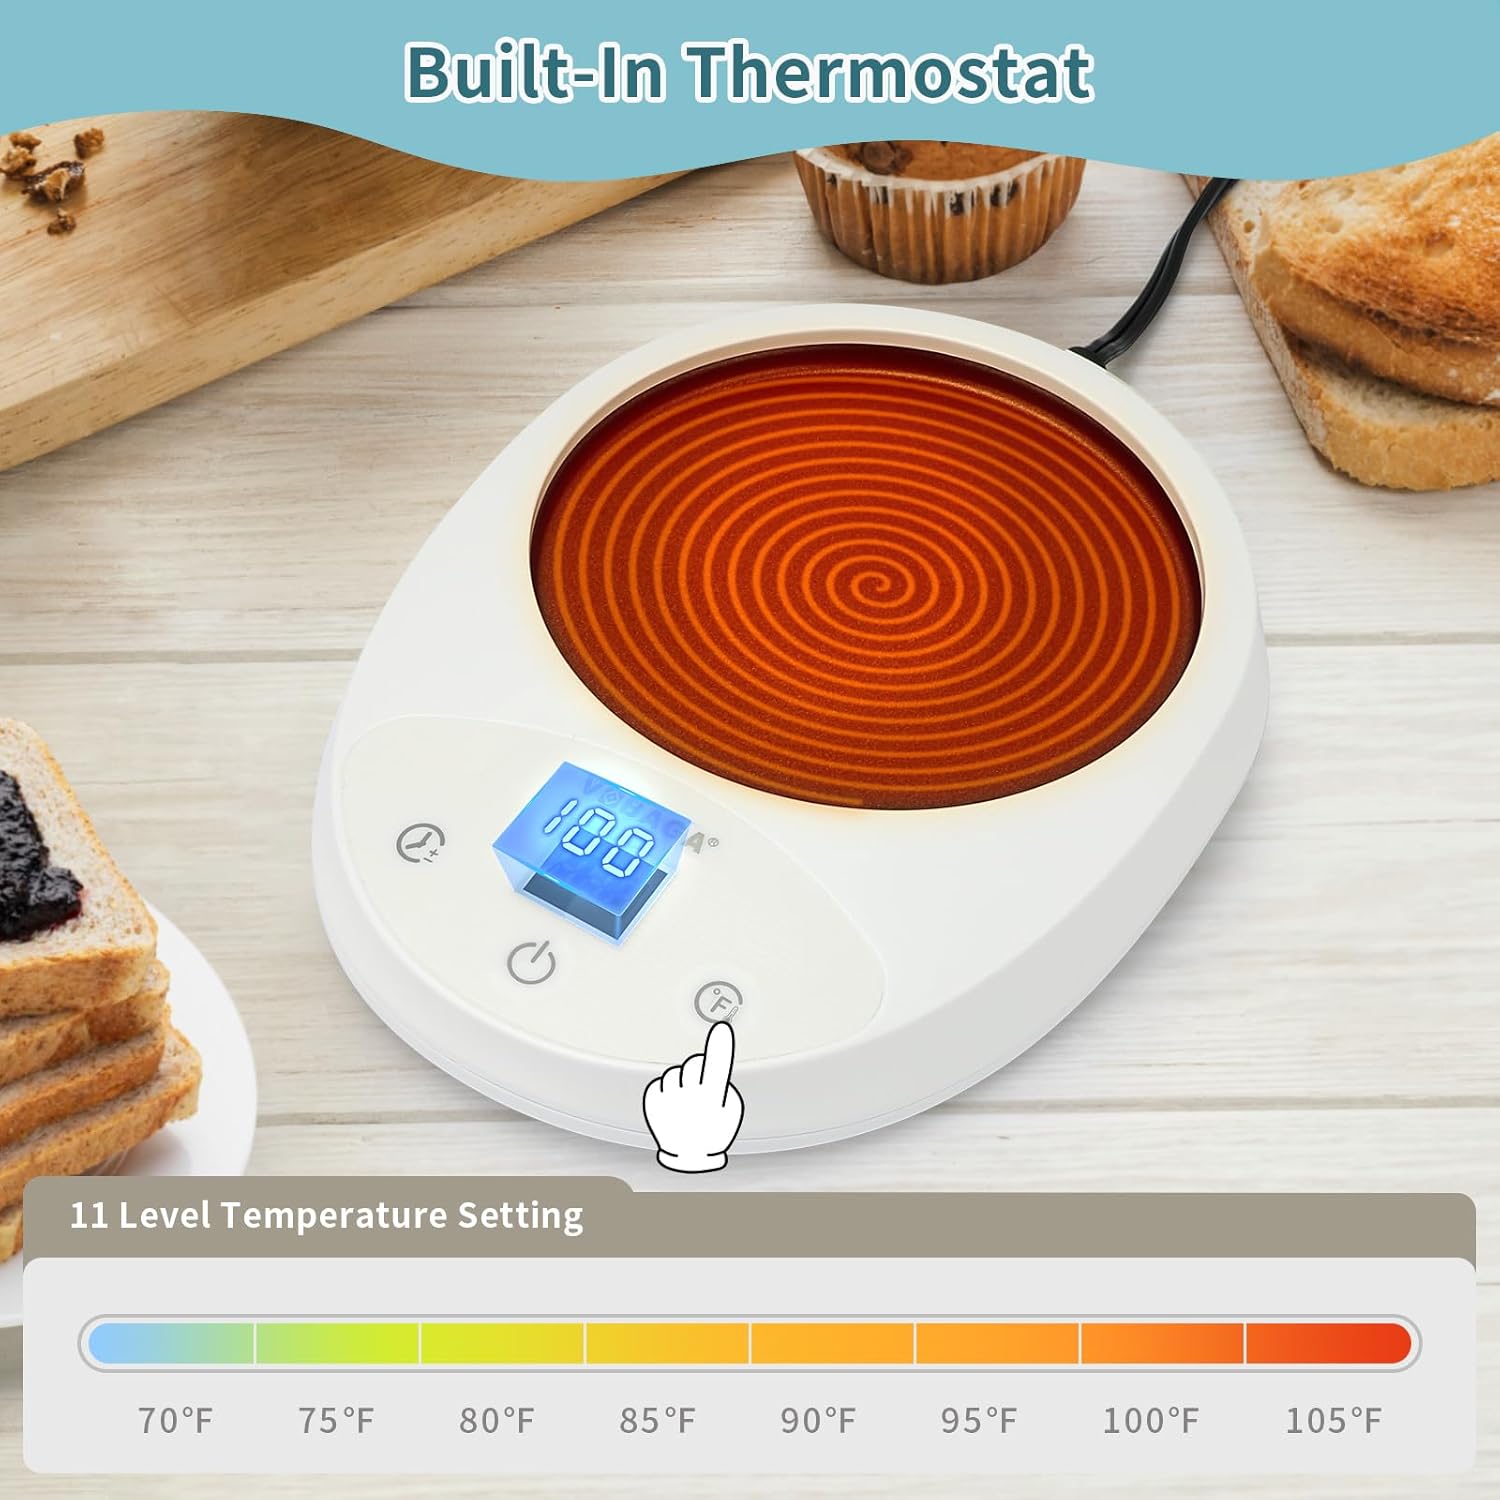
Image: The control panel of the warmer, highlighting the temperature setting function and LED display.
Impostazione del timer
- Con l'unità accesa, premere il tasto Pulsante timer (left button with clock symbol).
- Each press will cycle through the timer settings from 1 hour to 12 hours.
- The default auto shut-off is 4 hours if no timer is explicitly set.
- The selected time will be displayed on the LED screen. The unit will operate for the set duration and then automatically turn off.

Image: The warmer in use, demonstrating the effect of warming on sourdough starter over time.
Suggerimenti per ottenere i migliori risultati
- For optimal warming, cover your sourdough jar with a lid or cloth.
- Use a flat-bottom, thin-walled glass jar for efficient heat transfer.
Manutenzione
- Pulizia: Always unplug the warmer before cleaning. Wipe the surface of the warmer with a soft, damp panno. Non utilizzare detergenti abrasivi né immergere l'unità in acqua.
- Magazzinaggio: Quando non lo si utilizza, conservare lo scaldavivande in un luogo fresco e asciutto.
Risoluzione dei problemi
| Problema | Possibile causa | Soluzione |
|---|---|---|
| Lo scaldavivande non si accende. | Nessuna alimentazione elettrica. | Assicurarsi che il cavo di alimentazione sia collegato saldamente a una presa funzionante. |
| Warmer does not reach set temperature or heats slowly. | Ambient room temperature is too low; jar not covered; jar material is too thick. | Ensure the room is not excessively cold. Cover the sourdough jar with a lid or cloth. Use a flat-bottom, thin-walled glass jar for better heat transfer. |
| Warmer turns off unexpectedly. | Timer has expired; unit malfunction. | Check the timer setting. If the issue persists and the timer is not set to expire, contact customer support. |
Specifiche
| Caratteristica | Dettaglio |
|---|---|
| Numero di modello | VOB-130N |
| Intervallo di temperatura | 70°F - 105°F (3°F increments) |
| Impostazioni del timer | 1 - 12 ore |
| Default Auto Shut-Off | 4 ore |
| Consumo energetico | 5W |
| Ingresso volumetage | 120V |
| Materiale | Plastic, Metal heating element |
| Colore | Bianco |
| Peso dell'articolo | 13.4 once |
| Dimensioni del pacco | 8.54 x 5.75 x 1.42 pollici |
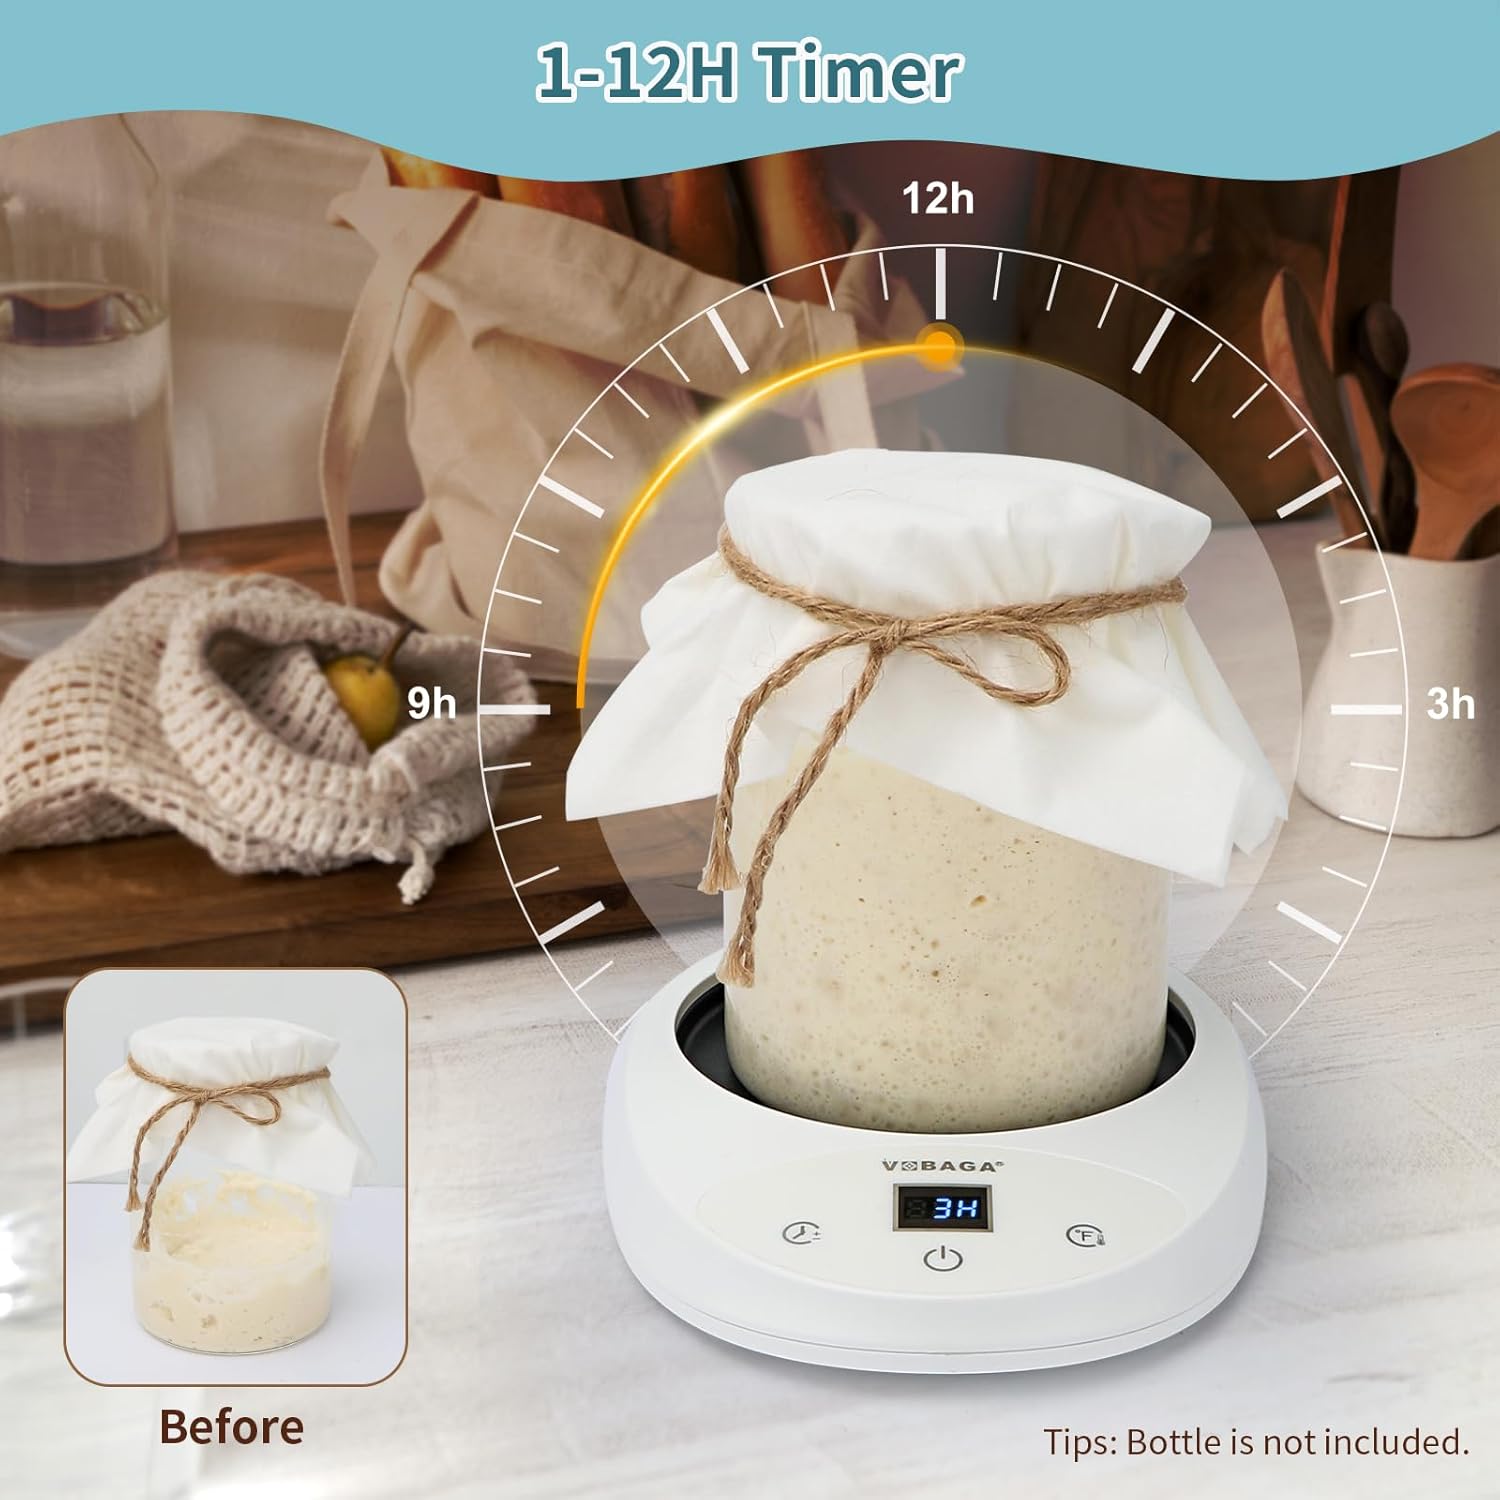
Image: Product dimensions of the VOBAGA Sourdough Starter Warmer.
Informazioni sulla garanzia
This product comes with a limited warranty. Please refer to the product packaging or contact VOBAGA customer support for specific warranty terms and conditions.
Assistenza clienti
For any questions, technical assistance, or warranty claims, please contact VOBAGA customer support through the retailer's platform or the official VOBAGA website. Please have your model number (VOB-130N) and purchase date available when contacting support.