1. Prodotto finitoview
This manual provides detailed instructions for the Nitecore MH25 PRO and MH10 V2 rechargeable flashlights. The MH25 PRO features a NiteLab UHi 40 LED with a maximum output of 3,300 lumens, designed for long-range illumination. The MH10 V2 utilizes a CREE XP-L2 V6 LED, offering a maximum output of 1,200 lumens, suitable for everyday carry and general use. Both flashlights are durable, rechargeable, and designed for various outdoor and daily applications.
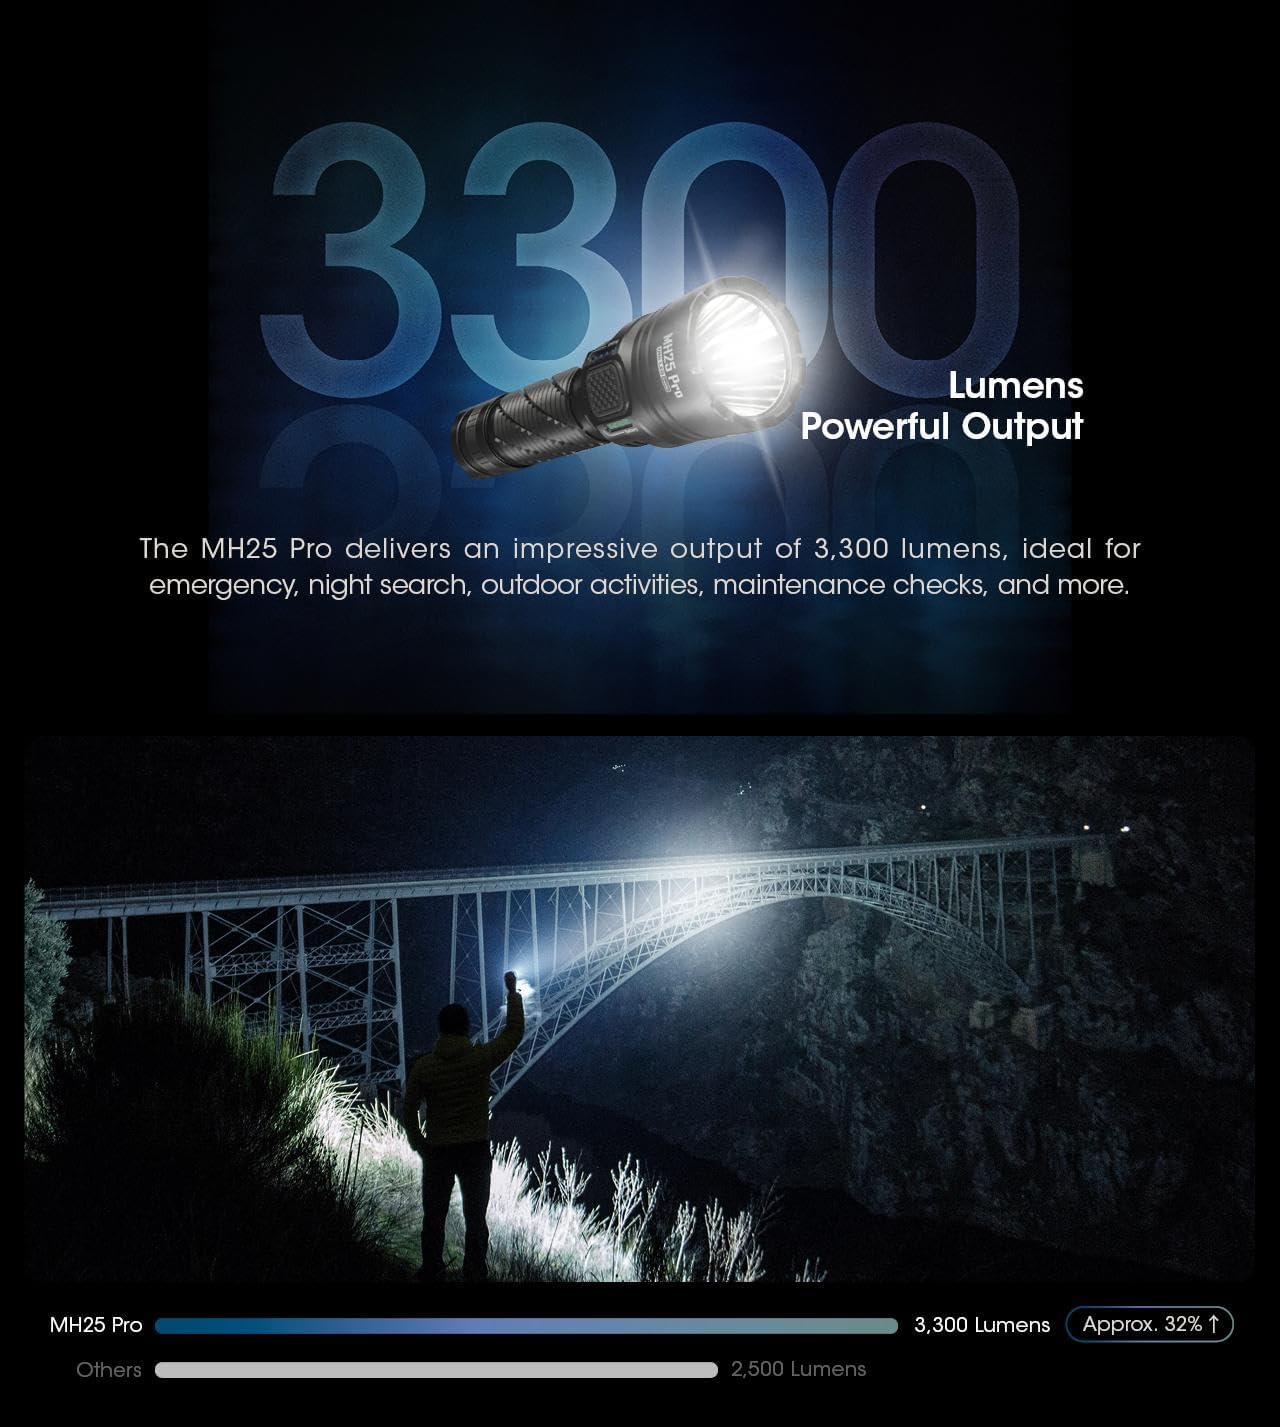
Image: The Nitecore MH25 PRO and MH10 V2 flashlights shown together, highlighting their compact design.
2. Contenuto della confezione
Verifica che tutti gli articoli siano presenti nel tuo pacco:
- Nitecore MH25 PRO Flashlight
- Nitecore MH10 V2 Flashlight
- NITECORE NL2153HP Li-ion Battery (for MH25 PRO)
- Li-ion Battery (for MH10 V2)
- Cavo di ricarica USB-C
- cordino
- O-ring di ricambio
- Clip
- Fondina
3. Impostazione
3.1 Installazione della batteria
Before first use, ensure the batteries are correctly installed. Unscrew the tail cap of each flashlight and insert the included Li-ion battery with the positive (+) terminal facing towards the head of the flashlight. Screw the tail cap back on tightly to ensure proper contact and water resistance.
3.2 Carica iniziale
Both flashlights are equipped with a USB-C charging port. Connect the provided USB-C cable to the flashlight's charging port and to a USB power source (e.g., wall adapter, computer, power bank). The charging indicator will provide feedback on the charging status. A full charge is recommended before initial use to maximize battery life.

Image: Close-up of the Nitecore MH10 V2's USB-C charging port, showing its location and design for direct charging.
4. Funzionamento
4.1 Controlli generali
Both MH25 PRO and MH10 V2 feature a tail switch for momentary and constant illumination, and a side mode button for brightness level and special mode selection.
4.2 MH25 PRO Operating Modes
The MH25 PRO offers two user modes: Modalità giornaliera E Modalità tattica. It has 5 brightness levels (Ultralow, Low, Mid, High, Turbo) and 3 special modes (Strobe, Beacon, SOS).
- Accensione/spegnimento: Premere completamente l'interruttore posteriore per accendere o spegnere la torcia.
- Regolazione della luminosità: With the light on, press the side mode button to cycle through brightness levels.
- Modalità speciali: Double-press the mode button to activate Strobe. Press again to cycle through Beacon and SOS.
- Commutazione della modalità: Refer to the detailed instructions in the included manual for switching between Daily and Tactical modes.
4.3 MH10 V2 Operating Modes
The MH10 V2 also features multiple brightness levels and special modes.
- Accensione/spegnimento: Premere completamente l'interruttore posteriore per accendere o spegnere la torcia.
- Regolazione della luminosità: With the light on, press the side mode button to cycle through brightness levels (Ultralow, Low, Mid, High).
- Modalità speciali: Double-press the mode button to activate Strobe. Press again to cycle through Beacon and SOS.

Image: Diagram illustrating the Daily Mode and Tactical Mode interfaces with their respective brightness and special modes.
4.4 Power and Level Indicators
Both flashlights feature power indicators near the mode button to display remaining battery power and current brightness level. Consult the specific product manual for detailed indicator patterns.
4.5 Sensor Protection Function (MH25 PRO)
The MH25 PRO includes a built-in optical sensor. If an obstruction is detected at close range, the flashlight's brightness will automatically decrease to prevent overheating and potential damage.

Image: The Nitecore MH25 PRO flashlight held in hand, showcasing its anti-slip knurling and overall design for a secure grip.

Image: The Nitecore MH25 PRO flashlight emitting a powerful beam, illustrating its 3300 lumens output and long throw capability.
Image: The Nitecore MH10 V2 flashlight held in a gloved hand, demonstrating its compact size and lightweight design.
5. Specifiche
5.1 Nitecore MH25 PRO Specifications
| Caratteristica | Dettaglio |
|---|---|
| Uscita massima | 3,300 lumen |
| Distanza massima del raggio | 705 metri |
| Intensità massima del raggio | 124,300 dollari |
| Autonomia massima | 650 ore (Ultra-bassa) |
| GUIDATO | NiteLab UHi 40 LED |
| Batteria | 1 x NL2153HP (5,300mAh) Li-ion |
| Modalità speciali | STROBE, BEACON, SOS |
| Resistenza all'impatto | 1 metro |
| Grado di impermeabilità | IP68 (sommergibile 2 metri) |
Image: Technical data table for the Nitecore MH25 PRO, detailing lumens, runtime, beam distance, and intensity for various modes.
5.2 Nitecore MH10 V2 Specifications
| Caratteristica | Dettaglio |
|---|---|
| Uscita massima | 1,200 lumen |
| Distanza massima del raggio | 202 metri |
| Intensità massima del raggio | 10,200 dollari |
| Autonomia massima | 1500 ore (Ultra-bassa) |
| GUIDATO | CREE XP-L2 V6 LED |
| Batterie compatibili | 1 x 21700, 1 x 18650, 2 x CR123/RCR123 |
| Modalità speciali | STROBE, BEACON, SOS |
| Resistenza all'impatto | 1 metro |
| Grado di impermeabilità | IP68 (sommergibile 2 metri) |
Image: Technical data table for the Nitecore MH10 V2, detailing lumens, runtime, beam distance, and intensity for various modes.
5.3 Specifiche generali
- Materiale: Lega di alluminio di qualità aeronautica
- Fine: HA III military grade hard-anodized
- Ricarica: USB-C ricaricabile
- Lenti ottiche: Double-sided scratch resistant coating
6. Manutenzione
6.1 Pulizia
Regularly clean the flashlight's body with a soft, damp panno. Per la lente, utilizzare un panno per la pulizia delle lenti per evitare graffi. Non utilizzare detergenti abrasivi o solventi.
6.2 Cura della batteria
To maintain optimal battery performance, charge the batteries regularly. If the flashlight will not be used for an extended period, remove the batteries to prevent leakage and store them in a cool, dry place. Avoid over-discharging or over-charging the batteries.
6.3 Resistenza all'acqua
Both flashlights are rated IP68, meaning they are dustproof and submersible to 2 meters. Ensure all caps and covers (especially the USB-C port cover) are securely closed before exposing the flashlight to water or dusty environments.
7. Risoluzione Dei Problemi
- La torcia non si accende:
- Controllare che la batteria sia inserita correttamente, con il terminale positivo (+) rivolto verso la testa.
- Assicurarsi che il tappo di coda sia avvitato saldamente.
- Charge the battery to ensure it has sufficient power.
- Luce fioca o tremolante:
- La batteria potrebbe essere scarica; ricaricarla.
- Pulisci i contatti della batteria e le filettature della torcia.
- La torcia si surriscalda rapidamente:
- The MH25 PRO has an Advanced Temperature Regulation (ATR) module and sensor protection to prevent overheating. If it becomes excessively hot, it may be operating in a high mode for an extended period or in a high ambient temperature. Reduce the brightness level.
- Problemi di ricarica:
- Assicurarsi che il cavo USB-C sia collegato correttamente sia alla torcia che alla fonte di alimentazione.
- Prova un cavo USB-C o un adattatore di alimentazione diverso.
8. Garanzia e supporto
For warranty information, please refer to the warranty card included with your product or visit the official Nitecore website. For technical support or service inquiries, please contact Nitecore customer service directly through their official channels.


