1. Introduzione
The Machenike G3V2 Bluetooth Controller is a versatile gaming peripheral designed for multi-platform compatibility, including Switch, iOS, Android, and Windows PC. It features Hall Effect joysticks and triggers, customizable buttons, RGB lighting, and a dedicated charging station for an enhanced gaming experience.
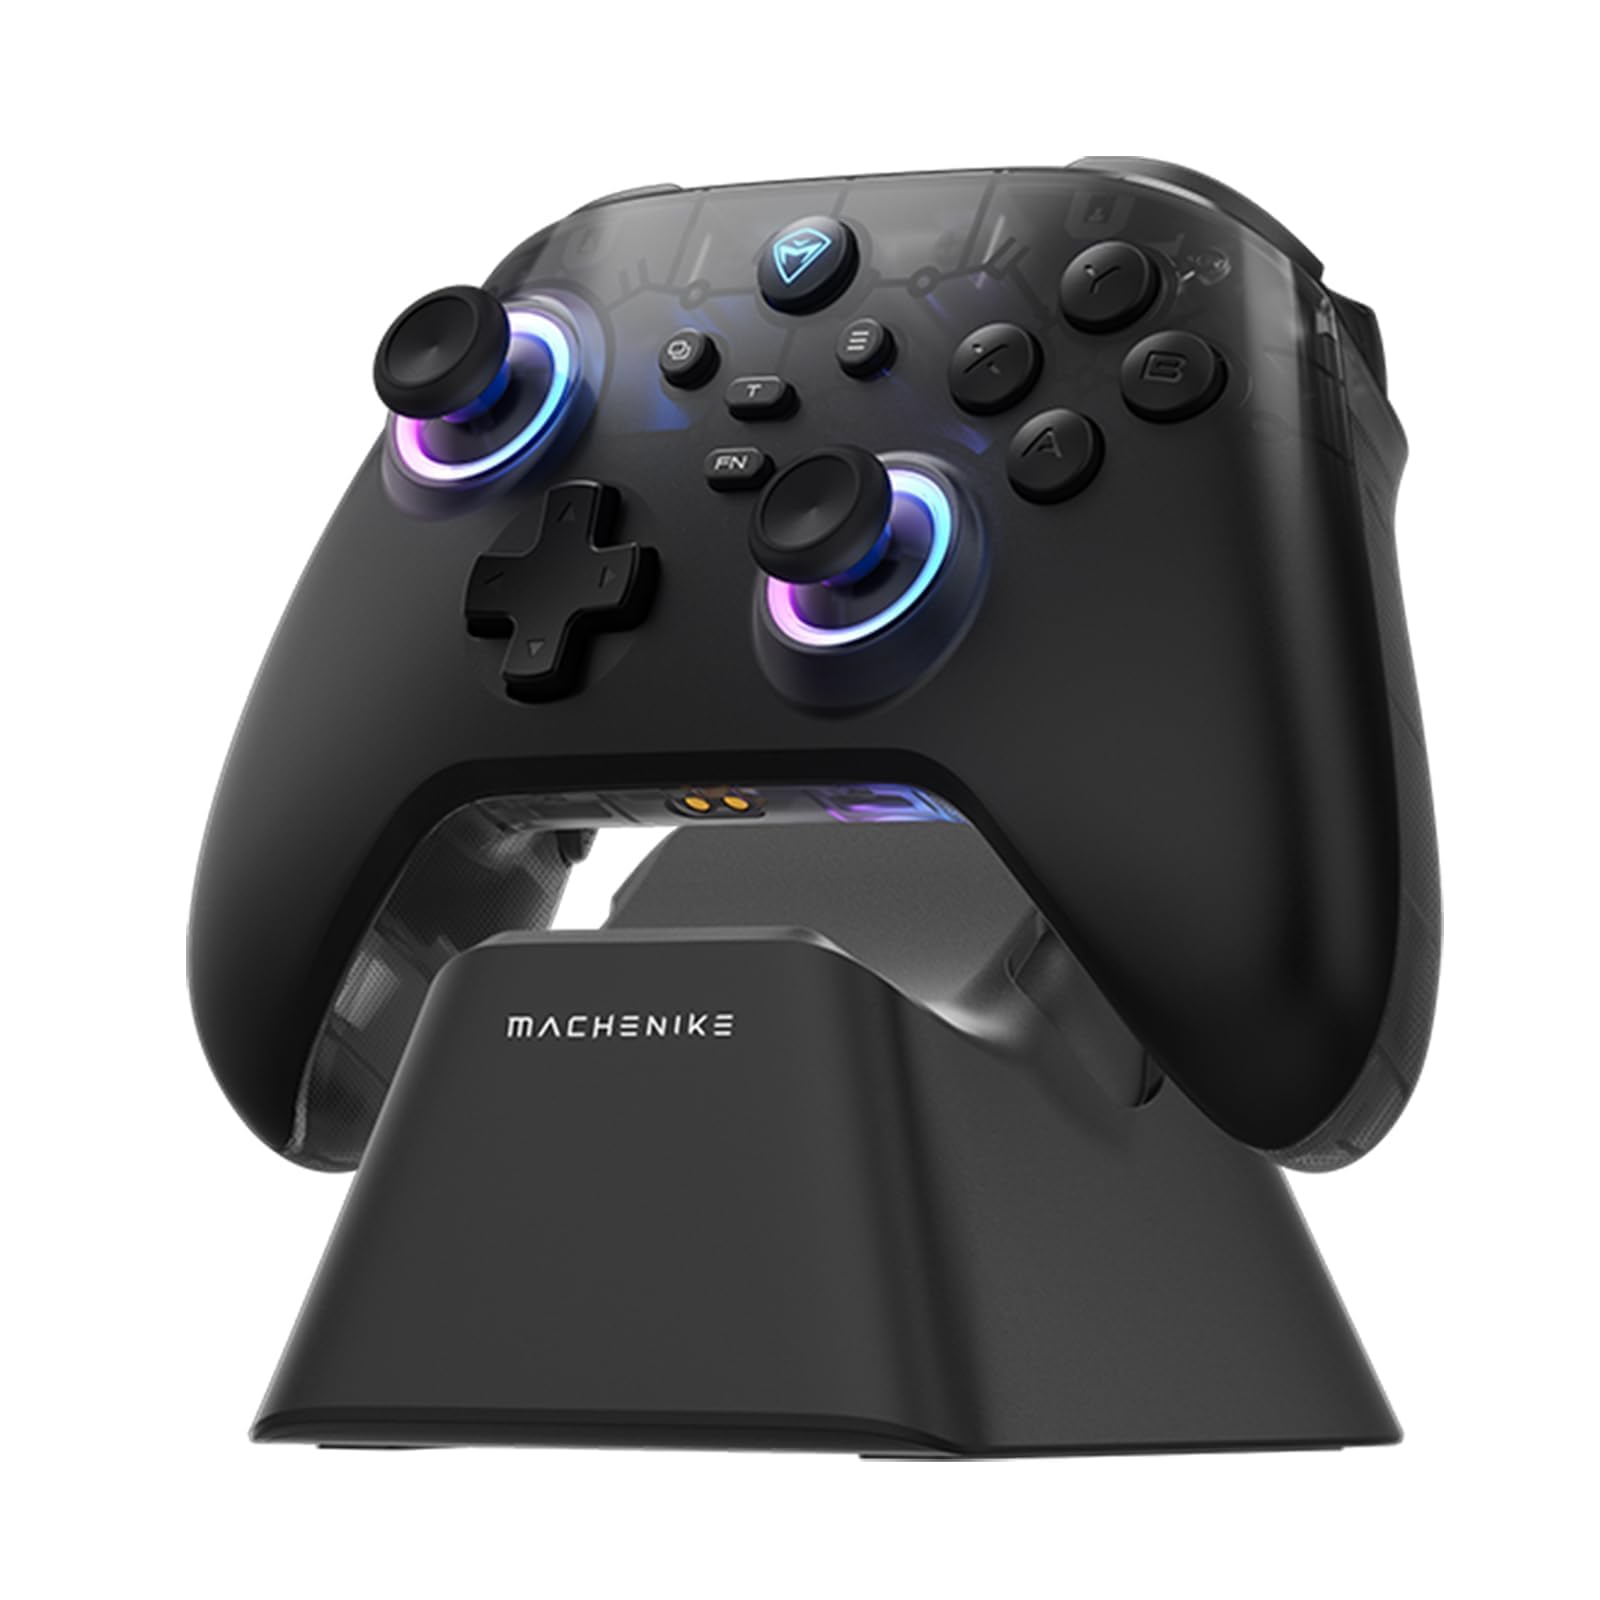
Image: The Machenike G3V2 Bluetooth Controller, showcasing its ergonomic design and vibrant RGB lighting around the joysticks.
2. Caratteristiche principali
- Lightning-Fast 1000Hz Responsiveness: Equipped with ultra-high gaming responsiveness for instant command capture and millisecond-level feedback.
- Comoda base di ricarica: Includes a dedicated charging dock for efficient and fast recharging via USB-C, protecting the controller and ensuring optimal performance.
- Dual Hall-Effect Joysticks and Triggers: Features newly upgraded Hall-Effect sensing joysticks and high-precision trigger buttons for superior control and durability, eliminating drift.
- Customizable Force Adjustable Stick Tension: Unique force adjustment feature allows customization of joystick feedback from lightweight to precise, adapting to various game needs.
- Fast Charging & Extended Playtime: Built-in 1000mAh high-capacity battery provides extended playtime with fast-charging technology.
- Supporto multipiattaforma: Compatible with Switch/Switch 2, iOS, Android, and Windows PC.
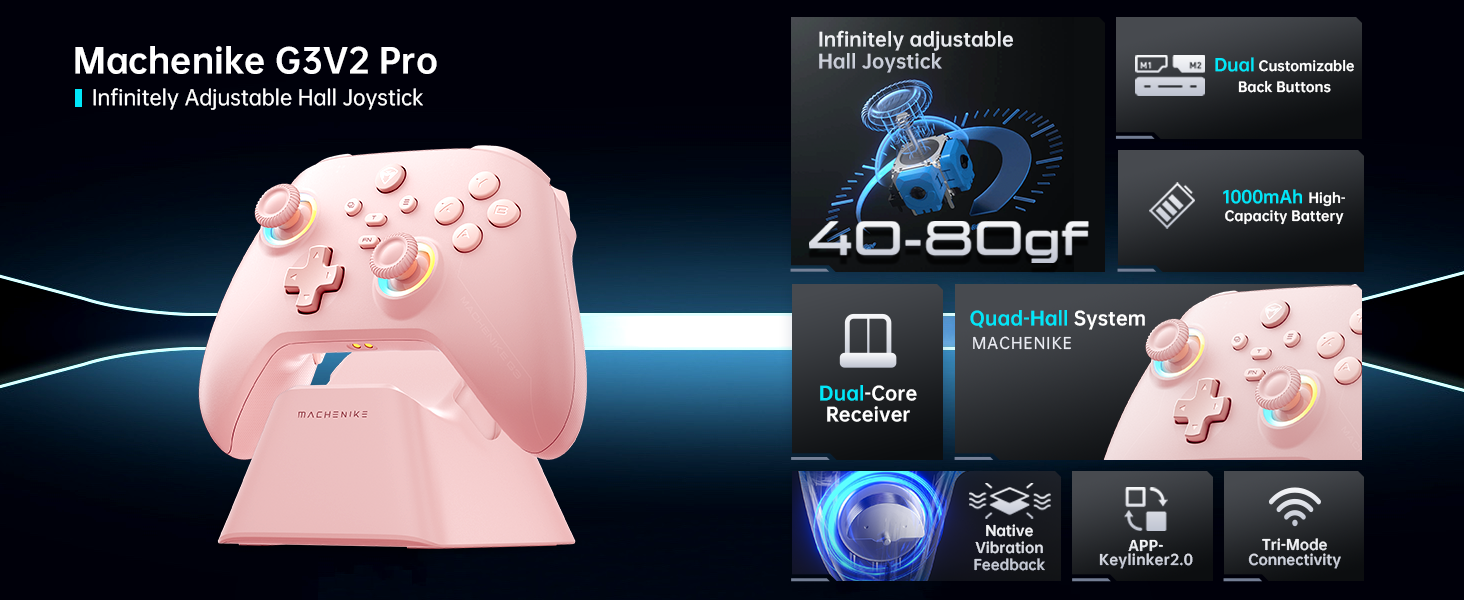
Immagine: Un overview of the Machenike G3V2 controller's key features, including its Hall Effect joysticks, customizable back buttons, and connectivity options.
3. Configurazione e connessione
3.1 Connecting to Nintendo Switch (Bluetooth Mode)
- Ensure your controller is charged.
- Sul controller, tieni premuto il tasto Y + Casa contemporaneamente i pulsanti finché la spia luminosa non lampeggia rapidamente, passando da un lampeggio lento a uno veloce. Questo mette il controller in modalità di associazione Switch.
- Sul tuo Nintendo Switch, vai al menu HOME.
- Select the 'Controllers' icon, then choose 'Change Grip/Order'.
- Attendi che il controller si connetta automaticamente. Una volta connesso, il controller vibrerà e la sua icona apparirà sullo schermo dello Switch.
- Premere il tasto A sul controller per confermare.
- To toggle between Switch and Xbox button layouts (A/B, X/Y swap), press FN + LA.
Video: A tutorial demonstrating how to connect the Machenike G3V2 controller to a Nintendo Switch console via Bluetooth mode, including button presses and on-screen confirmation.
3.2 Connecting to PC/iOS/Android (Bluetooth/Wired/2.4G)
The Machenike G3V2 controller supports multiple connection modes for various platforms:
- Bluetooth: For iOS, Android, and some PC setups. Activate Bluetooth on your device and search for 'Machenike G3V2' to pair.
- Wireless 2.4G: Use the included USB dongle for PC and other compatible devices. Plug the dongle into your device, then power on the controller.
- Wired: Connect the controller directly to your PC or compatible device using a USB-C cable.
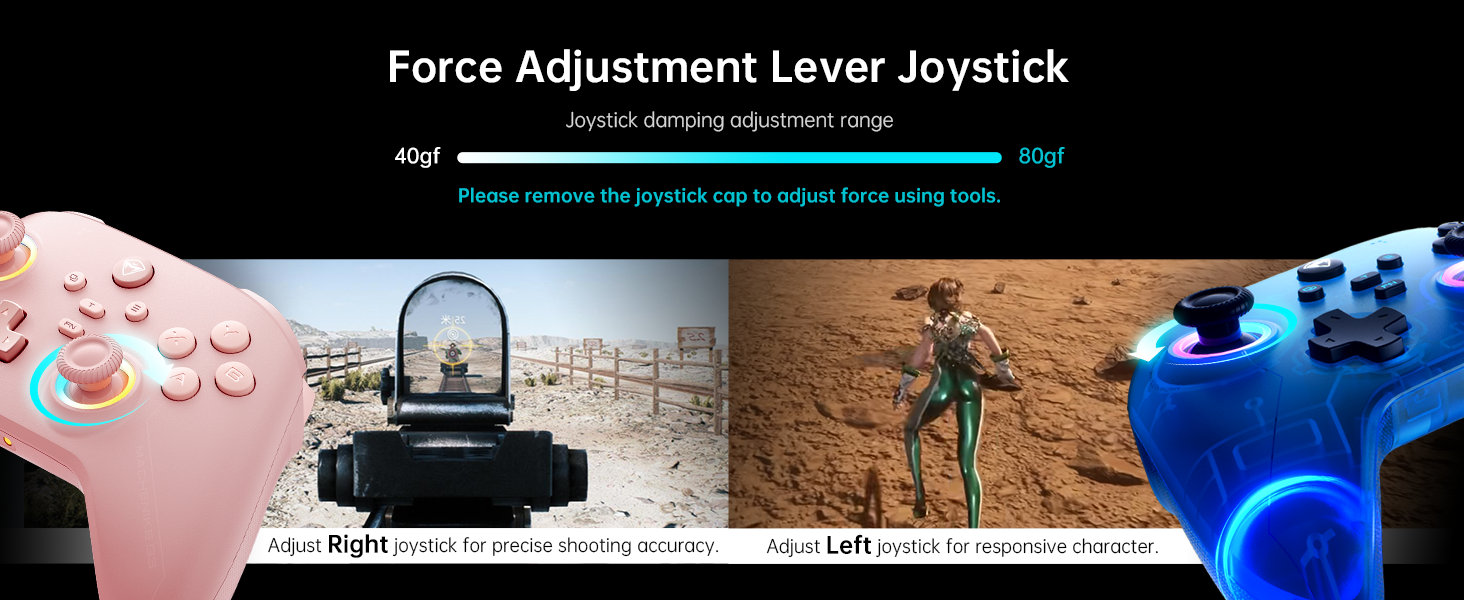
Image: The Machenike G3V2 controller highlighting its ergonomic design, anti-slip grip, and responsive triggers for comfortable and precise control.
4. Funzionamento e personalizzazione
4.1 Pulsanti posteriori programmabili (M1/M2)
The controller features two customizable back buttons (M1 and M2) that can be assigned to single keys or complex macros. This is particularly useful for games requiring quick actions or combos.
- To Assign a Single Key:
un. tieni premuto FN + M1 (or M2) simultaneously until the joystick light ring glows with a soft blue breathing effect, indicating recording mode.
b. Press the desired button you wish to assign (e.g., 'A' button).
c. stampa M1 (or M2) once to save the assignment. The light ring will flash three times, confirming successful saving. - To Clear an Assignment:
un. tieni premuto FN + M1 (or M2) simultaneously to enter recording mode.
b. Without pressing any other button, press M1 (or M2) again to save a blank input. The light ring will flash three times, clearing the previous assignment. - To Record a Macro (Multiple Keys):
un. tieni premuto FN + M1 (or M2) simultaneously to enter recording mode.
b. Press the sequence of keys you want to record (e.g., A, B, X, Y, RB, LB). The timing between key presses will be recorded.
c. stampa M1 (or M2) once to save the macro. The light ring will flash three times.
Video: A detailed guide on how to set up and record keystroke macros using the programmable back buttons (M1/M2) on the Machenike G3V2 controller.
4.2 Calibrazione del joystick e del grilletto
Calibration helps maintain accuracy and prevent drift in joysticks and triggers. This can be done whether the controller is off or connected.
- Calibrazione del joystick:
un. Tenere premuto il B + Indietro + Home buttons simultaneously until the blue LED starts flashing.
b. Move both joysticks in full circles (about three rotations) slowly and steadily.
c. Premere il tasto Inizio per salvare. Il controller si spegnerà, indicando che la calibrazione è avvenuta correttamente. - Calibrazione del trigger:
un. Tenere premuto il Y + Indietro + Home buttons simultaneously until the red LED starts flashing.
b. Press both triggers normally all the way down three times. Ensure gentle but full pressure.
c. Premere il tasto Inizio per salvare. Il controller si spegnerà, indicando che la calibrazione è avvenuta correttamente.
After calibration, reconnect the controller to your device to test the new settings. Always use normal, gentle pressure during calibration for accurate results.
Video: A guide on how to calibrate the joysticks and triggers of the Machenike G3V2 controller to ensure optimal performance and accuracy.
4.3 Illuminazione RGB
The controller features dynamic RGB lighting around the joysticks. Specific controls for changing lighting modes or colors can often be found in the Keylinker 2.0 mobile application or through dedicated button combinations (refer to the app for advanced customization).
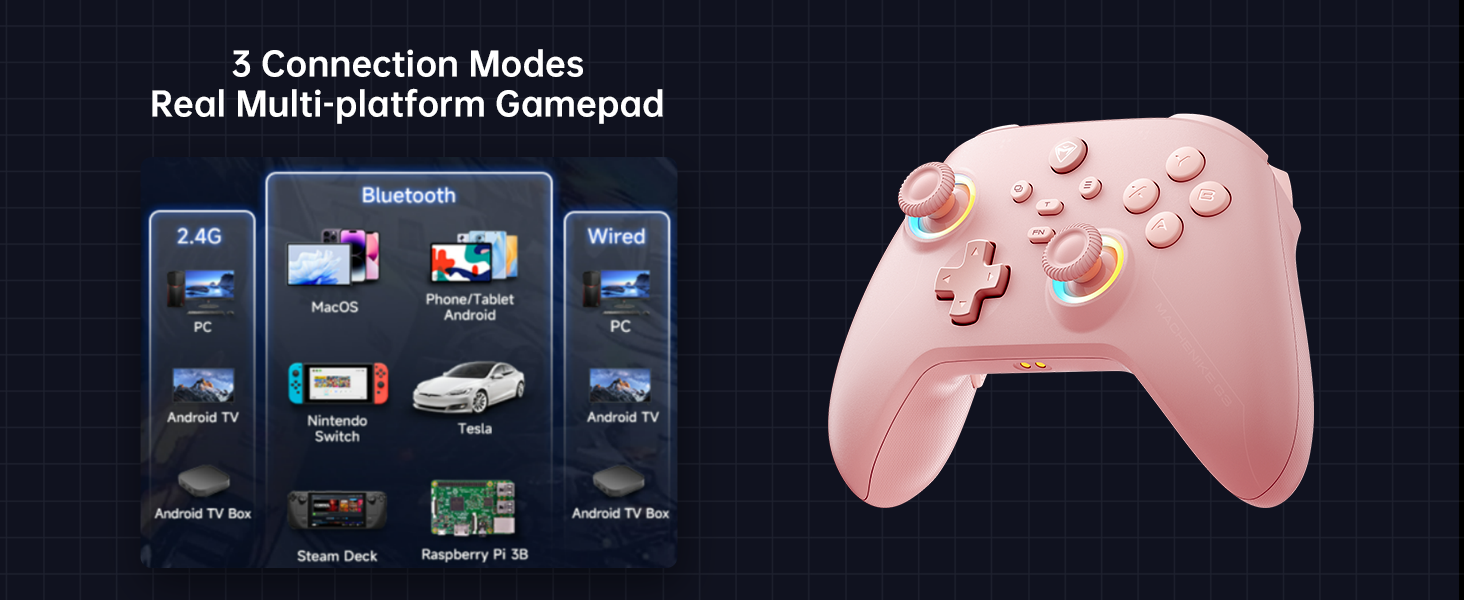
Image: The Machenike G3V2 controller illustrating its 4-level native vibration feedback, providing immersive experiences for various game genres.
5. Ricarica
The Machenike G3V2 controller comes with a 1000mAh high-capacity battery and a dedicated charging dock.
- Utilizzo della base di ricarica: Simply place the controller onto the dedicated charging dock. The built-in USB-C port on the dock facilitates quick recharging.
- Ricarica diretta tramite USB-C: You can also charge the controller directly using a USB-C cable connected to a power source.
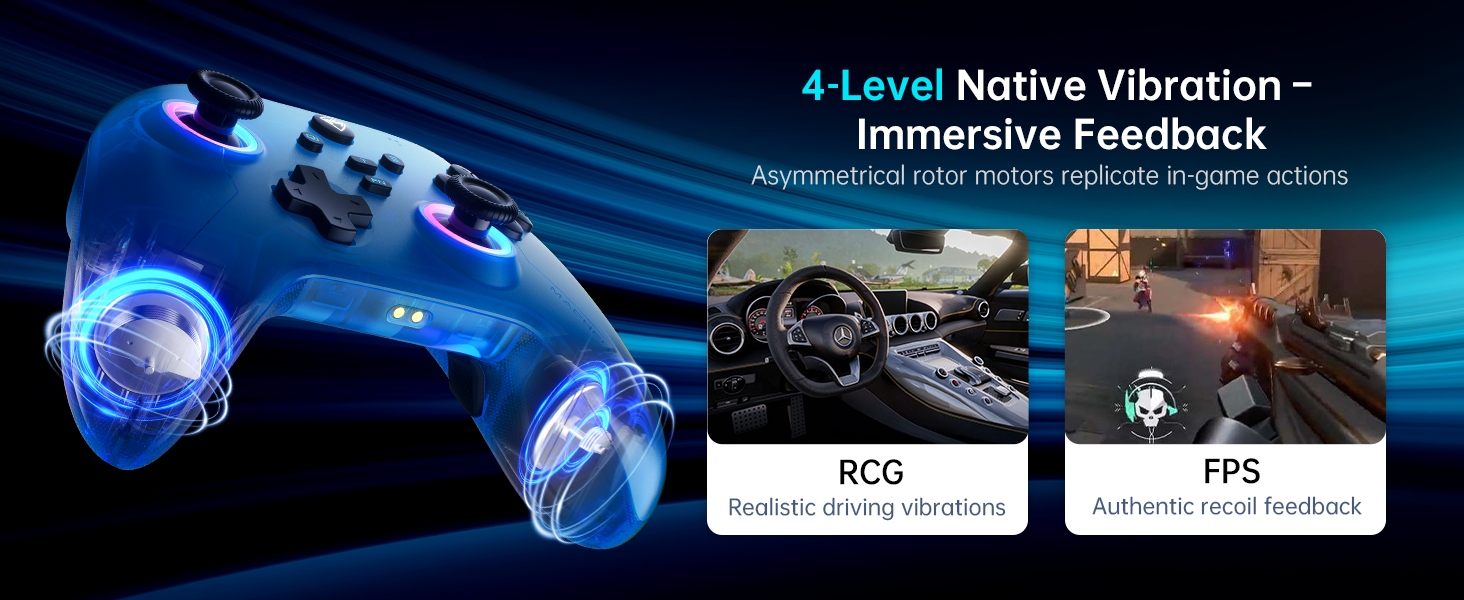
Image: The Machenike G3V2 controller resting on its dedicated charging dock, ready for an instant power boost.
6. Compatibilità
- Piattaforme supportate: Nintendo Switch, Switch 2, iOS, Android, Windows PC.
- Non compatibile con: Xbox, PlayStation, or GeForce Now.
- For other game platforms not explicitly mentioned, please consult customer service before purchase.
7. Manutenzione
- Pulizia: Utilizzare un panno morbido e asciutto per pulire il controller. Evitare l'uso di prodotti chimici aggressivi o materiali abrasivi.
- Magazzinaggio: Conservare il controller in un luogo fresco e asciutto, lontano dalla luce solare diretta e da temperature estreme.
- Cura della batteria: Per prolungare la durata della batteria, evitare di scaricare completamente il controller frequentemente. Caricarlo regolarmente, anche se non lo si utilizza per lunghi periodi.
8. Risoluzione Dei Problemi
- Il controller non si connette:
- Assicurarsi che il controller sia completamente carico.
- Verify the correct pairing mode is activated for your device (e.g., Y+Home for Switch).
- On your device, try forgetting the controller from Bluetooth settings and re-pairing.
- For PC, try connecting via the 2.4G dongle or wired connection. - Deriva o imprecisione del joystick:
- Perform joystick calibration as described in Section 4.2. - Trigger Issues:
- Perform trigger calibration as described in Section 4.2. - I pulsanti non rispondono:
- Ensure the controller is properly connected.
- Check if any programmable back buttons (M1/M2) have unintended assignments (clear them if necessary).
- Reconnect the controller. - Problemi di ricarica:
- Ensure the charging dock or USB-C cable is properly connected.
- Prova un cavo USB-C o un adattatore di alimentazione diverso.
9. Specifiche
| Caratteristica | Dettaglio |
|---|---|
| Numero di modello | PE-Aggiornamento |
| ASIN | B0F93RPT5H |
| Produttore | Macchinari |
| Peso dell'articolo | 0.529 once |
| Dimensioni del pacco | 6.93 x 6.46 x 3.23 pollici |
| Batterie | 1 batteria ai polimeri di litio (inclusa) |
| Connettività | Bluetooth, wireless 2.4G, cablato (USB-C) |
| Tasso di sondaggio | 1000 Hz |
| Joystick | Hall Effect, Adjustable Tension (40-80gf) |
| Trigger | Hall Effect, 255 Levels, Millimeter Precision |
| Pulsanti programmabili | 2 Back Buttons (M1, M2) |
| Vibrazione | Feedback di vibrazione nativa a 4 livelli |
10. Garanzia e supporto
Machenike products are designed for durability and performance. For warranty information, technical support, or service inquiries, please refer to the official Machenike websito o contattare direttamente il servizio clienti. Conservare la ricevuta d'acquisto per eventuali reclami in garanzia.
Risorse online e FAQ potrebbero essere disponibili anche su Negozio Machenike su Amazon.


