1. Introduzione
This manual provides essential information for the safe and efficient operation of your Anern 4200W Hybrid Solar Inverter. Please read this manual thoroughly before installation and use. Keep it for future reference.
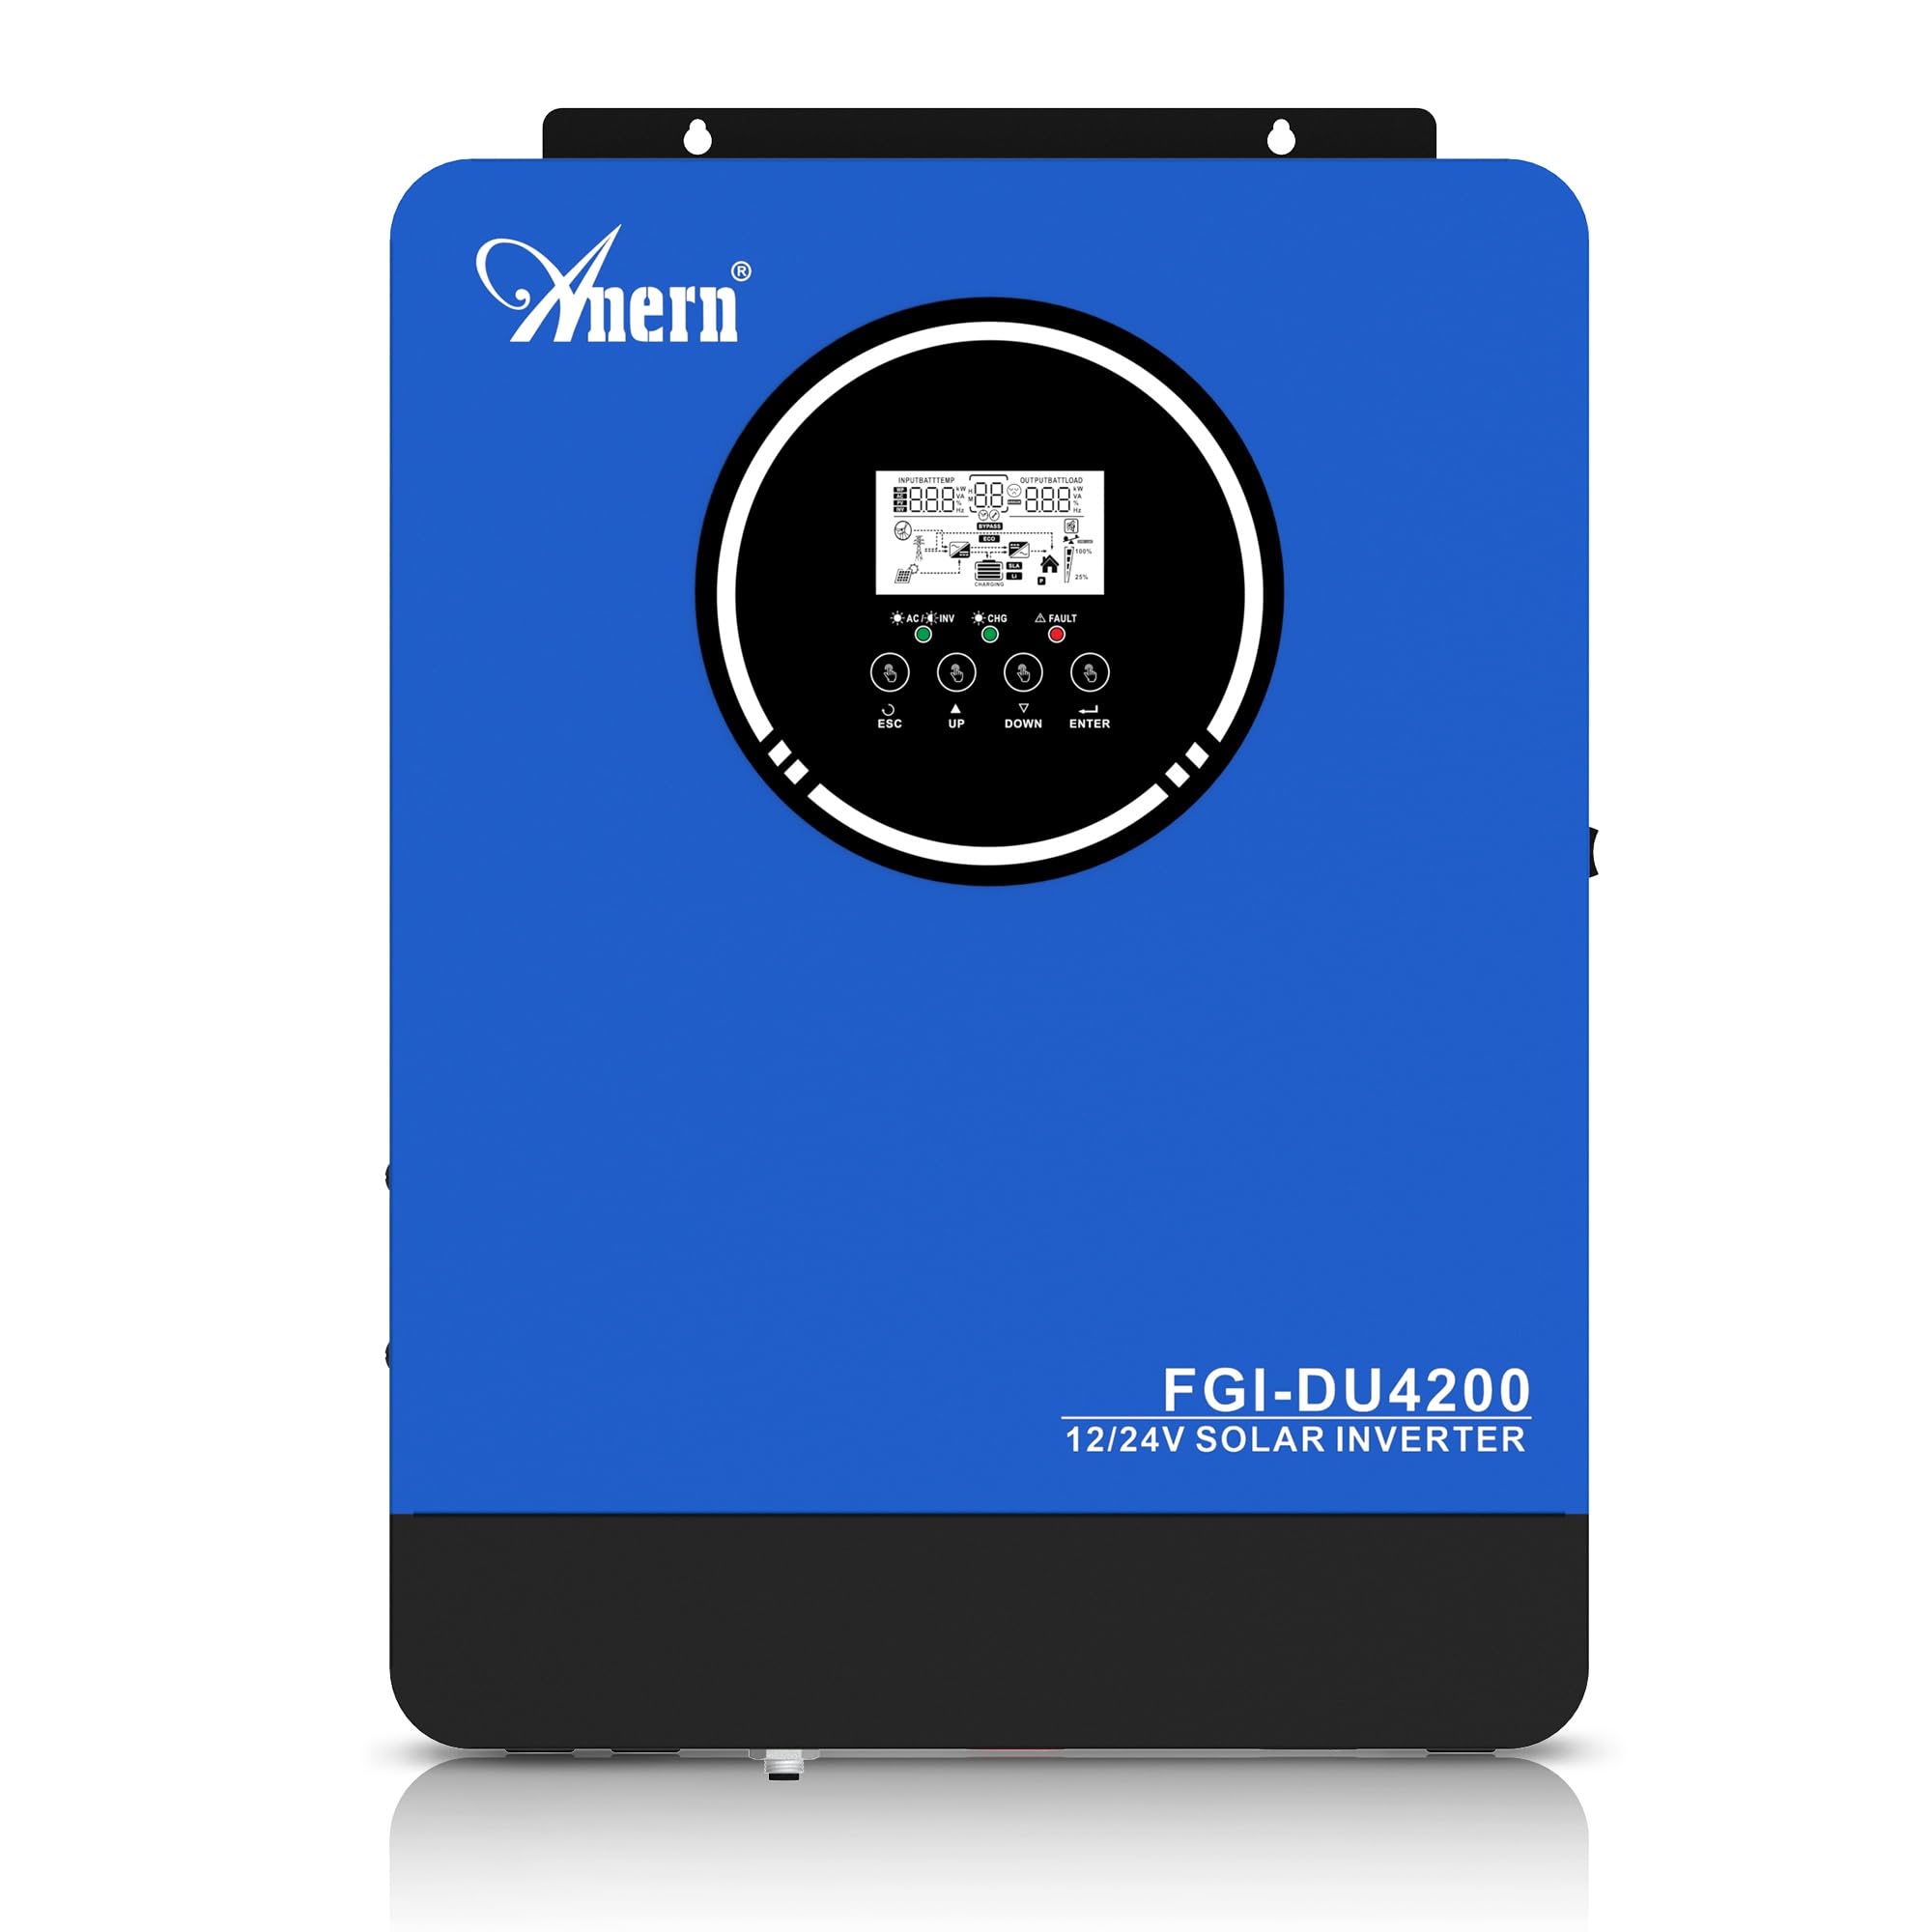
Figure 1: Anern 4200W Hybrid Solar Inverter. This image displays the main unit of the inverter, highlighting its key specifications such as 100A AC charging current, 4200W rated output power, and 500 VDC maximum PV array voltage.
2. Istruzioni di sicurezza
Per ridurre il rischio di scosse elettriche, incendi o lesioni, osservare sempre le seguenti precauzioni di sicurezza:
- L'installazione deve essere eseguita da personale qualificato.
- Ensure all wiring is correctly connected and equipped with appropriate protective switches.
- Non smontare l'inverter. All'interno non ci sono parti riparabili dall'utente.
- Evitare di esporre l'inverter a pioggia, neve, spruzzi o altri liquidi.
- Assicurare un'adeguata ventilazione attorno all'inverter per evitare il surriscaldamento.
- Scollegare tutte le fonti di alimentazione (fotovoltaico, batteria, rete elettrica) prima di eseguire qualsiasi operazione di manutenzione o cablaggio.
3. Prodotto finitoview
The Anern 4200W Hybrid Solar Inverter is designed to convert DC power from solar panels and batteries into AC power for household use. It features an integrated 100A MPPT solar charge controller and supports both 12V and 24V battery systems with automatic detection.
Caratteristiche principali:
- Uscita onda sinusoidale pura da 4200 W: Fornisce un'alimentazione stabile e pulita per dispositivi elettronici sensibili.
- Regolatore di carica solare MPPT 100A: Massimizza la raccolta di energia dai pannelli solari.
- 12V/24V Battery Auto-Detection: Automatically adjusts output based on connected battery voltage.
- Interfaccia BMS: Supports communication with lithium batteries for enhanced monitoring and protection.
- Display LED in tempo reale: Shows system status, operating data, and error codes.
- Configurable Charging & Output Modes: Offers flexibility for various application needs.
- Monitoraggio WiFi/GPRS opzionale: Remote monitoring capability (module sold separately).

Figure 2: Inverter Display and Controls. This image illustrates the inverter's LCD display, function buttons for configuration, and the optional WiFi module for remote monitoring.
4. Configurazione e installazione
4.1 Schema elettrico
Refer to the electrical schematic for proper system wiring. Ensure all connections are secure and correctly polarized.

Figure 3: Electrical Schematic. This diagram shows the complete wiring for a solar inverter system, including solar panels, combiner box, DC/AC breakers, inverter, utility grid connection, and loads.
4.2 Collegamento della batteria
The inverter supports 12V and 24V battery configurations. It automatically detects the battery voltage and adjusts its output accordingly (2300W for 12V, 4200W for 24V). For 24V systems, connect two 12V batteries in series. For 12V systems, connect batteries in parallel if increasincapacità g.

Figure 4: Battery Connection Options. This image illustrates how to connect batteries for 12V (parallel connection for 2300W output) and 24V (series connection for 4200W output) systems.
The inverter also supports lithium batteries and includes a BMS (Battery Management System) interface for monitoring and protection. Ensure the BMS is properly connected if using lithium batteries.

Figure 5: Communication Interfaces. This image highlights the dual communication interfaces for BMS (Battery Management System) and optional WiFi module, enabling remote monitoring and battery communication.
4.3 Sequenza di avvio e spegnimento
Sequenza di avvio:
- Collegare la batteria.
- Accendere l'inverter.
- Activate the protective switches for PV, Utility, and Loads.
Sequenza di spegnimento:
- Deactivate the protective switches for Loads, Utility, and PV.
- Spegnere l'inverter.
- Scollegare la batteria.
Important Note: Inductive loads (e.g., motors, refrigerators) may require up to 3 times their rated power for startup. Ensure the inverter's capacity is sufficient to handle these surge loads. Exceeding the inverter's surge capacity can cause damage.
5. Funzionamento
5.1 Display LCD e impostazioni
The inverter features an LED display that provides real-time system data and operating status. Use the function buttons below the display to navigate menus and configure settings. Settings include battery charging current, AC/solar charging priority, and charging current priority.
5.2 modalità di ricarica
L'inverter offre quattro modalità di ricarica configurabili:
- Priorità solare: Per la ricarica si dà priorità all'energia solare.
- Solo solare: Per la ricarica viene utilizzata solo l'energia solare.
- Priorità di utilità: Utility grid power is prioritized for charging.
- Solar + Utility Hybrid: Combina l'energia solare e quella di rete per la ricarica.
5.3 modalità di uscita
Three output modes are available to adapt to various application needs:
- Priorità solare (SUB): Solar power is prioritized for loads.
- Priorità di utilità (USB): Utility grid power is prioritized for loads.
- SBU: Solar, Battery, Utility priority.

Figure 6: Charging and Output Modes. This diagram visually explains the four available charging modes (Solar Charge, Utility Priority, Solar Priority, Hybrid Charge) and three load output modes (PV Priority, Utility Priority, SBU Priority).
5.4 Monitoraggio remoto
The inverter supports remote monitoring via an optional WiFi/GPRS module (sold separately). This allows users to monitor system performance and status from a distance.
6. Manutenzione
Una manutenzione regolare garantisce prestazioni ottimali e longevità del vostro inverter:
- Mantenere l'inverter pulito e privo di polvere. Utilizzare un panno asciutto per la pulizia.
- Assicurarsi che le aperture di ventilazione non siano ostruite.
- Controllare periodicamente tutti i collegamenti elettrici per verificarne la tenuta e l'assenza di segni di corrosione.
- Monitor the battery status, especially if using lithium batteries with the BMS interface, to prevent overcharge or deep discharge.
- Inspect solar panels for dirt or damage that could reduce efficiency.
7. Risoluzione Dei Problemi
The LED display will show error codes if issues arise. Refer to the inverter's display for specific error codes to diagnose and resolve problems. Common issues and their potential solutions include:
- Nessuna potenza in uscita: Check battery connections, DC/AC breakers, and inverter power switch.
- Batteria scaricatage: Ensure batteries are adequately charged. Check charging sources (solar, utility).
- Avviso di sovraccarico: Reduce the connected load. Inductive loads may cause temporary overloads during startup.
- Surriscaldamento: Ensure proper ventilation. Clean any dust from the inverter's vents.
- Errore di ingresso PV: Controllare i collegamenti del pannello solare e il volumetage. Ensure PV array voltage rientra nell'intervallo specificato (55-500 V CC).
Per problemi persistenti o codici di errore non elencati, contattare l'assistenza clienti.
8. Specifiche tecniche
| Caratteristica | Specificazione |
|---|---|
| Marca | Anern |
| Numero di modello | AN-FGI-DU 4200 |
| Energia elettrica | 4200 Watt |
| Potenza di uscita | 4500 Watt |
| Max. Output Power (Watts) | 4200 |
| Forma d'onda di uscita | Onda sinusoidale pura |
| Fonte di alimentazione | Alimentato a energia solare, alimentato a batteria |
| Usi consigliati del prodotto | Casa |
| Componenti inclusi | Manuale di istruzioni |
| Conformità | CE |
| Dimensioni del prodotto | Dimensioni: 30 x 10 x 40 cm; 8.86 kg |
9. Garanzia e supporto
For warranty information and technical support, please refer to the documentation provided with your purchase or contact Anern customer service. Keep your purchase receipt as proof of purchase.


