1. Introduzione
The EPOMAKER EK21 is a versatile and highly functional numeric keypad designed for enhanced productivity and gaming. It features a 20-key layout with an aluminum alloy knob, hot-swappable switches, and customizable RGB lighting. The EK21 supports triple connectivity modes (wired, Bluetooth 5.0, and 2.4GHz wireless) and is programmable via VIA software, offering seamless compatibility across Windows, Mac, and Android operating systems.
2. Contenuto della confezione
Si prega di verificare che tutti gli articoli siano presenti nel pacco:
- EPOMAKER EK21 VIA Guarnizione Numero Pad
- 2-in-1 Keycap-and-Switch Puller
- 1.8m Detachable USB A-to-C Braided Cable
- Chiavetta wireless da 2.4 GHz
- Manuale d'uso
- Extra “Back” Keycap

Figure 2.1: Contents included in the EPOMAKER EK21 package.
3. Prodotto finitoview
The EK21 is a 20-key mechanical number pad featuring a gasket-mounted design for a comfortable typing experience. It includes an aluminum alloy knob for versatile control and per-key RGB backlighting. The device supports hot-swappable switches, allowing users to easily change switches without soldering.

Figura 3.1: Oltreview of the EPOMAKER EK21 Number Pad and its key features.
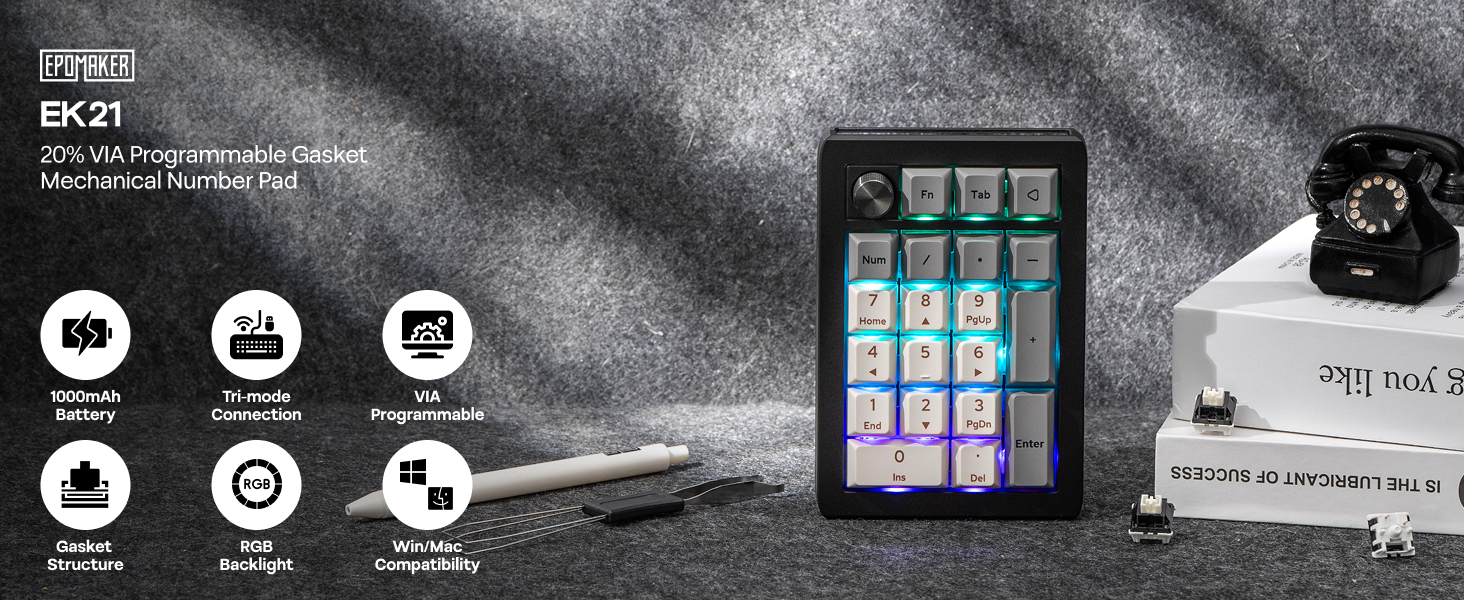
Figure 3.2: EPOMAKER EK21 VIA Mechanical Numpad.
4. Impostazione
The EK21 offers three connectivity options: wired, 2.4GHz wireless, and Bluetooth. Choose the method that best suits your needs.
4.1. Connessione cablata
- Connect the provided USB A-to-C cable to the USB-C port on the EK21.
- Collega l'estremità USB-A del cavo a una porta USB disponibile sul computer.
- Ensure the mode switch on the side of the numpad is set to 'USB'. The device will be recognized automatically.
4.2. Connessione wireless a 2.4 GHz
- Individuare il dongle wireless da 2.4 GHz nella confezione.
- Collega il dongle a una porta USB disponibile sul tuo computer.
- Set the mode switch on the side of the numpad to '2.4G'. The device should connect automatically.
4.3. Connessione Bluetooth 5.0
- Set the mode switch on the side of the numpad to 'BT'.
- Sul tuo computer o dispositivo, attiva il Bluetooth e cerca nuovi dispositivi.
- Select 'EPOMAKER EK21' from the list of available devices to pair.
- The EK21 supports up to three Bluetooth devices. Switch between paired devices using Fn + Q/W/E.

Figure 4.1: Tri-Mode Connectivity options for the EK21.

Figure 4.2: Convenient Connectivity Hub on the EK21.
5. Istruzioni per l'uso
5.1. Funzioni base dei tasti
The EK21 functions as a standard numeric keypad. Keys are pre-programmed for numerical input, arithmetic operations, and navigation (Home, End, PgUp, PgDn, Ins, Del).
5.2. Multi-functional Aluminum Alloy Knob
The aluminum alloy knob provides quick access to various functions. By default, it controls volume:
- Ruota in senso orario: alza il volume
- Rotate counter-clockwise: Volume Down
- Premere: Muto/Riattiva
The knob's functionality can be customized using the VIA software (see Section 6).

Figure 5.1: Functions of the Multi-functional Aluminum Alloy Knob.
5.3. Combinazioni di tasti funzione
Utilize the 'Fn' key for additional controls:
- Fn + . (dot key): Controllo della batteria
- Fn + Invio: Attiva/disattiva l'effetto retroilluminazione
- Fn + - / +: Regola la luminosità della retroilluminazione

Figure 5.2: Dynamic RGB Backlight and Function Key Combinations.
6. Customization with VIA Software
The EK21 is fully programmable via VIA software, allowing you to customize key assignments, create macros, and fine-tune the knob's functionality. This feature enables you to adapt the numpad to your specific workflow or gaming setup.
- Scarica il software VIA: Visita il sito ufficiale EPOMAKER websito o VIA website to download the latest version of the VIA software.
- Scarica JSON File: Obtain the specific JSON keymap file per l'EK21 dell'EPOMAKER webluogo. Questo file is necessary for VIA to recognize and configure your numpad.
- Carica mappa tasti: Open the VIA software. If the EK21 is not automatically detected, load the downloaded JSON file manually within the software.
- Personalizza: Once recognized, you can remap any key, create complex macros, and assign custom functions to the aluminum alloy knob. Changes are applied in real-time.
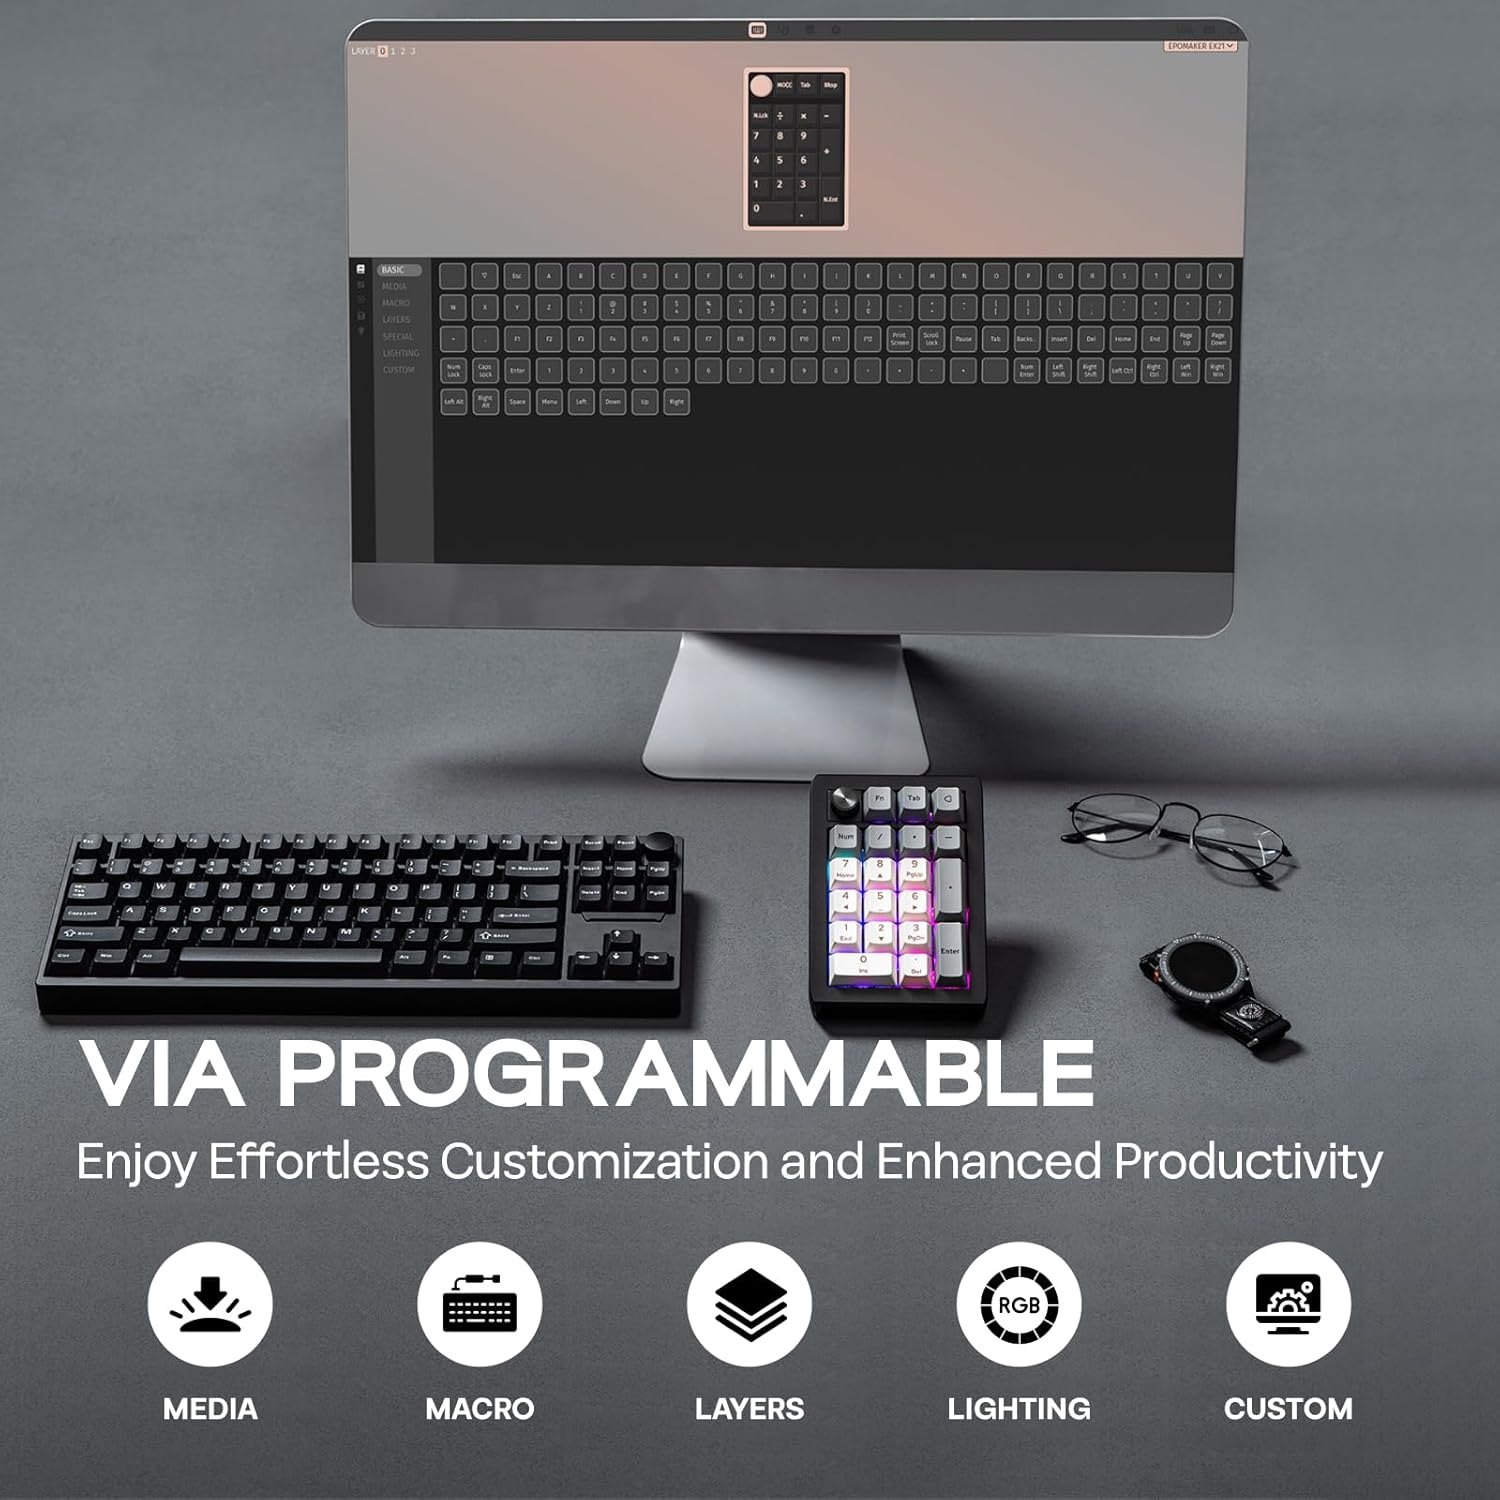
Figure 6.1: VIA Programmable features for effortless customization.
7. Dynamic RGB Backlight
The EK21 features per-key RGB backlighting, allowing for various lighting effects and colors. You can adjust these settings directly on the numpad using function key combinations or through the VIA software for more advanced customization.
- Toggle Effects: Use Fn + Enter to cycle through different backlight effects.
- Regola luminosità: Use Fn + - (minus) and Fn + + (plus) to increase or decrease backlight brightness.

Figure 7.1: Per-Key RGB Backlight in action.
Video 7.1: Demonstration of the EK21 VIA Numeric Keypad's lighting display.
8. Gestione della batteria
The EK21 is equipped with a 1000mAh battery, providing extended usage in wireless modes. The battery status can be checked using a function key combination.
- Controllo della batteria: Press Fn + . (dot key) to check the current battery level. The RGB lighting may indicate the charge status.
- Ricarica: Connect the numpad to a power source using the provided USB-C cable. The device can be used while charging.

Figure 8.1: The EK21 features a 1000mAh battery for extended use.

Figure 8.2: The 1000mAh battery ensures powerful and lasting performance.
9. Comfort ed ergonomia
The EK21 is designed with user comfort in mind, incorporating several features to enhance the typing experience and reduce fatigue.
- Struttura della guarnizione: The gasket-mounted design provides a cushioned and flexible typing feel, reducing harsh impacts and improving sound profile.
- Poron Bottom Layer & Sandwich Foam: These internal layers absorb sound and vibrations, contributing to a quieter and more pleasant typing sound.
- IXPE Switch Pad: Further enhances the typing feel by providing a soft landing for switches.
- Finely Tuned Stabilizers: Ensures consistent and stable key presses, especially for larger keys like 'Enter' and '0'.
- PC Plate with CNC Cutting: Offers a robust and aesthetically pleasing finish, contributing to the overall durability.

Figure 9.1: Internal structure and components contributing to comfort and sound.
Figura 9.2: Esploso view of the EK21's gasket-mount construction.
10. Manutenzione
10.1. Pulizia
To maintain the longevity and appearance of your EK21, regular cleaning is recommended:
- Use a soft, dry cloth to wipe the surface of the numpad.
- Per una pulizia più approfondita, rimuovere i tasti utilizzando l'apposito estrattore in dotazione.
- Utilizzare aria compressa per rimuovere polvere e detriti dagli spazi tra gli interruttori.
- Keycaps can be cleaned with mild soap and water, ensuring they are completely dry before reattaching.
10.2. Switch hot-swap
The EK21 features hot-swappable sockets, allowing you to change mechanical switches without soldering. Use the provided switch puller for this process:
- Gently grip the switch with the switch puller and pull upwards until it detaches from the PCB.
- Allineare i pin del nuovo interruttore con i fori sul PCB.
- Premere con decisione finché l'interruttore non scatta in posizione. Assicurarsi che i perni non siano piegati durante l'inserimento.

Figure 10.1: Hot-swappable switches allow for easy customization and maintenance.
11. Risoluzione Dei Problemi
If you encounter issues with your EK21, try the following troubleshooting steps:
- Problemi di connettività:
- Ensure the mode switch is set correctly (USB, 2.4G, or BT).
- For 2.4GHz, ensure the dongle is securely plugged in.
- For Bluetooth, ensure your device's Bluetooth is enabled and the numpad is paired. Try re-pairing if necessary.
- Prova a connetterti tramite cavo USB-C per escludere problemi di connettività wireless.
- VIA Software Not Recognizing Device:
- Ensure the numpad is connected via USB-C cable. VIA typically requires a wired connection for initial setup and flashing.
- Verify you have downloaded and loaded the correct EK21 JSON file in the VIA software.
- Riavviare il software VIA e/o il computer.
- Retroilluminazione RGB non funzionante:
- Check backlight brightness using Fn + + (plus).
- Toggle backlight effects using Fn + Enter.
- Ensure the numpad is sufficiently charged if in wireless mode.
- I tasti non rispondono:
- If only specific keys are affected, try hot-swapping the switch with a known working one to check if the switch is faulty.
- Assicurarsi che gli interruttori siano completamente inseriti nelle rispettive prese.
12. Specifiche
| Caratteristica | Dettaglio |
|---|---|
| Dimensioni del prodotto | 3.66 x 5.43 x 1.14 pollici (9.3 x 13.8 x 2.9 cm) |
| Peso dell'articolo | 13.4 once (0.38 kg) |
| Tecnologia di connettività | Wireless a 2.4 GHz, Bluetooth 5.0, USB-C cablato |
| Capacità della batteria | 1000mAh |
| Descrizione della tastiera | Meccanico |
| Caratteristiche speciali | Backlit (RGB), Ergonomic, Hot-Swappable PCB, Lightweight, VIA Programmable |
| Dispositivi compatibili | Laptop, PC, Smartphone, Tablet (Windows, Mac, Android) |
| Materiale del copritastiera | PBT subcolorante |
| Materiale della piastra | PC (Polycarbonate) with CNC Cutting |
| Struttura interna | Gasket Mount with Poron bottom layer, sandwich foam, IXPE switch pad |

Figure 12.1: Dimensions and Weight of the EK21 Number Pad.

Figure 12.2: Switch Specifications for the EK21.
13. Garanzia e supporto
EPOMAKER products come with a standard manufacturer's warranty. For specific warranty details, duration, and terms, please refer to the warranty information provided with your purchase or visit the official EPOMAKER websito. In caso di problemi o se si necessita di assistenza tecnica, contattare l'assistenza clienti EPOMAKER tramite i canali ufficiali.
EPOMAKER Support: https://www.epomaker.com/pages/contact-us


