Introduzione
The FEELWORLD FW759PRO is a 7-inch full HD IPS touchscreen camera monitor designed to enhance your video production workflow. It features a 1280x800 resolution, 1000:1 contrast ratio, and a 178° ultra-wide viewing angle, providing a clear and detailed display for precise monitoring. This manual will guide you through the setup, operation, and maintenance of your FW759PRO monitor.
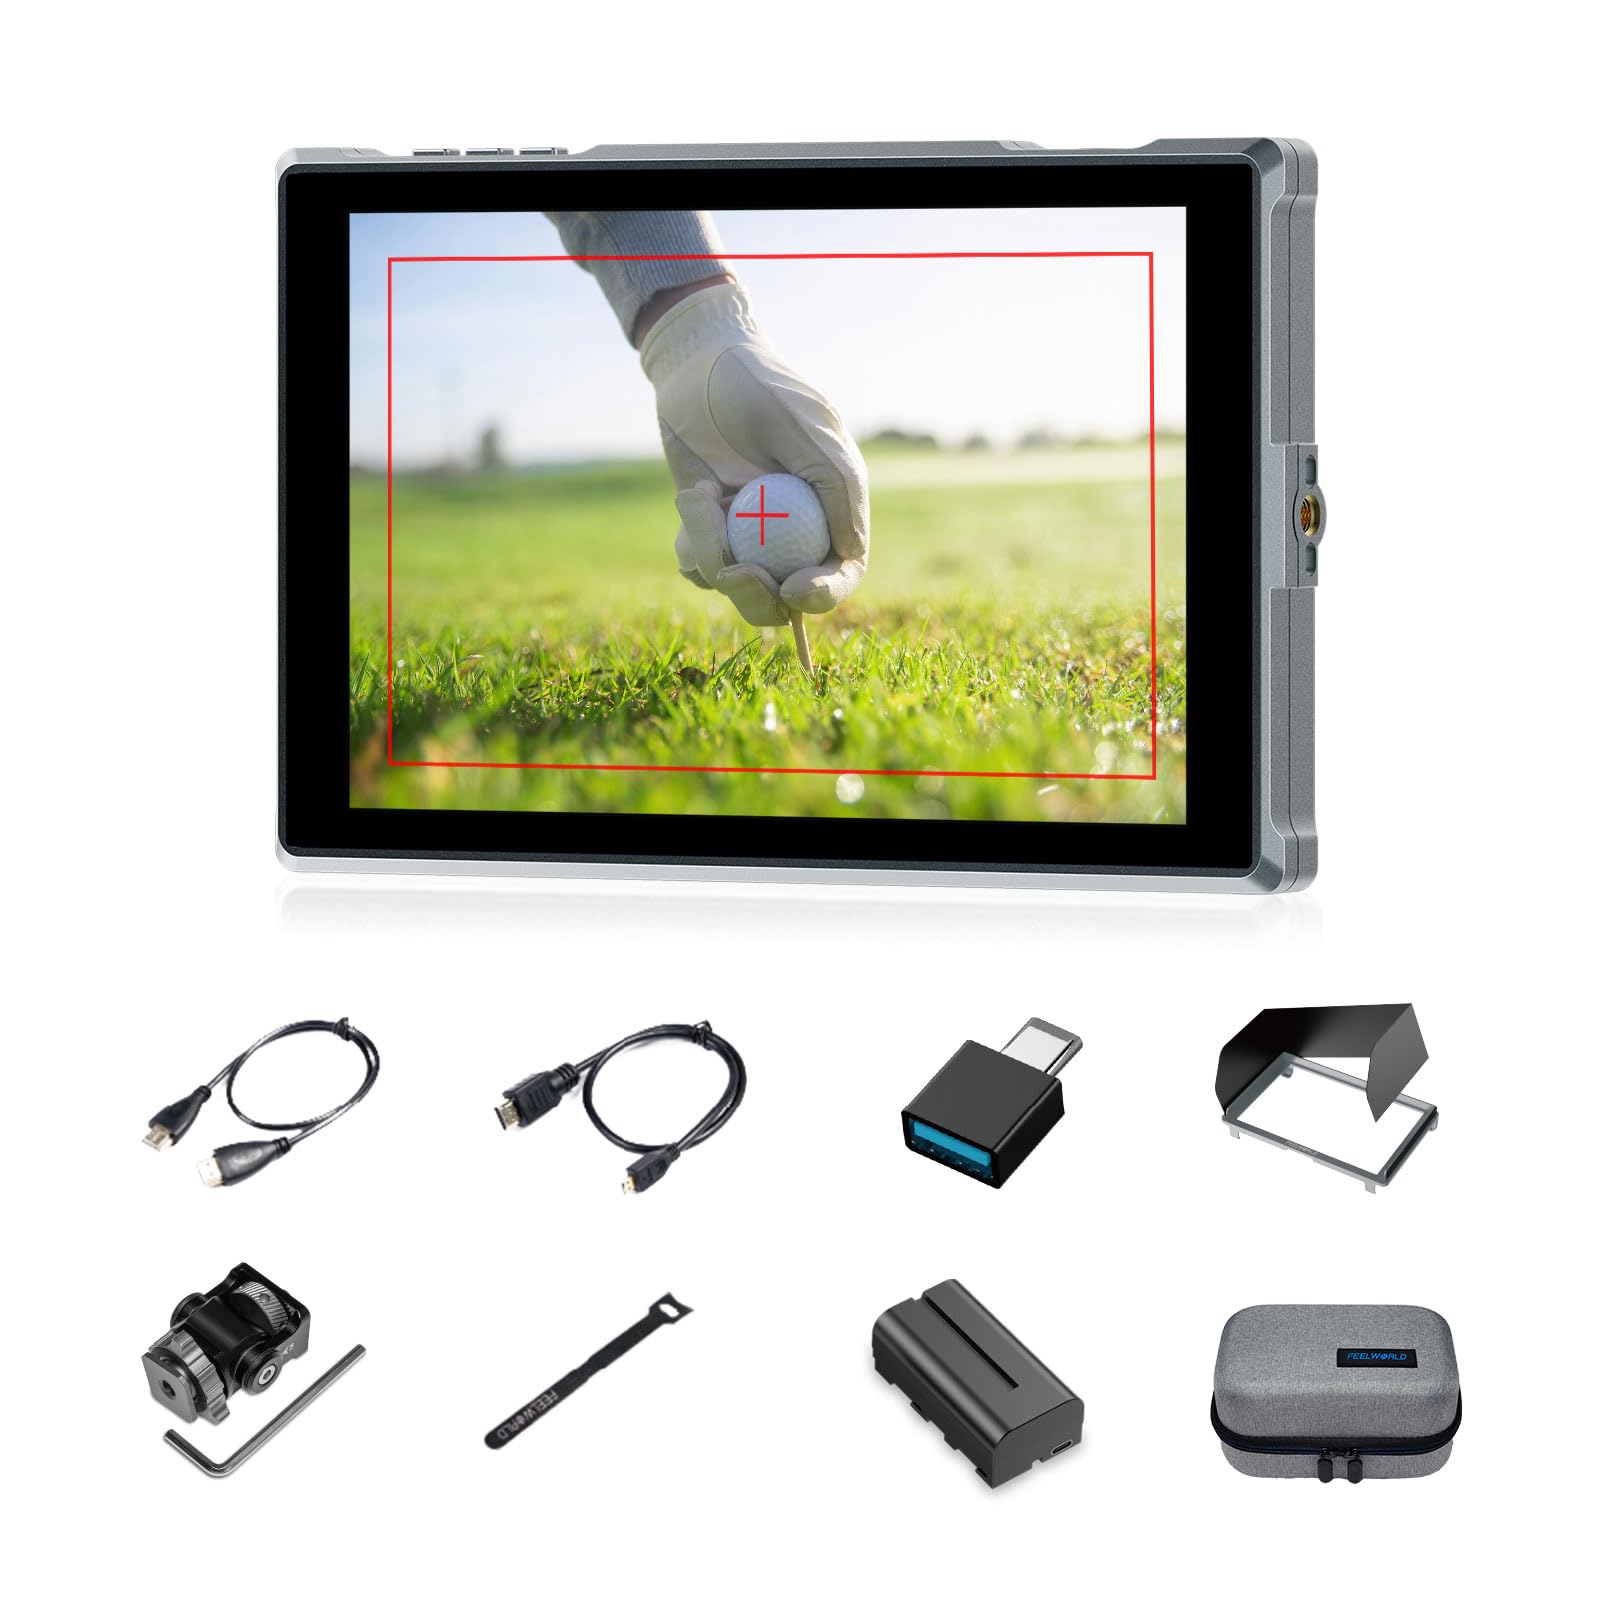
Figure 1: FEELWORLD FW759PRO Monitor Overview
Caratteristiche principali:
- 7-inch Full HD IPS Touchscreen (1280x800 resolution)
- 4K HDMI Input & Output (up to 4K30Hz) and AV Input
- Slim and Lightweight Design (22mm thickness, 300g weight)
- Multiple Power Options: NP-F series battery, 12V DC IN, 5V Type-C
- Advanced Monitoring Functions: Histogram, Embedded Audio, False Colors, Peaking Filter, etc.
- Customizable Features: 4 groups of menu settings, 9:16 vertical screen marker
Impostare
1. Contenuto della confezione
Verificare che tutti gli articoli siano presenti nel pacco:
- 1 x FW759PRO Monitor
- 1 cavo HDMI
- 1 x Micro HDMI Cable
- 1 x Mini Hot Shoe Mount + Hex Wrench
- 1 adattatore da USB-A a USB-C
- 1 x Sun Shade + Frame
- 1 fascetta per la gestione dei cavi
- 1 x Guida rapida
- 1 x F550 Battery
- 1 x Borsa

Figura 2: Accessori inclusi
2. Accensione del monitor
The FW759PRO offers three power options:
- Batteria serie NP-F: Attach a compatible NP-F series battery to the battery plate on the rear of the monitor.
- INGRESSO CC 12V: Connect a 12V DC power adapter (not included, suitable for 1A, DC 5.5*2.1mm plug) to the "DC IN 12V" port.
- 5V Tipo-C: Connect a 5V/2A (or higher) Type-C power source to the "TYPE-C 5V" port.

Figura 3: Opzioni di ingresso alimentazione
3. Montaggio del monitor
The monitor features two 1/4"-20 mounting ports on its sides for versatile attachment to camera rigs, arms, or tripods. Use the included mini hot shoe mount to attach it to your camera's hot shoe or cold shoe mount.

Figure 4: 1/4 Inch Mounting Ports
4. Connecting to a Camera/Device
The FW759PRO supports 4K HDMI and AV inputs:
- Ingresso HDMI: Connect your camera or video source using an HDMI cable to the HDMI port. The monitor supports up to 4K30Hz signals.
- Ingresso AV: For specialized or legacy devices, use the AV input port.

Figura 5: Porte di connettività
Istruzioni per l'uso
1. Accensione/spegnimento
Press and hold the power button located on the top edge of the monitor to turn it on or off.
2. Funzionamento del touchscreen
The FW759PRO features an intuitive touchscreen interface for menu navigation and function control.
- Regola la retroilluminazione: Swipe up/down on the left half of the screen.
- Regola volume: Swipe up/down on the right half of the screen.
- Access Shortcut Menu: Swipe up/down on the bottom of the screen.

Figure 6: Touchscreen Gestures
3. Menu Navigation and Custom Buttons
Access the main menu by tapping the screen. Navigate through options using touch. The monitor also features customizable function buttons (F1, F2, F3) on the top edge, allowing quick access to frequently used features.

Figure 7: Menu and Custom Buttons
4. Advanced Monitoring Functions
The FW759PRO includes several tools for precise exposure and focus control:
- Istogramma: Visualizza la distribuzione tonale dell'immagine.
- Filtro di picco: Evidenzia i bordi netti per facilitare la messa a fuoco.
- Audio incorporato: Monitors audio levels.
- Falsi colori: Helps set exposure by displaying different exposure levels as distinct colors.
- Controlla campo: Assists in calibrating the monitor.
- Griglia Nove: Aids in composition.
- Marcatore dello schermo: Various aspect ratio markers for framing.
- Indicatore centrale: Marks the center of the screen.
- Marcatore di rapporto: Provides different aspect ratio guides.
- Sovrascansione: Regola l'area di visualizzazione.
- Modalità anamorfica: De-comprime il cibo anamorficotage (1.33x, 1.6x, 2.0x, or custom).
- Capovolgimento immagine: Capovolge l'immagine orizzontalmente o verticalmente.
- Blocco immagine: Blocca il fotogramma corrente.
- Ingrandire: Ingrandisce una parte dell'immagine per un'ispezione dettagliata.
- Pixel-to-Pixel: Visualizza l'immagine alla sua risoluzione nativa senza ridimensionamento.

Figure 8: Auxiliary Functions Overview

Figure 9: False Color Function

Figure 10: Anamorphic Mode
5. New Feature Upgrades
- 9:16 Vertical Screen Marker: Ideal for content creators producing vertical video for platforms like TikTok and YouTube Shorts.
- 4 Groups Menu Setting Saving: Save up to four custom menu configurations for quick recall. Once settings are adjusted, they save automatically and can be called directly.

Figure 11: 9:16 Vertical Screen Marker
Manutenzione
1. Pulizia del monitor
- Use a soft, lint-free cloth to gently wipe the screen and body of the monitor.
- Per macchie ostinate, leggermente dampPulisci il panno con acqua o con una soluzione detergente adatta allo schermo.
- Evitare l'uso di prodotti chimici aggressivi, solventi o materiali abrasivi, poiché potrebbero danneggiare lo schermo o la finitura.
2. Cura della batteria
- Conservare le batterie in un luogo fresco e asciutto quando non vengono utilizzate.
- Avoid fully discharging lithium-ion batteries frequently to prolong their lifespan.
- In caso di stoccaggio prolungato, caricare le batterie fino a circa il 50-60% della loro capacità.
Risoluzione dei problemi
Nessun segnale visualizzato
- Controllare i collegamenti dei cavi: Ensure HDMI or AV cables are securely connected to both the monitor and the camera/source.
- Verifica origine input: Confirm that the correct input source (HDMI or AV) is selected on the monitor.
- Camera Output Settings: Check your camera's video output settings to ensure it is sending a signal and that the resolution/frame rate is compatible with the monitor (up to 4K30Hz).
- Prova con un altro cavo/dispositivo: If possible, try a different HDMI/AV cable or connect the monitor to another video source to isolate the issue.
Monitor Does Not Power On
- Controllare la batteria: Ensure the NP-F battery is charged and correctly installed.
- Verifica adattatore di alimentazione: If using DC IN or Type-C, confirm the power adapter is connected and providing sufficient power (12V DC IN, 5V/2A Type-C).
- Pulsante di accensione: Assicurarsi che il pulsante di accensione sia premuto e tenuto premuto per alcuni secondi per avviare l'accensione.
Touchscreen non responsivo
- Restart Monitor: Power off and then power on the monitor.
- Schermo pulito: Assicurarsi che lo schermo sia pulito e privo di detriti o umidità che potrebbero interferire con l'input touch.
Specifiche
| Caratteristica | Dettaglio |
|---|---|
| Marca | Feelworld |
| Nome del modello | FW759PRO |
| Dimensioni dello schermo | 7 pollici |
| Risoluzione | 1280x800 |
| Proporzioni | 16:10 |
| Rapporto di contrasto | 1000:1 |
| Tipo di visualizzazione | Informazione pubblica |
| Viewangolo di ing | 178 gradi |
| Tecnologia di connettività | Auxiliary, HDMI |
| Connettività Hardware | Cavo HDMI |
| Caratteristiche aggiuntive | Touchscreen, Portable |
| Tempo di risposta | 2 millisecondi |
| Numero totale di porte HDMI | 2 |
| Produttore | LAIZESKE |
Garanzia e supporto
Informazioni sulla garanzia
The FEELWORLD FW759PRO monitor comes with a Garanzia di 1 anno dalla data di acquisto. La presente garanzia copre difetti di fabbricazione e malfunzionamenti in condizioni di normale utilizzo. Si prega di conservare la prova d'acquisto per eventuali reclami in garanzia.
For detailed warranty terms and conditions, please refer to the official FEELWORLD websito o contattare il servizio clienti.
Assistenza clienti
If you encounter any issues not covered in this manual or require further assistance, please contact FEELWORLD customer support. Contact information can typically be found on the official FEELWORLD websito o nella Guida rapida inclusa nel prodotto.


