1. Introduzione
This manual provides essential instructions for the installation, operation, and maintenance of your Aninerel 3000W Hybrid Solar Inverter, model ANJ-3KW-LV-WIFI. This device is designed to convert 24V DC power to 110V AC pure sine wave power, suitable for various off-grid and backup power applications. Please read this manual thoroughly before installation and use to ensure safe and efficient operation.
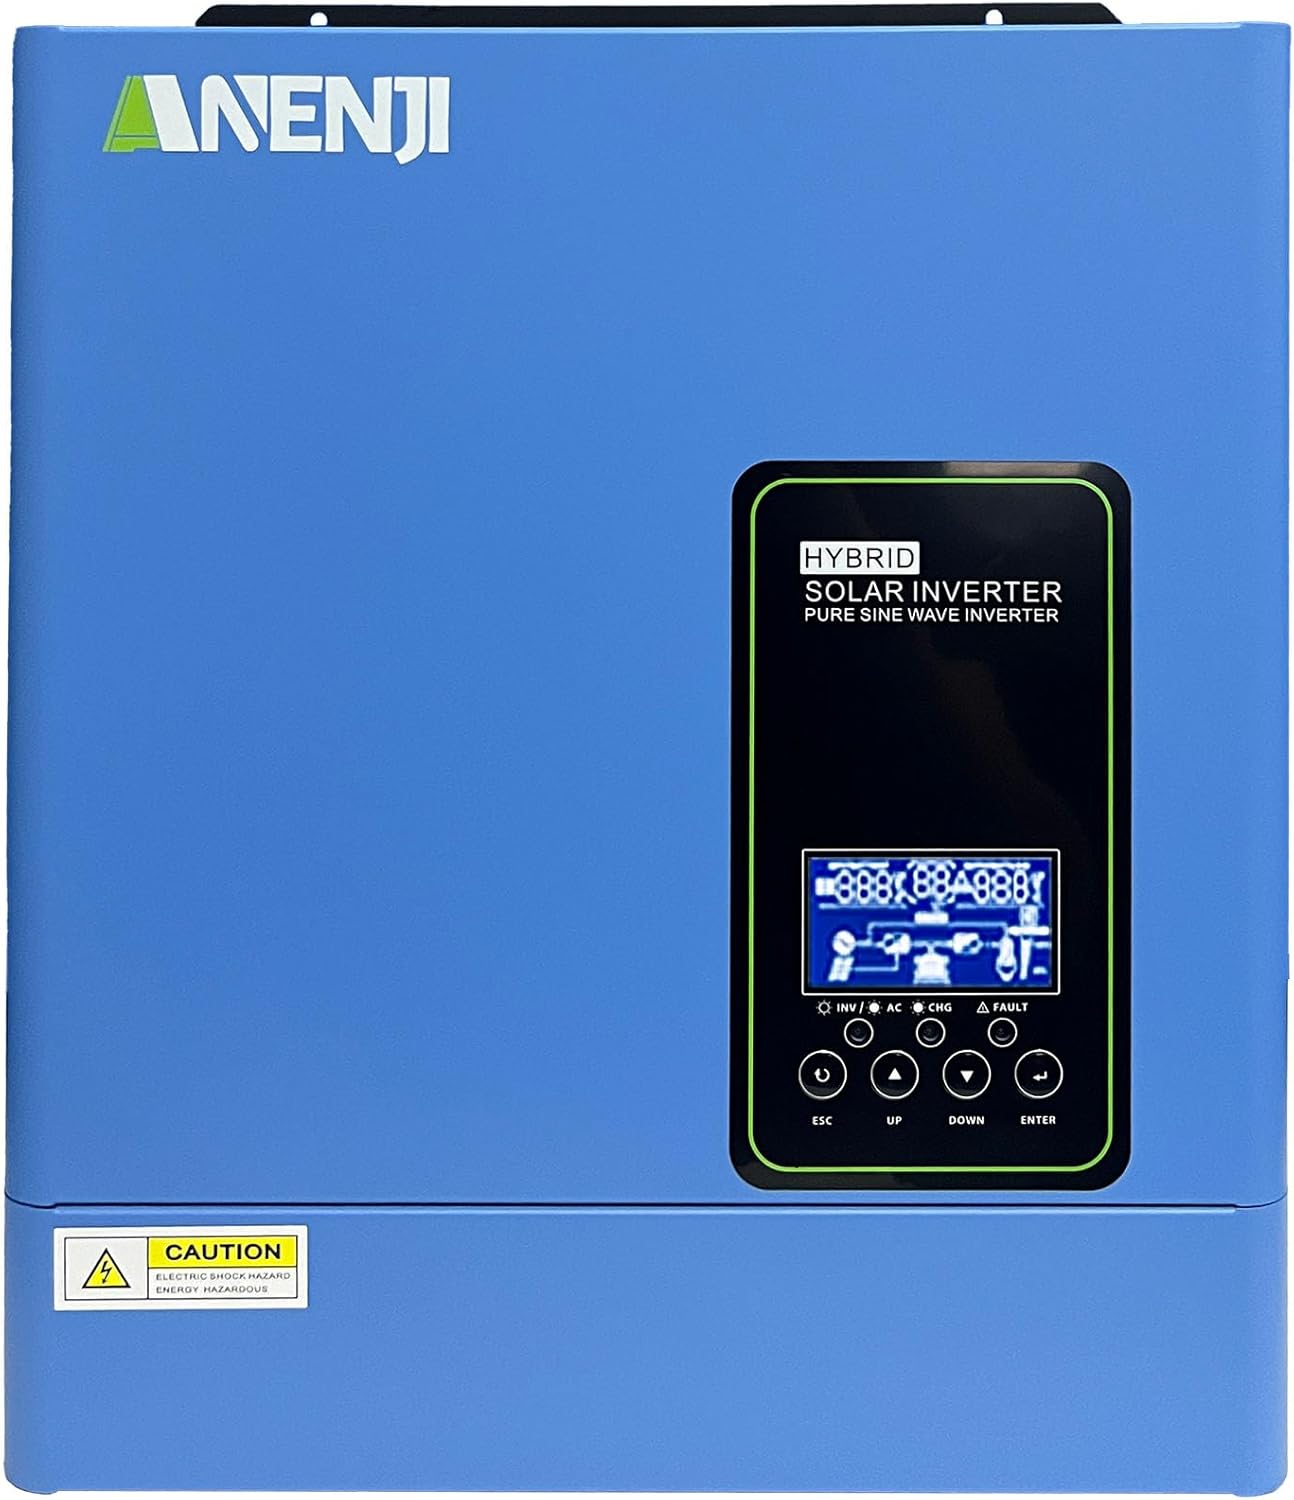
Figura 1.1: Fronte view of the Aninerel 3000W Hybrid Solar Inverter. The inverter features a blue casing with the Aninerel logo and a central LCD display panel with control buttons.
2. Istruzioni di sicurezza
Per ridurre il rischio di scosse elettriche, incendi o lesioni, osservare sempre le seguenti precauzioni di sicurezza:
- Read all instructions and cautionary markings on the unit and in this manual before installation or operation.
- Do not disassemble the inverter. Refer servicing to qualified personnel. Incorrect reassembly may result in electric shock or fire.
- Per ridurre il rischio di scosse elettriche, scollegare tutti i cavi prima di procedere a qualsiasi operazione di manutenzione o pulizia.
- This inverter is designed for indoor or semi-outdoor use with an IP65 rating. Avoid direct exposure to rain or snow.
- Assicurare una ventilazione adeguata attorno all'inverter per evitare il surriscaldamento. Non ostruire le aperture di ventilazione.
- Durante l'installazione utilizzare utensili e dispositivi di protezione individuale adeguati.
- Ensure all wiring connections are tight and secure to prevent loose connections that can cause overheating.
- Non collegare l'inverter a una rete di servizi pubblici senza la dovuta autorizzazione e senza le opportune misure di sicurezza.
3. Prodotto finitoview
The Aninerel 3000W Hybrid Solar Inverter integrates a pure sine wave inverter, an MPPT solar charge controller, and a battery charger into one compact unit. It is designed to provide uninterrupted power support.
3.1 Caratteristiche principali
- Uscita onda sinusoidale pura da 3000 W: Converts 24V DC to 110V AC, providing stable power for sensitive electronics.
- Integrated 100A MPPT Solar Charge Controller: Maximizes solar energy harvesting with up to 500VDC PV input.
- Flexible Charging and Output Modes: Offers multiple modes (Solar Only, AC Priority, Hybrid Charging; Mains Priority, PV Priority, Hybrid Output) for diverse power management.
- Ampia compatibilità della batteria: Supports AGM, GEL, Lead-acid, Li-ion, and LiFePO4 24V batteries.
- Schermo LCD intelligente: Provides real-time monitoring and allows for easy configuration of system settings.
- Wi-Fi incorporato: Enables remote monitoring of the inverter status (registration required).
- Design robusto: IP65-rated enclosure for durability in various environments, with intelligent cooling.
- Protezioni complete: Include sovravoltage, sottovoltage, reverse polarity, and short circuit protection.

Figura 3.1: Pannello anteriore e posterioreview. This diagram labels the LCD display, indicators, function buttons, RS485 communication port, grounding terminal, battery input, dry contact port, built-in Wi-Fi, AC input, AC output, PV input, and power on/off switch.
3.2 Pannello frontale e indicatori
- Schermo LCD: Shows system status, operational data, and configuration settings.
- Indicatore di carica: Illuminates to indicate battery charging status.
- Indicatore di stato: Provides general operational status of the inverter.
- Indicatore di guasto: Lights up to signal system errors or warnings.
- Pulsanti funzione (ESC, SU, GIÙ, INVIO): Utilizzato per navigare nei menu e regolare le impostazioni sul display LCD.
3.3 Collegamenti del pannello posteriore
- Porta di comunicazione RS485: Per la comunicazione esterna e il monitoraggio.
- Terminale di messa a terra: Essenziale per la messa a terra di sicurezza.
- Ingresso batteria: Si collega al banco batterie da 24 V.
- Porta a contatto pulito: Per controllo o segnalazione esterna.
- Built-in Wi-Fi Module: For wireless monitoring.
- Ingresso CA: Connects to grid utility or generator AC power.
- Uscita CA: Si collega ai carichi domestici.
- Ingresso FV: Si collega ai pannelli solari.
- Interruttore di accensione/spegnimento: Controlla l'alimentazione principale dell'inverter.
4. Installazione e configurazione
Proper installation is crucial for the safe and efficient operation of your hybrid solar inverter. Ensure all connections are made by a qualified electrician and adhere to local electrical codes.
4.1 Montaggio dell'inverter
- Scegliete un luogo adatto, asciutto, ben ventilato e protetto dalla luce solare diretta e dall'umidità.
- Assicurare uno spazio sufficiente attorno all'inverter per un corretto flusso d'aria e raffreddamento.
- Montare l'inverter verticalmente su una superficie robusta utilizzando elementi di fissaggio adeguati.
4.2 Collegamenti di cablaggio
Follow the wiring diagram carefully. All wiring should be performed with the inverter and all power sources disconnected.
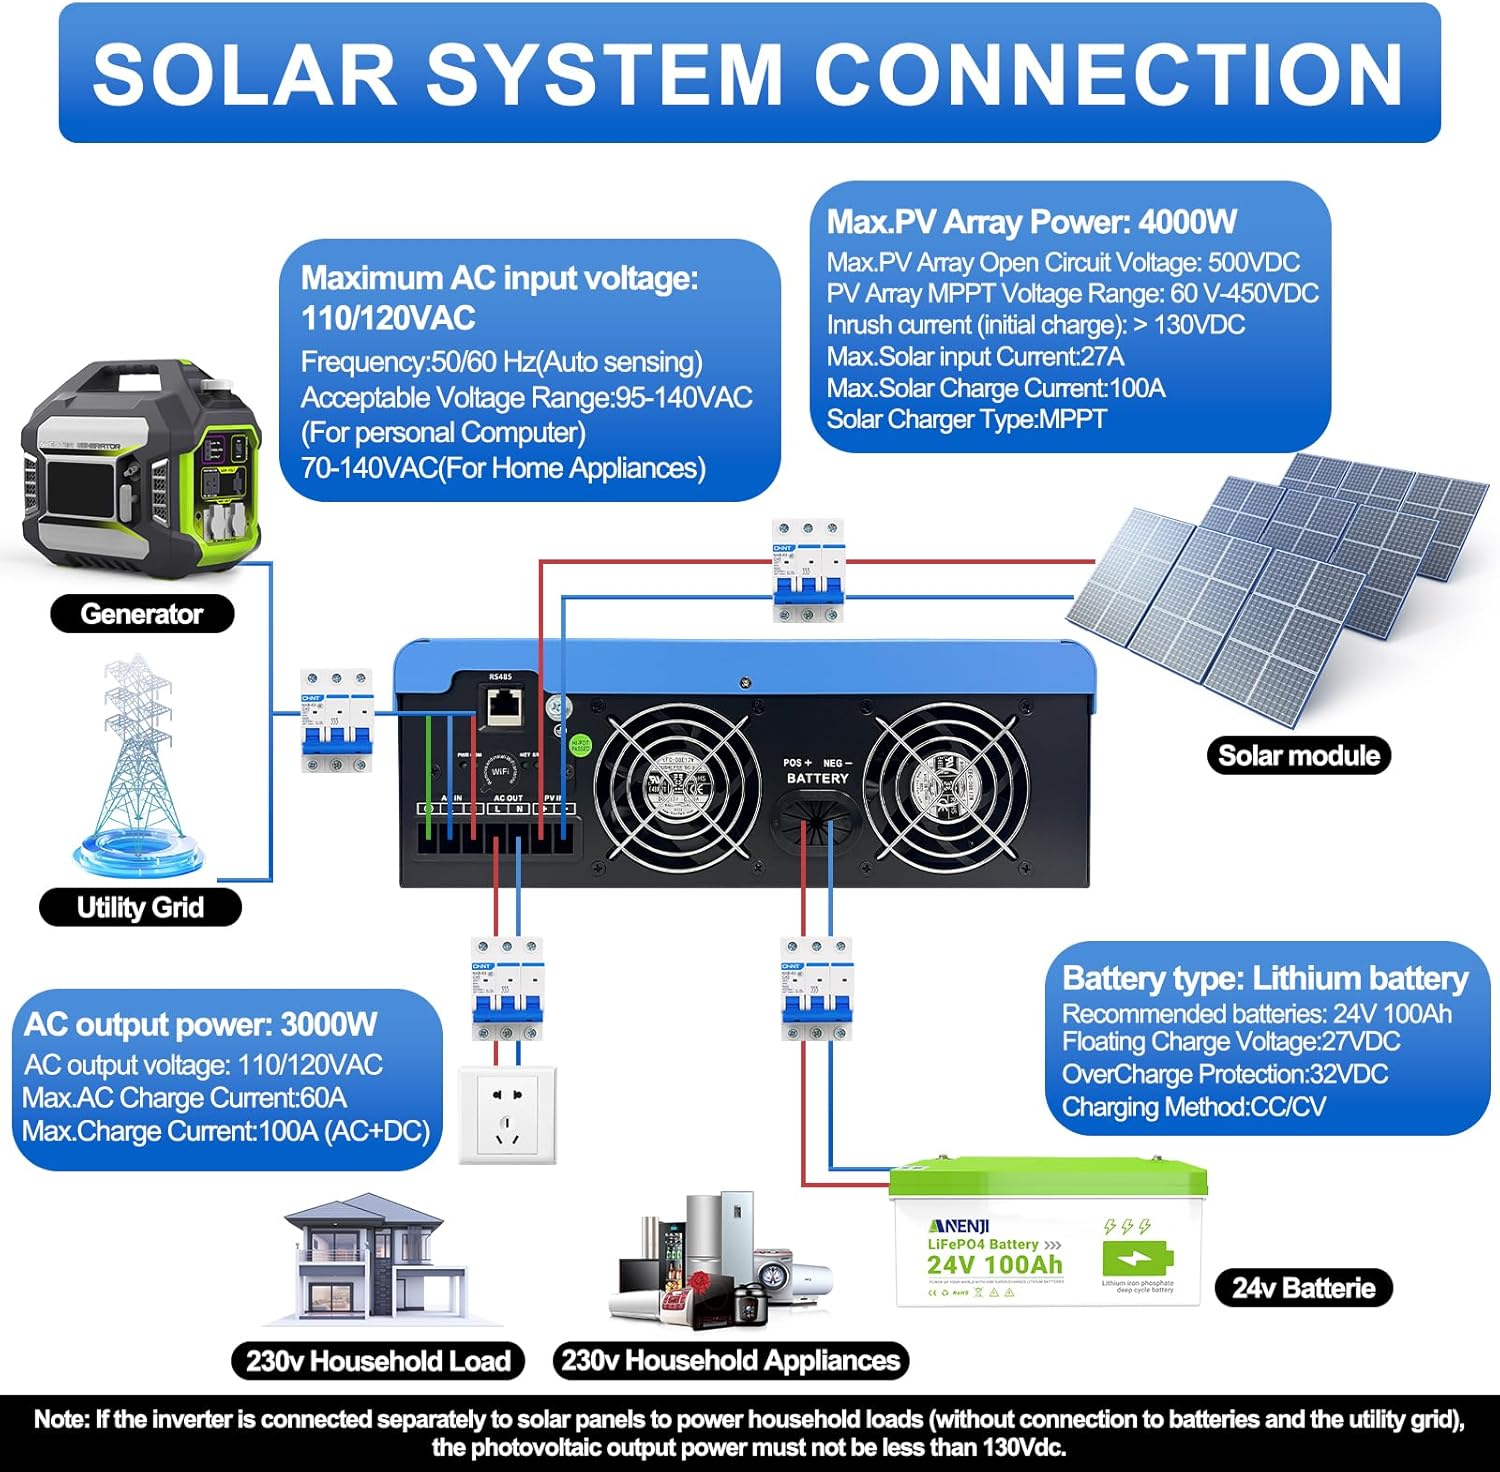
Figure 4.1: Solar System Connection Diagram. This diagram illustrates the connections for solar panels, generator, utility grid, 24V battery, and household loads to the inverter. It shows the PV input, battery input, AC input, and AC output terminals.
4.2.1 Collegamento della batteria
- Connect the 24V battery bank to the battery input terminals on the inverter. Ensure correct polarity (+ to + and - to -).
- Use appropriate cable gauges for the battery connections to handle the expected current.
- The ANJ-3KW-LV-WIFI model supports a 24-volt DC system and is recommended for use with batteries of at least 100 ampere-hours capacity.

Figure 4.2: Inverter Battery Connection. This diagram shows wiring configurations for both 12-volt and 24-volt battery systems, emphasizing correct series/parallel connections for the desired voltage.
4.2.2 Collegamento PV (pannello solare)
- Connect the solar panel array to the PV input terminals. Observe correct polarity.
- Ensure the total open circuit voltage of the PV array does not exceed 500VDC.
- The MPPT voltage range is 60-450VDC. Ensure your PV array voltage falls within this range for optimal charging.
4.2.3 Collegamento ingresso CA
- Connect the utility grid or generator AC power to the AC input terminals.
- The inverter supports 110/120VAC input with auto-sensing frequency (50/60Hz).
4.2.4 Collegamento dell'uscita CA
- Connect your household loads or appliances to the AC output terminals.
- The inverter provides 3000W continuous AC output at 110/120VAC.
4.3 Accensione iniziale
- Dopo aver effettuato tutti i collegamenti in modo sicuro, accendere prima l'interruttore della batteria.
- Quindi, accendere l'interruttore del pannello fotovoltaico (se applicabile).
- Finally, switch on the AC input breaker (if applicable) and the inverter's main power switch.
- Observe the LCD display for initial boot-up and status indicators.
5. Funzionamento
The inverter offers various configurable settings to optimize power management based on your specific needs.
5.1 Display LCD e impostazioni
The LCD display provides real-time information and allows you to configure operational parameters using the function buttons.
- Utilizzare il UP E GIÙ pulsanti per navigare tra le opzioni del menu.
- Premere ENTRARE per selezionare un'opzione o confermare un'impostazione.
- Premere ESC to exit a menu or cancel an action.
5.2 Charging Priority Modes
Queste impostazioni determinano il modo in cui la batteria viene caricata dalle fonti di alimentazione disponibili.

Figure 5.1: Charger Source Priority. This diagram illustrates three charging priority options: Solar First (solar panels charge first, AC input only if solar is unavailable), Solar and AC Input Simultaneously (both solar and utility charge at the same time), and Solar Only (solar energy is the exclusive charging source).
- Solar First: Prioritizes solar power for charging. AC input will only charge the battery when solar power is insufficient or unavailable.
- AC Priority (Utility Priority): Prioritizes AC input (utility or generator) for charging. Solar power will supplement or take over if AC input is unavailable.
- Solo solare: The inverter will only charge the battery bank from solar power. AC input will not be used for charging.
5.3 Modalità di priorità di uscita
These settings determine the power source for your connected loads.

Figure 5.2: Output Source Priority. This diagram shows three output priority options: Solar First (power from solar first, AC input supplements if solar is insufficient), AC First (redirects AC input to power loads, uses solar/batteries when AC is unavailable), and DC Priority (prioritizes solar first, then battery, then AC input only when voltage drops to a programmable value).
- Solar First (priorità fotovoltaica): Prioritizes solar power to supply loads. If solar power is insufficient, the battery bank will supplement, and then AC input will be used.
- AC First (Mains Priority): Prioritizes AC input (utility or generator) to power loads. If AC input is unavailable, the inverter will switch to battery power.
- DC Priority (Battery Priority): Prioritizes solar power first, then battery power. AC input will only engage when the battery voltage drops below a programmable threshold.
5.4 Monitoraggio Wi-Fi
The built-in Wi-Fi module allows for remote monitoring of your inverter's performance and status via a dedicated application. Registration may be required to access this feature.

Figure 5.3: Wi-Fi Monitoring. This image depicts a user monitoring the hybrid inverter's status wirelessly via a smartphone application, highlighting the convenience of the built-in Wi-Fi feature.
6. Manutenzione
Regular maintenance helps ensure the longevity and optimal performance of your Aninerel Hybrid Solar Inverter.
- Pulizia: Pulire periodicamente l'esterno dell'inverter con un panno asciutto. Assicurarsi che le aperture di ventilazione siano libere da polvere e detriti.
- Connessioni: Annually check all electrical connections (battery, PV, AC input/output) for tightness and corrosion. Tighten any loose connections.
- Ambiente: Assicurarsi che l'ambiente di installazione rimanga entro gli intervalli di temperatura e umidità specificati.
- Firmware: Controllare il produttore websito per eventuali aggiornamenti firmware disponibili per migliorare le prestazioni o nuove funzionalità.
7. Risoluzione Dei Problemi
Questa sezione fornisce soluzioni ai problemi più comuni che potresti riscontrare. Se il problema persiste, contatta l'assistenza clienti.
| Problema | Possibile causa | Soluzione |
|---|---|---|
| L'inverter non si accende | Nessuna connessione alla batteria o batteria scaricatage; Power switch off; Loose wiring. | Controllare i collegamenti della batteria e il voltage; Ensure power switch is ON; Verify all wiring is secure. |
| Nessuna uscita CA | Overload; Short circuit on output; Inverter in fault mode; Output priority setting. | Reduce load; Check for short circuits; Refer to LCD fault codes; Adjust output priority settings. |
| La batteria non si carica con l'energia solare | Basso volume PVtage; Incorrect PV connection; Solar charging disabled; Faulty solar panels. | Controllare il volume dell'array fotovoltaicotage (must be >60VDC); Verify PV polarity; Check charging priority settings; Inspect solar panels. |
| Avviso di surriscaldamento | Insufficient ventilation; Excessive ambient temperature; Overload. | Ensure clear airflow around inverter; Relocate to cooler area; Reduce connected load. |
| Il monitoraggio Wi-Fi non funziona | No Wi-Fi signal; Incorrect app configuration; Registration issue. | Check Wi-Fi signal strength; Reconfigure app settings; Contact support for registration issues. |
8. Specifiche
Technical specifications for the Aninerel 3000W Hybrid Solar Inverter ANJ-3KW-LV-WIFI:
| Caratteristica | Specificazione |
|---|---|
| Numero di modello | ANJ-3KW-LV-WIFI |
| Potenza di uscita continua | 3000W |
| Potenza di picco in uscita | 6000W |
| Ingresso CC Voltage | 24V |
| Volume di uscita CAtage | 110 V CA |
| Forma d'onda di uscita | Onda sinusoidale pura |
| Potenza massima in ingresso FV | 4000W |
| Corrente del regolatore MPPT | 100A |
| Massimo Circuito aperto fotovoltaico voltage | 500 V CC |
| MPPT array fotovoltaico voltage Gamma | 60-450 V CC |
| Corrente di ingresso CA massima | 60A |
| Frequenza di uscita | 50/60 Hz (rilevamento automatico) |
| Compatibilità della batteria | AGM, GEL, Lead-acid, Li-ion, LiFePO4 (24V) |
| Grado di protezione | Grado di protezione IP65 |
| Dimensioni del prodotto | 15 x 6.98 x 18 pollici |
| Peso dell'articolo | 16.5 libbre |
9. Garanzia e supporto
For warranty information, please refer to the warranty card included with your product or visit the official Aninerel website. For technical support, troubleshooting assistance, or service inquiries, please contact Aninerel customer service through their official channels.
Manufacturer: Shenzhen Anenji Energy Technology Co.,Ltd