Introduzione
This manual provides detailed instructions for the installation, operation, and maintenance of your PNI AGD1200 Garage Door Opener Automation Kit. Please read this manual thoroughly before beginning installation or operation to ensure safe and correct use of the product. This kit is designed for automating sectional garage doors up to 17 square meters.
Contenuto della confezione
Verifica che tutti i componenti elencati di seguito siano presenti nel tuo pacchetto:
- Unità motore
- Telecomandi (2 unità)
- Rail Sections (3 x 110 cm)
- Rail Connection Pieces (2 units)
- Accessori di montaggio
- Manuale dell'utente (questo documento)

Image: Included mounting accessories for installation.

Image: Rail sections and chain mechanism.
Informazioni sulla sicurezza
Osservare sempre le seguenti precauzioni di sicurezza per evitare lesioni o danni al prodotto e alla proprietà:
- Leggere attentamente tutte le istruzioni prima dell'installazione e dell'uso.
- Prima di installare l'apriporta, assicurarsi che la porta del garage sia bilanciata e in buone condizioni di funzionamento.
- Prima di effettuare qualsiasi intervento di manutenzione o riparazione, scollegare l'alimentazione dell'apriporta del garage.
- Tenere bambini e animali domestici lontani dall'area della porta del garage, soprattutto durante il funzionamento.
- Do not allow children to play with the remote controls.
- Installare il pulsante di controllo a parete ad almeno 1.5 metri (5 piedi) dal pavimento e lontano da tutte le parti mobili della porta.
- Non camminare o sostare mai sotto una porta del garage in movimento.
- Ensure the safety reversal system is tested monthly.
- Utilizzare solo ricambi e accessori originali.
Specifiche
| Caratteristica | Specificazione |
|---|---|
| Codice prodotto | PNI-AGD1200 |
| Volume di alimentazionetage | 230 V CA 50/60 Hz |
| Motor Force (Closing/Opening) | 1200 N |
| Frequenza del telecomando | 433 MHz |
| Potere del telecomando | Batteria 27A 12V |
| Codifica del segnale | Codice dinamico |
| Luce LED | 3V 0.045W |
| LED Illumination Duration | 3 minuti |
| Temperatura di esercizio | Temperatura -26 ~ 80 °C |
| Product Dimensions (Motor Unit) | Dimensioni: 21 x 11 x 37 cm |
| Peso del prodotto | 13.7 kg |
| Materiale | Metallo |
| Recommended Door Type | Sectional Garage Doors up to 17m² |
Configurazione e installazione
Controlli prima dell'installazione
- Assicurarsi che la porta del garage funzioni manualmente senza problemi e che sia correttamente bilanciata.
- Controllare che non vi siano ostacoli lungo il percorso della porta.
- Verify that the power outlet is within reach and meets the specified voltage requisiti.
Assembling the Rail
- Connect the three rail sections using the provided rail connection pieces. Ensure the chain is correctly threaded through the entire rail assembly.
- Secure all connections firmly with the appropriate hardware.

Image: Rail mounting brackets.
Montaggio dell'unità motore
- Attach the assembled rail to the motor unit.
- Position the motor unit centrally above the garage door, ensuring it is level.
- Secure the motor unit to the ceiling joists or a sturdy mounting board using the provided mounting accessories.
- Connect the other end of the rail to the garage door header bracket.

Immagine: Frontale view dell'unità motoria.
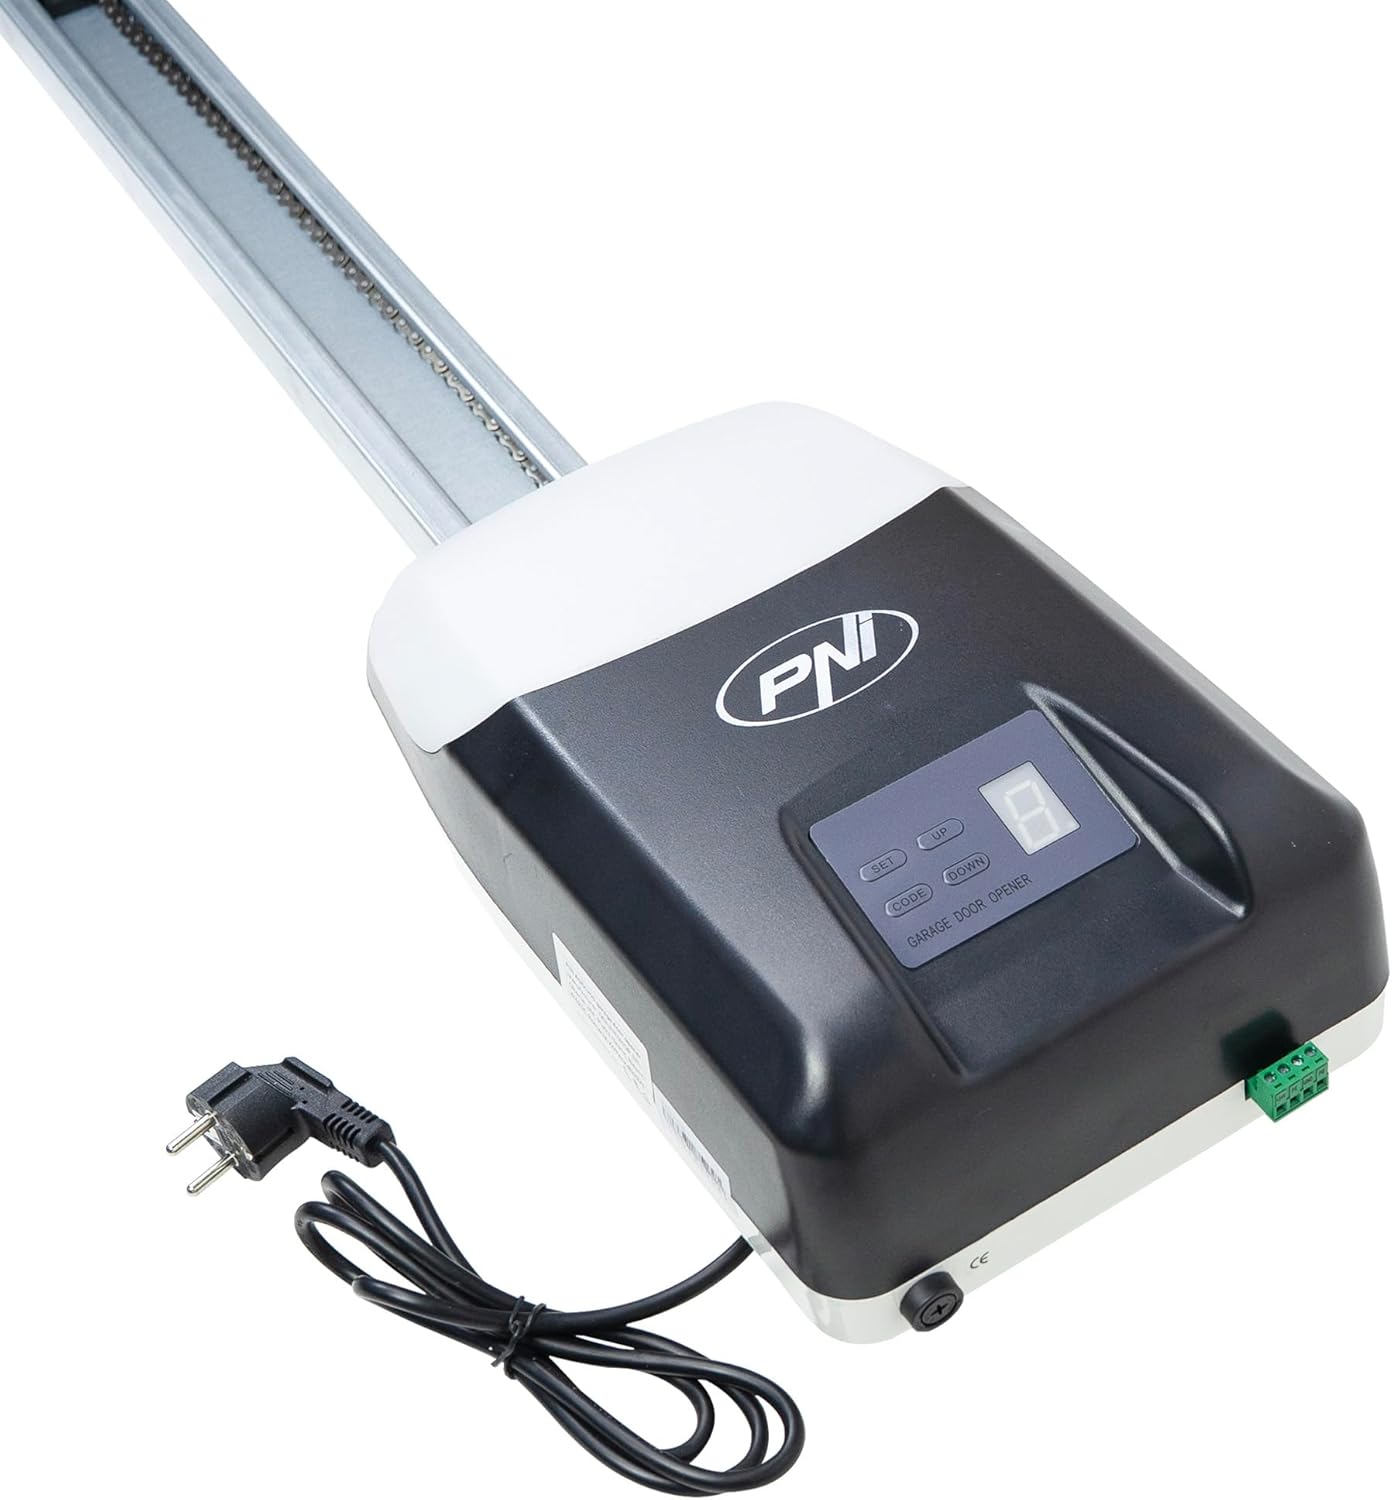
Image: Motor unit with rail and power cable.
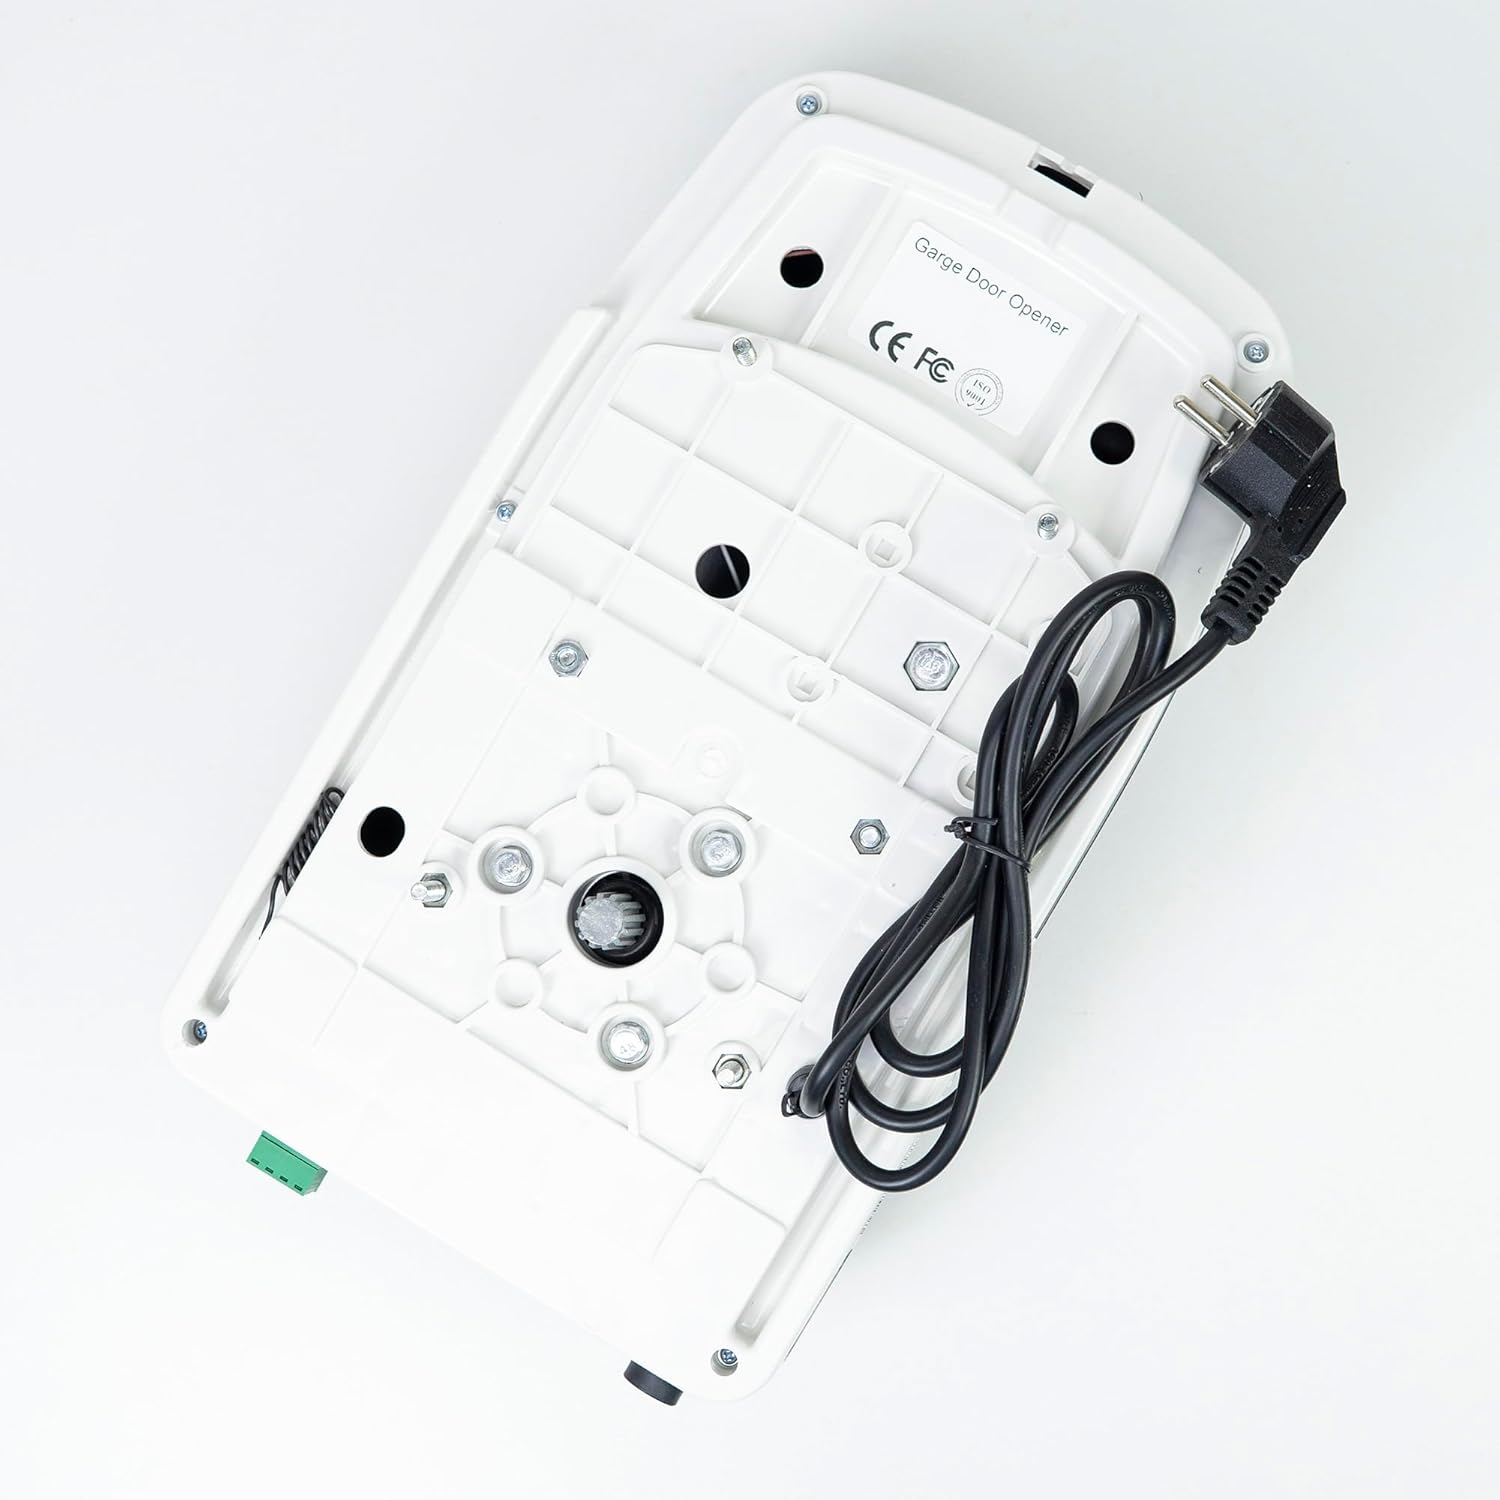
Immagine: In basso view of the motor unit, showing mounting points.
Connessione elettrica
Once the motor unit and rail are securely mounted, plug the power cord into a grounded 230V AC outlet. Ensure the power cord is routed safely and not pinched by any moving parts.
Istruzioni per l'uso
Associazione del telecomando
- Press and hold the 'CODE' button on the motor unit's control panel until the LED display shows 'P'.
- Within 30 seconds, press the desired button on your remote control. The LED display will flash to confirm successful pairing.
- Repeat for any additional remote controls.

Image: Motor unit with two remote controls.

Image: Remote control for the garage door opener.
Funzionamento di base
- Porta aperta: Press the programmed button on the remote control or the 'UP' button on the control panel.
- Chiudi porta: Press the programmed button on the remote control or the 'DOWN' button on the control panel.
- Stop Door: Press any button on the remote control or the 'SET' button on the control panel while the door is in motion.
Regolazione dei limiti
The opener automatically learns the door's travel limits during initial setup. If adjustments are needed:
- Press and hold the 'SET' button until the LED display shows '1' for the open limit or '2' for the close limit.
- Use the 'UP' and 'DOWN' buttons to move the door to the desired open or close position.
- Press 'SET' again to confirm the new limit.
Manutenzione
Una manutenzione regolare garantisce prestazioni ottimali e longevità dell'apriporta del garage:
- Mensile: Test the safety reversal system. Place a 2x4 inch board flat on the floor in the door's path. The door should reverse upon contact. If it does not, adjust the force settings or consult a technician.
- Trimestrale: Lubricate the door's moving parts (rollers, hinges, bearings) with a garage door lubricant. Do not lubricate the rail or chain unless specifically instructed.
- Annualmente: Inspect all hardware for loose bolts, worn parts, or signs of damage. Tighten any loose fasteners.
- Keep the motor unit and rail clean from dust and debris.
Risoluzione dei problemi
Per i problemi più comuni e le possibili soluzioni, fare riferimento alla tabella seguente:
| Problema | Possibile causa | Soluzione |
|---|---|---|
| L'apriporta non risponde al telecomando. | Remote battery is dead; remote is not paired; signal interference. | Replace remote battery; re-pair remote control; check for sources of interference. |
| La porta non si apre o non si chiude completamente. | I limiti di corsa necessitano di regolazione; ostruzione nel percorso della porta. | Adjust travel limits as per instructions; remove any obstructions. |
| La porta si inverte inaspettatamente. | Safety reversal system activated by obstruction; force settings too high/low. | Check for obstructions; test safety reversal system; adjust force settings if necessary (consult manual for specific steps). |
| Il motore funziona ma la porta non si muove. | Trolley disengaged from door; chain/belt broken or loose. | Re-engage trolley; inspect chain/belt for damage or tension. |
| La luce LED non si accende. | LED bulb faulty; power issue. | Controllare il collegamento elettrico; se il problema persiste, contattare l'assistenza. |
Garanzia e supporto
Your PNI AGD1200 Garage Door Opener Automation Kit is covered by a manufacturer's warranty against defects in materials and workmanship. Please retain your proof of purchase for warranty claims.
For technical assistance, troubleshooting beyond this manual, or warranty service, please contact PNI customer support through their official website or the retailer where the product was purchased. Provide your model number (AGD1200) and a detailed description of the issue when seeking support.